# Getting Started

Welcome to the ColdMC Wiki

{% hint style="info" %} <code class="expression">"Page is outdated for " + space.vars.VERSION + " (" + space.vars.LAST + ")"</code>
{% endhint %}

{% hint style="danger" %} <mark style="color:red;">**Wiki is work-in-progress!**</mark>
{% endhint %}

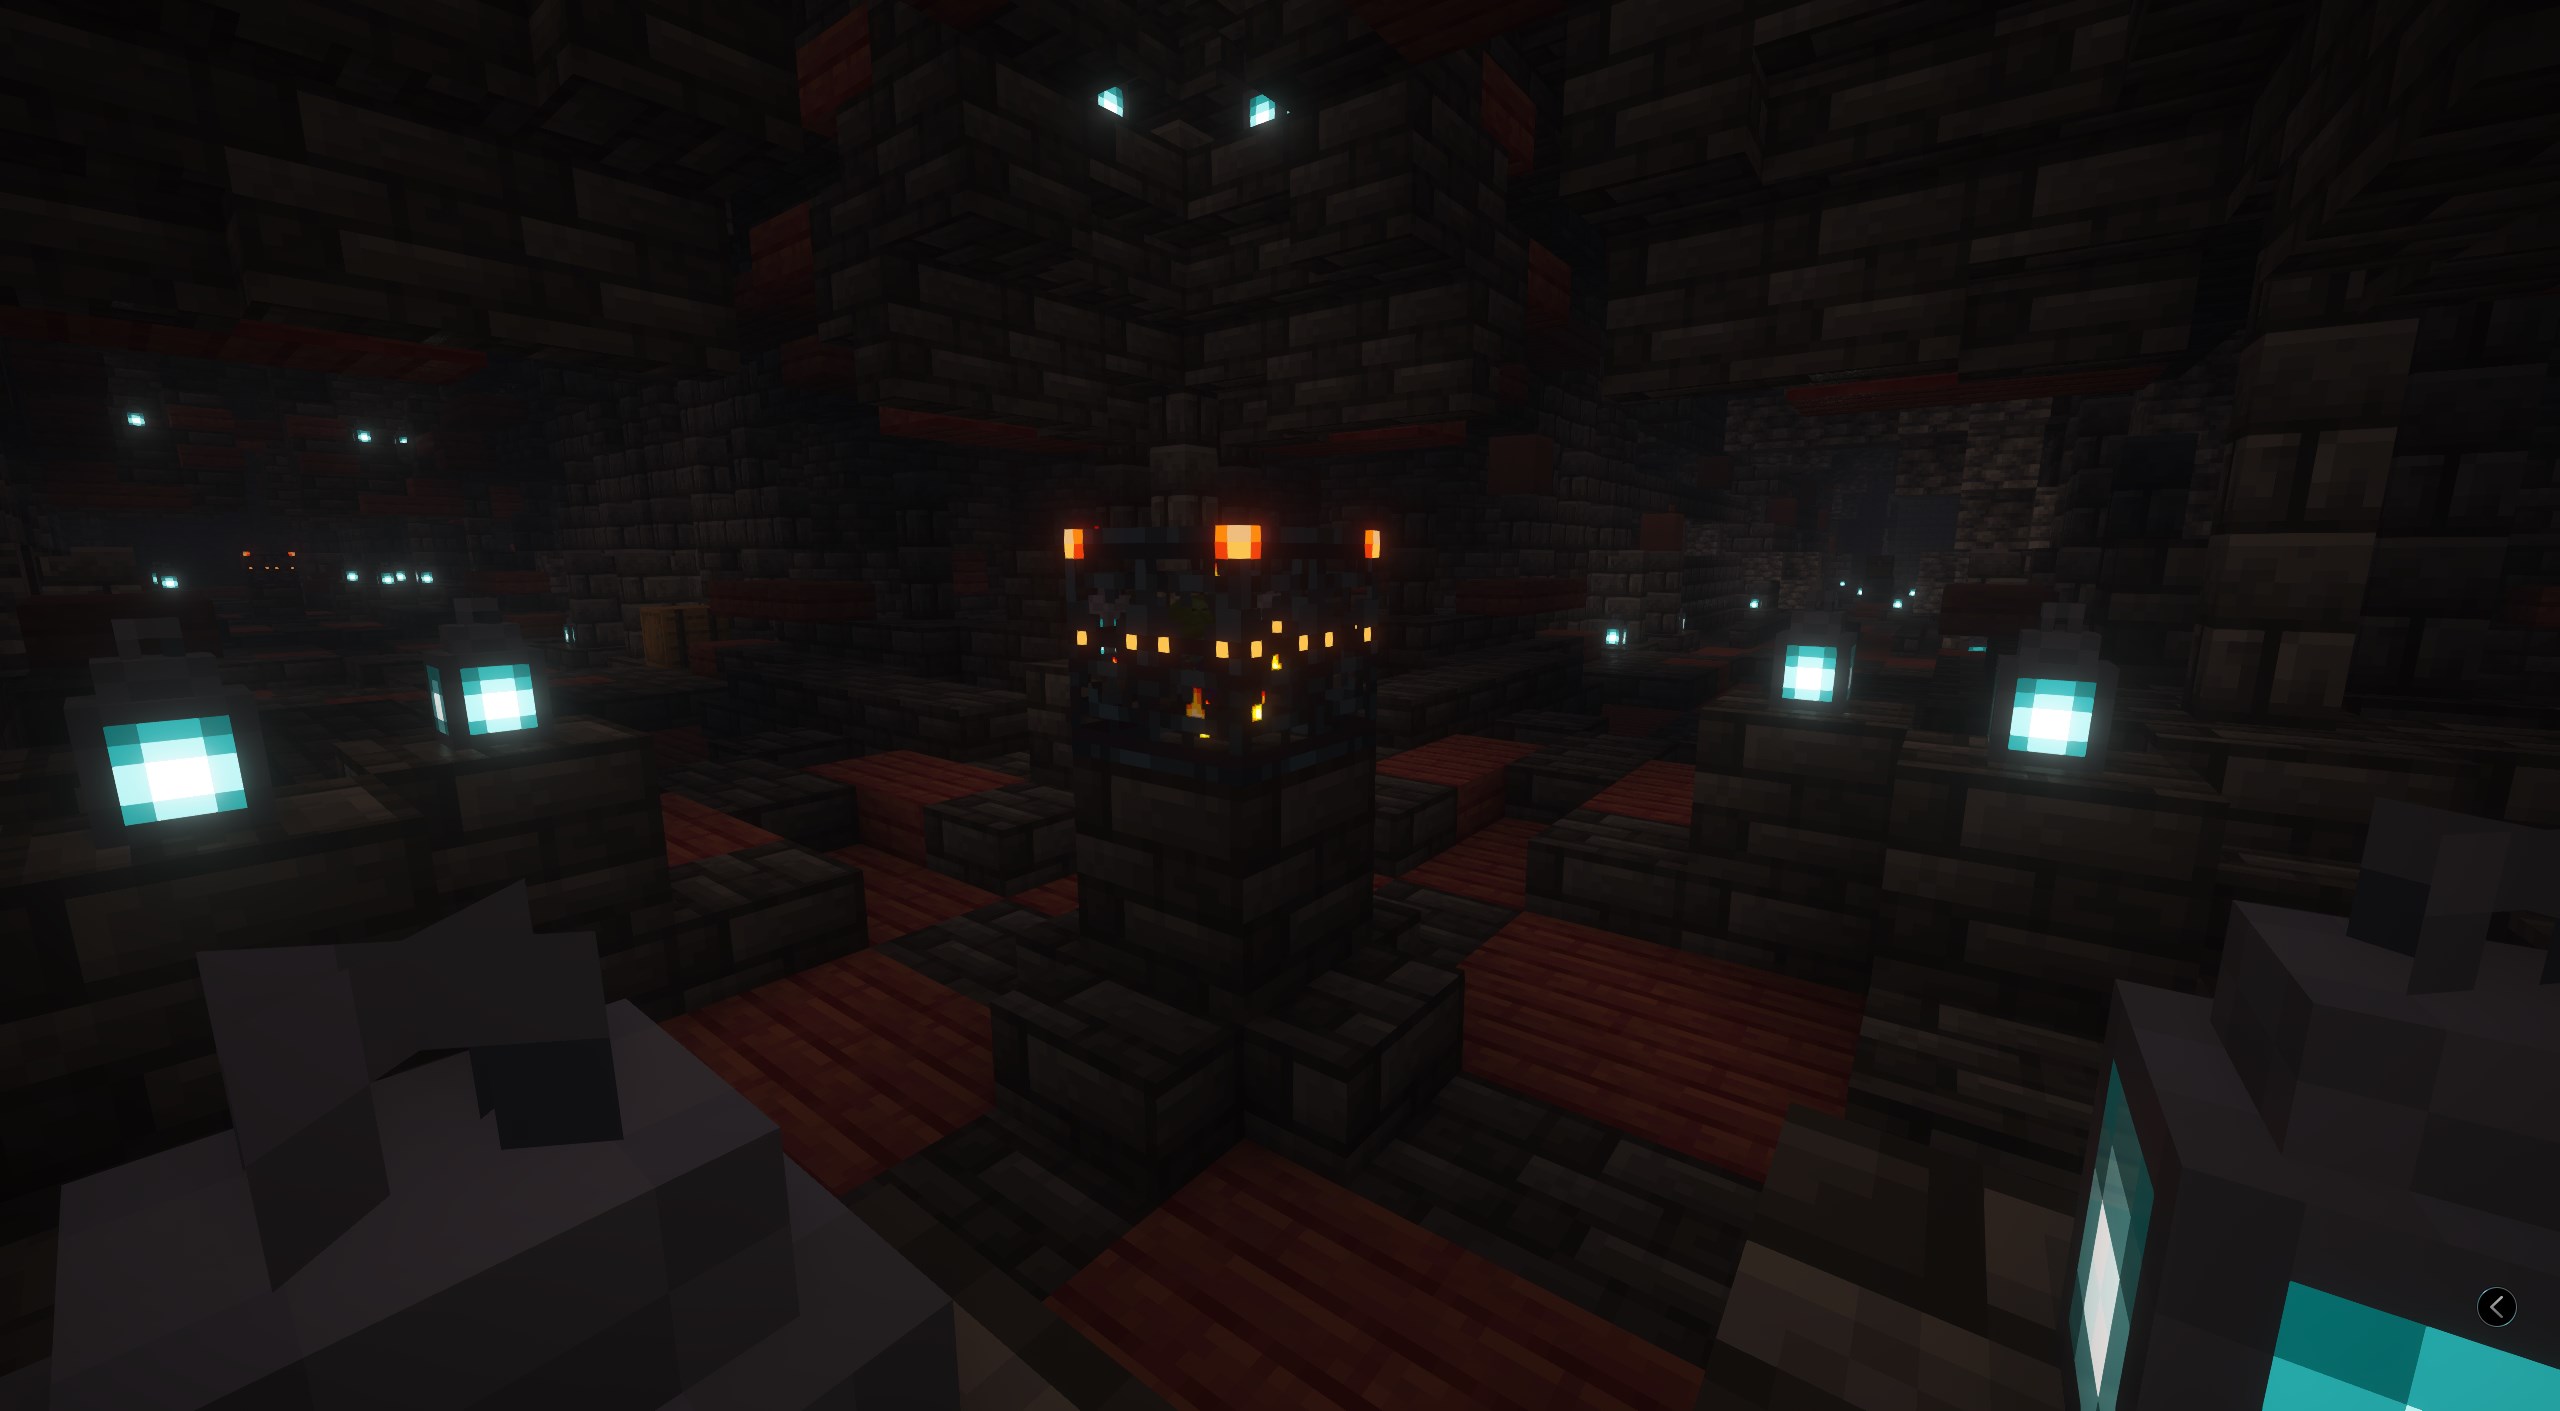
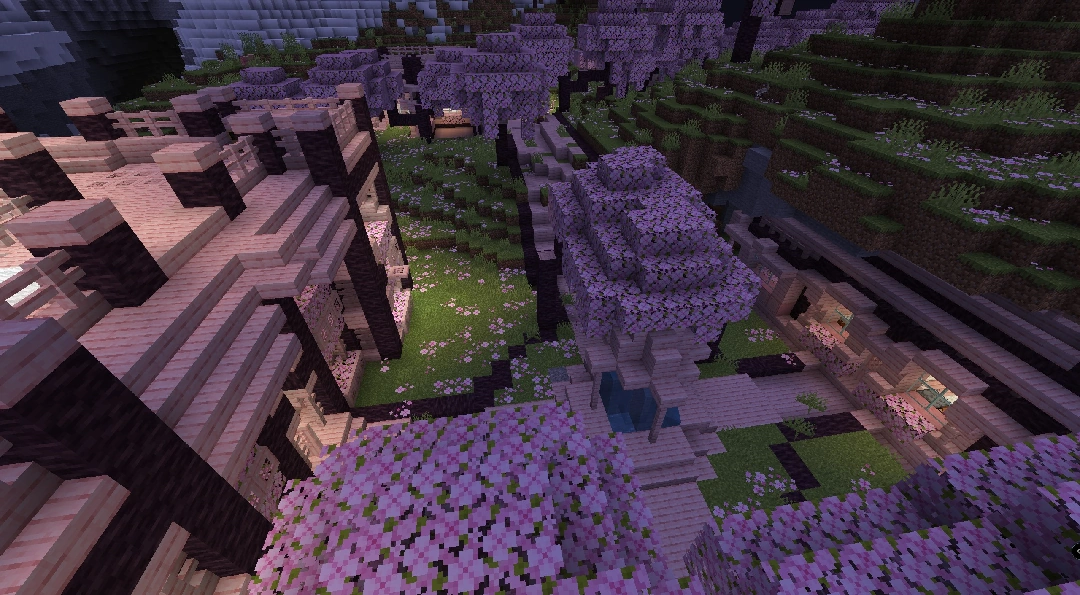
Welcome to **ColdMC**, your ultimate Minecraft experience!&#x20;

Do you sometimes just wish for a world where we can go on adventurous journeys, to mystical realms unknown, discovering new creatures and plant life, riding dragons and meeting new people to help you along the way. Just to do that... be there.. make memories... that could be life changing. I would never want to leave a world like that... Hiking atop a foggy, humid mountain in the middle of no where, a dark sunset at the beach, with nobody else. An impossible to explain feeling. Words fall short, unable to capture the essence of it all. The opportunities are boundless, the horizons limitless. It’s sickening knowing that no matter how much you dream, reality will always be chains tied to your existence. Yet, a glimmer of hope now emerges.&#x20;

Whether you’re new to our server or a seasoned player, this wiki is your go-to resource for all the information you need to thrive in our world. Here, you’ll find everything from basic server guidelines to detailed guides on gameplay mechanics, custom features, and community events. Let’s dive in and get started!

***

#### Getting Started

**1. Server Address**

* **IP Address:** `coldmc.com`
* **Version:** We support the latest version of Minecraft, but older versions down to 1.21.5+ may also be compatible.

**2. Joining the Server**

* Launch Java Minecraft and click on "Multiplayer."
* Click "Add Server" and enter the server details.
* Connect to the server and accept our pack by clicking "Yes".

{% hint style="info" %}
You only need to download the pack once! (or again if we update the whole game)
{% endhint %}

**3. Creating a character**

* Once you join, you are first prompted with the profile selection GUI. This GUI displays all of the profiles that you have registered, along with some basic information about each one. The player is required to select a profile from this GUI before you can proceed to play on the server.
* After chosing a profile, the corresponding data will be loaded, including health and mana, inventory, location, bed spawn point, ender-chest, quest progression, loaded ammunition... You can create or delete profiles using the GUI.

**4. Read** [New Overworld](/dim/overworld) **to start claiming land and using custom features!**

***

#### Server Rules

To ensure a fun and fair experience for everyone, please abide by the following rules:

1. **Respect All Players:** No harassment, hate speech, or bullying.
2. **No Griefing:** Do not destroy or steal others' creations.
3. **Cheating is Prohibited:** No use of hacks, mods, or exploits.
4. **Keep Chat Clean:** Avoid spamming, advertising, or using offensive language.
5. **Follow Staff Instructions:** Our staff is here to help, please respect their decisions.

Breaking the rules can result in warnings, temporary bans, or permanent bans depending on the severity of the offense.

Read more [here](https://docs.google.com/document/d/1NuHrVMGeP1028pgO7QTfrpWAvO_gLbMY9JowHRAR4gY/edit#heading=h.xrqt60fw978n). (or write "/rules" in game)

***

#### Custom Features

ColdMC isn’t your ordinary Minecraft server; we’ve implemented several custom features to enhance gameplay:

* **Custom Items and Crafting Recipes:** Discover unique items and crafting recipes exclusive to ColdMC in the [Advanced Crafting Station](/items/stations/early-stations/advanced-crafting-station).
* **Quests and Missions:** Take on quests to earn rewards and advance your skills. Read more at [Scenario Types](/systems/scenario-types).
* **Economy System:** Earn in-game currency, trade with other players, and build your empire.
* **Land Claiming:** Protect your builds and resources with [Towns & Land Claiming](/dim/overworld/mechanics/towns-and-land-claiming).
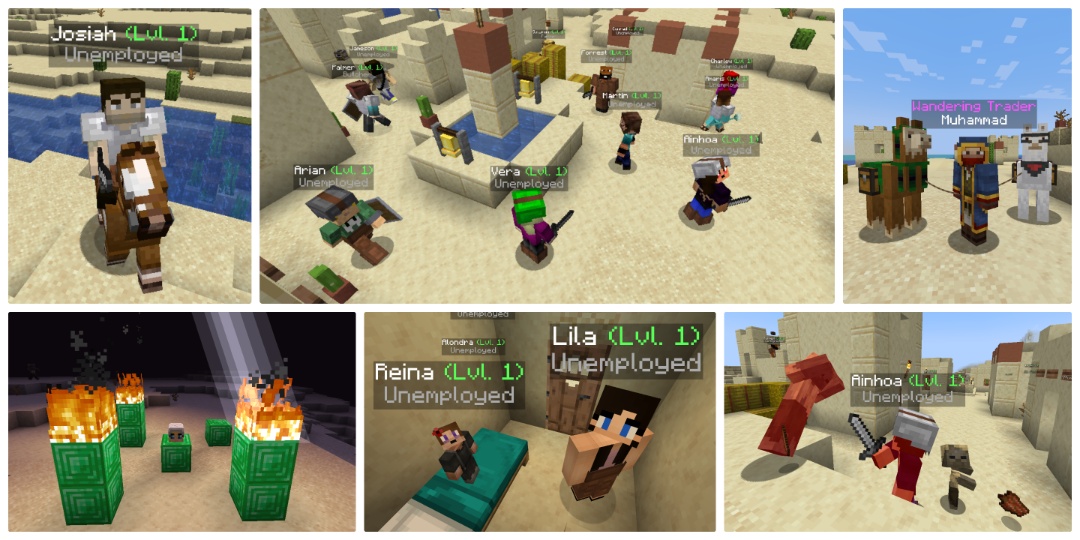
* **MMORPG:** Level up skills to gain special abilities and perks. Read more at [Mastery](/systems/skills), [Arcanum (Lv99)](/systems/gaia-new-v1.100/arcanum-lv99), [Magic (Lv20)](/systems/magic-lv20), [Star Levels](/systems/star-levels).
* **Mini-Games:** Enjoy a variety of mini-games for a quick break from regular gameplay, like [Water Fishing (old)](/dim/overworld/mechanics/water-fishing-old), [Generators](/dim/overworld/mechanics/generators), [Overworld Farming (old)](/dim/overworld/mechanics/overworld-farming-old) etc.
* **Spell Customization:** Customize and upgrade your spells through a skill tree system, allowing you to tailor your magic to your playstyle.
* [Classes (Lv30)](/systems/classes-lv30) **and** [Races (Lv100)](/systems/races-lv100)**:** Certain spells are exclusive to specific classes and races, adding depth to your character’s abilities and strategy.
* **Entities:**
  * [Pets](/entities/pets) Tame unique pets that offer companionship and sometimes even combat support. Each pet may come with special abilities or buffs. ("/pets")
  * [Mounts](/entities/mounts) Ride powerful and exotic mounts to traverse the world more quickly. Some mounts may have additional benefits, such as flight or speed boosts. ("/horses")
  * [NPCs](/entities/npcs) Interact with custom NPCs that populate the world, offering quests, items, and lore.
  * [Monsters](/entities/monsters) Face off against a variety of custom monsters that provide challenges and rewards.
  * [Bosses](/entities/bosses) Engage in epic battles with powerful bosses that require strategy and teamwork to defeat.
  * [World Boss](/entities/ex-bosses/world-boss) Take on world bosses—massive, server-wide events where players must band together to bring down a formidable foe.
* **Ranks, Levels, Rarities, Tiers, Stacks, and Tags:**
  * **Ranks:** Progress through various ranks on the server to unlock new privileges, commands, and bonuses. Higher ranks may offer exclusive items or abilities.
  * **Levels:** Level up your character/profile and skills through EXP points gained from various professions, unlocking new abilities and boosts as you progress.
  * **Rarities:** Items on ColdMC have different rarity levels, from common to fabled, each with unique stats and effects.
  * **Tiers:** Spells are classified into tiers, with higher tiers offering better stats and more powerful bonuses.
  * **Stacks:** Manage your items efficiently with basis enhancements that can be worth up to of the corresponding basis
  * **Tags:** Special items and entities may have tags that indicate their unique properties, which can be used to display with your username in chat.
* **Dimensions (Public has found 11/31 dimensions)**
  * **Explore the Realms:** Inspired by the legendary world tree Yggdrasil combined with Terra Infinita, ColdMC offers custom dimensions, each representing a different realm with its own unique environment, challenges, and rewards.<br>
  * [New Overworld](/dim/overworld) The mortal realm, similar to the Overworld in traditional Minecraft, but with enhanced features, zones like [The World Beyond](/dim/overworld/zones/the-world-beyond) and richer lore. The [New Overworld](/dim/overworld) serves as the hub where all adventures begin.
  * [Nether: Incendium](/dim/nether-incendium) The realm of fire and chaos is home to the fire beasts and a land of constant warfare. It’s the first ultimate test of strength, where players can obtain more powerful loot.
  * [The End](/dim/the-end) The realm of the dead is a gloomy dimension filled with old evolved undead creatures and ancient secrets. It’s a place of immense danger, but also even greater rewards for those who survive here.
  * [Mythical Lands](/dim/mythical-lands) The realm of the elves is a world of eternal twilight and ethereal beauty. It’s a place of powerful boosted magic, where players can find magical items and magical ores.
  * [The Garden](/dim/the-garden) A lush and verdant realm is the hidden lands of nature spirits and ancient wisdom. Here, players can harvest powerful herbs and encounter mystical creatures.
  * [Wastelands](/dim/wastelands) A dry and fiery dimension, The Wasteland is ruled by volcanic activity and molten lava. Players who brave its dangers can discover most legendary treasures and materials for infinity crafting.
  * [The Aether Highlands](/dim/the-aether-highlands) A realm of divine light is home to the angels and the seat of immense magical energy. Expect to find divine materials, world items and face celestial beings.
  * [Land of Quaoar](/dim/land-of-quaoar) A cold and mountainous land, the Land of Eternal Frost is the domain of giants. It’s a dangerous dimension filled with powerful monsters, but also rich in the most valuable resources.
  * [Lands of Collosi](/dim/lands-of-collosi) The underground realm of the dwarves is a labyrinth of mines and forges. Here, players can find mythical or fabled metals and craft the most powerful weapons and armor.<br>
  * **Realm-Specific Loot:** Each of the dimensions offers exclusive items, materials, and rewards that can only be found within its realm. Whether it’s divine relics in the Aether or ancient tomes in the Nether, the treasures of Yggdrasil are worth the journey.
  * **Unique Biomes and Challenges:** Every dimension has its own set of biomes, creatures, and environmental hazards. Prepare yourself accordingly before entering these realms, as each offers a distinct and immersive experience.
* **Job Classes and Race Classes (Public has found 45/2082 classes)**
  * [Classes (Lv30)](/systems/classes-lv30) Choose from a variety of classes, each with its own strengths, weaknesses, and unique abilities. Classes may specialize in combat, magic, crafting, or support roles.
  * [Races (Lv100)](/systems/races-lv100) Select from different races, each offering distinct traits and abilities that impact your gameplay. Races may have bonuses to certain skills or access to race-specific items and spells.
  * [Class Skills](/systems/classes-lv30/class-skills) Each class has its own set of abilities, including passive perks and active skills, making your choice impactful on your gameplay style.
  * **Race-Specific Spells and Abilities:** Races may unlock specific spells or abilities that further customize your character’s capabilities.
* **Guilds:**
  * **Form or Join a Guild:** Band together with other players to form a guild, allowing you to share resources, build together, and take on greater challenges.
  * **Guild Benefits:** Gain access to guild-specific perks such as shared storage, guild missions, and collective buffs.
  * **Guild Wars:** Participate in guild wars, where you can compete against other guilds for dominance and rewards.
  * **Guild Levels and Upgrades:** Level up your guild to unlock new abilities, increase member capacity, and gain more powerful buffs.

***

#### Support and Help

If you encounter any issues or need assistance, our staff team is here to help. You can reach out through the following channels:

* **In-Game:** Use the `/menu` command to open the menu.
* [**Discord**](https://discord.gg/uTsATaer3P)**:** Post in the #ticket channel for help from staff.
* [**Reddit**](https://www.reddit.com/r/coldmc/)**:** Post here to get help from community members.
* [**Forums**](http://forum.coldmc.com/)**:** Create a support ticket or browse through our help topics.

Other socials you can reach out to:

* [**Instagram**](https://www.instagram.com/coldmcserver/)


# FAQ

What does FAQ mean? It stands for Frequently Asked Questions. :)

> Question: Why does my screen have many rows of rectangles?

Answer: That is because you did not accept the resource pack. Click on the ColdMC in your server list. Click on "Edit" and change "Server resource pack" to "Yes".

***

> Q: I'm on a client and my interface (UI or GUI) is all messed up, what's wrong?

A: Your client makes your Boss Bar misaligned or shadowy, to solve this, [follow this tutorial](/tutorials/using-any-external-client).

***

> Q: What versions do you support?

A: ColdMC supports Java 1.21.5 and all newer versions! If the newest version is not supported yet, try 1.21.8

***

> Q: How do I claim land?

A: Click and read this page: [Towns & Land Claiming](/dim/overworld/mechanics/towns-and-land-claiming)

***

> Q: Will ColdMC ever be ported to Bedrock and allow cross-play between Bedrock and Java?

A: We have plans to allow bedrock players to join our servers. This is **not** yet implemented.

***

> Q: Why does my friends have much larger phantoms?

A: If your combat level is higher, you get higher leveled mobs.

***

> Q: What is the Dimensions from?

A: The Dimensions are nine unique realms inspired by Norse mythology, each with its own environment and resources. Players can explore these dimensions to find rare materials, monsters and bosses.

***

> Q: What can you do in The Hallow biome?

A: In The Hallow, magical waters can transmute items into different forms. Most transmutations are reversible, making rare materials more accessible. The Hallow is a rare biome.

***

> Q: What is Armor Penetration?

A: Armor penetration is a special mechanic in ColdMC which causes a percentage of damage to completely ignore armor pieces on monsters or animals, being reduced only by their enchantments and Resistance effect. Especially good for fighting knight-type monsters or entities with armor.

***

> Q: What kind of items can be crafted with the Advanced Crafting Station?

A: The station can craft newbie-tier items such as the first powerful weapons, enhanced armor, and custom tools using uncommon and rare materials.

***

> Q: What is the purpose of custom spells in ColdMC and how do I use them?

A: Custom spells in ColdMC costs Mana and allow players to use magical abilities specific to their class or race, providing various offensive, defensive, and utility effects. This can be activated by using a wand, staff, or any type of magical book, scroll, weapon or item.

***

> Q: What is Rage and how is it used compared to Mana and its spells?

A: Rage is a stat like Mana but is used for profession abilities instead magical spells. This could be for example mining faster, cutting down whole trees, or getting a boost in damage. This can be activated by leveling up in a mastery or skill and then right clicking the respective tool.

***

> Q: How do I get my own guild in ColdMC?

A: We currently do not take in more guild applications.

***

> Q: How do guilds function in ColdMC?

A: Guilds allow players to team up, share resources, take on quests, and participate in guild raids. They offer collective benefits and can level up to unlock additional features.

***

> Q: Where can I download ColdMC's own packs and code to use for myself?

A: We currently do not offer download links for any of our own contents.

***

> Q: What packs do ColdMC use?

A: We use these public packs: [Terralith](https://stardustlabs.miraheze.org/wiki/Terralith), [Structory](https://stardustlabs.miraheze.org/wiki/Structory), and more. And also non public builds and assets like [Songs of War Builds](https://www.youtube.com/watch?v=yCNUP2NAt-A).

***

> Q: Are you open for commissions?

A: Yes, please contact us on discord!


# Gaia Status

```
// Gaia, STATUS
```

<table data-view="cards"><thead><tr><th></th></tr></thead><tbody><tr><td><pre><code>System Status:
// Nominal
</code></pre></td></tr><tr><td><pre><code>Mastery algo:
// Stable
</code></pre></td></tr><tr><td><pre><code>Entity rates:
// Expected
</code></pre></td></tr></tbody></table>

{% hint style="info" %}
All core systems are operational. Player activity is within expected parameters. Dimensional stability is maintained across all accessible realms (11/25). Resource distribution is balanced. No critical errors detected.
{% endhint %}

{% hint style="info" %}
Current stardust value distribution across dimensions:

* Overworld: 67%
* Nether: 12%
* Alfheim: 8%
* The End: 5%
* The Garden: 3%
* The Wastelands: 2%
* The Aether: 1%
* Land of Eternal Frost: 1%
* Lands of Collosi: 1%
* Remaining dimensions: Minimal activity.

Active Guilds: 13.

Active Quests: 147.

Active World Boss events: 0.
{% endhint %}

***

{% hint style="info" %}
Any further inquiries?
{% endhint %}


# New Overworld

The mortal realm, similar to the Overworld in traditional Minecraft, but with enhanced features and richer lore. ColdMC's new Overworld serves as the hub where all adventures begin.

### Zones

* [The Known World: Midgard](/dim/overworld/zones/the-known-world-midgard)
* [The Ice Walls](/dim/overworld/zones/the-ice-walls) (\~7000 far)
* [The World Beyond](/dim/overworld/zones/the-world-beyond)
* [Mountains Rings](/dim/overworld/zones/mountains-rings) (\~20 000 far)
* [The Far World](/dim/overworld/zones/the-far-world)

### Introduced Mechanics

* [Towns & Land Claiming](/dim/overworld/mechanics/towns-and-land-claiming)
* [Nations](/dim/overworld/mechanics/nations)
* [Villaging](/dim/overworld/mechanics/villaging)
* [ChestShop](/dim/overworld/mechanics/chestshop)
* [Spawners](/dim/overworld/mechanics/spawners)
* [Generators](/dim/overworld/mechanics/generators)

### Popular Locations

* Firstia (Quest Town)
* Astral Conclave (Nation)
* Banished Ancients (Nation)

{% hint style="info" %}
See the full map [here](http://map.coldmc.com:40556/#world:-32:0:64:7844:0:0:0:0:perspective)
{% endhint %}

### Natural Generated Resources

| Resource                                                                | Rarity                                      | Main Craft                                                             |
| ----------------------------------------------------------------------- | ------------------------------------------- | ---------------------------------------------------------------------- |
| [Mythril Ore](/items/ingredients/list-of-ores-metals/mythril-ore)       | <mark style="color:blue;">**Rare**</mark>   | [Mythril Pickaxe](/items/tools/list-of-pickaxes/mythril-pickaxe)       |
| [Orichalcum Ore](/items/ingredients/list-of-ores-metals/orichalcum-ore) | <mark style="color:blue;">**Rare**</mark>   | [Orichalcum Pickaxe](/items/tools/list-of-pickaxes/orichalcum-pickaxe) |
| [Titanium Ore](/items/ingredients/list-of-ores-metals/titanium-ore)     | <mark style="color:purple;">**Epic**</mark> | [Titanium Pickaxe](/items/tools/list-of-pickaxes/titanium-pickaxe)     |

{% hint style="info" %}
Want to know the default generation coordinates for vanilla ores? Read this: [Vanilla Ore Distribution](/dim/overworld/vanilla-ore-distribution)
{% endhint %}

### Bosses

<details>

<summary>Eden Bosses (5) - depricated soon</summary>

Raj Raksha\
Tenkū Mizu Gami\
Arachne\
Magus Theron\
Rústa

</details>

### Monsters

<details>

<summary>Ghoul</summary>

Rewarded +0.05 <mark style="color:purple;">stardust</mark>

Power: 8 Health, 2 Damage

Drops:

* Undead Heart
* Ghoul Tissue
* Bone
* Coins

Description: This is an undead monster without a mob crystal. **Ghoul**\
Variants: Undead\
Ghouls are corpses that shamble towards players and attack with a relentless hunger. Their presence can be quite frightening, especially in dark or abandoned places.

Found in: Overworld

Rarity: Common

Class: F

</details>

<details>

<summary>Phantom Whisperer</summary>

Rewarded +0.05 <mark style="color:purple;">stardust</mark>

Power: 7 Health, 3 Damage

Drops:

* <mark style="color:blue;">Strong Soul</mark>
* Pure Soul
* Mob Crystal
* Coins

Description: This is a ghost-type monster with a mob crystal inside that gives it energy to live. Phantom Whisperers are undead archers who attack from a distance with their bows. Their arrows can be dangerous if not avoided.

Found in: Overworld

Rarity: Common

Class: F

</details>

<details>

<summary>Sculk Lurkerer</summary>

Rewarded +0.06 <mark style="color:purple;">stardust</mark>

Power: 12 Health, 3 Damage

Drops:

* Slimy Mucus
* Dark Bone
* Mob Crystal
* Coins

Description: This is an undead monster without a mob crystal. Sculk Lurkerer act alot like a spider.

Found in: Overworld

Rarity: Common

Class: F

</details>

<details>

<summary>Mechanical Abomination</summary>

Mechanicals in Midgard has the ability to silently approach and explode, causing damage to your pets, mounts and animals. Drops Black powder used to create most machines\
Rarity: Common

</details>

<details>

<summary>Base Mobs (13)</summary>

**Spider**\
Spiders are aggressive arachnids that can climb walls and are known for their swift attacks. They are often found in dark, secluded areas and can surprise players with their ability to quickly descend from ceilings.\
Rarity: Common

**Enderman**\
Endermen are tall, slender creatures that can teleport and are known for their eerie behavior and ability to pick up blocks. They are highly elusive and can be quite formidable when provoked.\
Rarity: <mark style="color:green;">Uncommon</mark>

**Witch**\
Witches are spell-casters that throw harmful potions and can brew various potions for themselves. They are usually found in dark environments like swamps or caves.\
Rarity: <mark style="color:green;">Uncommon</mark>

**Slime**\
Slimes are gelatinous creatures that bounce around and split into smaller slimes when killed. They are found in swamp biomes and underground in slime chunks.\
Rarity: <mark style="color:green;">Uncommon</mark>

**Magma Cube**\
Magma Cubes are fiery creatures that spawn in Muspelheim but can also appear in certain biomes in Midgard, such as in some conditions or specific events. They bounce and split into smaller cubes when defeated.\
Rarity: <mark style="color:green;">Uncommon</mark>

**Illager**\
Variants: Pillager, Barbarian, Evoker, Vindicators, Pillagers, Ravagers\
Illagers are hostile villagers with various abilities. Evokers can summon vexes and cast spells, Vindicators wield axes, Pillagers use crossbows, and Ravagers are large, powerful beasts often encountered during raids.\
Rarity: <mark style="color:green;">Uncommon</mark> to <mark style="color:blue;">Rare</mark>

**Drowned**\
Drowned are underwater versions of zombies that spawn in oceans or river biomes. They are capable of swimming and attacking players from beneath the water.\
Rarity: Common

**Phantoms**\
Phantoms are flying hostile mobs that spawn in the night sky if a player hasn't slept for several in-game days. They swoop down to attack players and are known for their eerie screeches.\
Rarity: Common

</details>

### Structures

<details>

<summary>Yggdrasil (9)</summary>

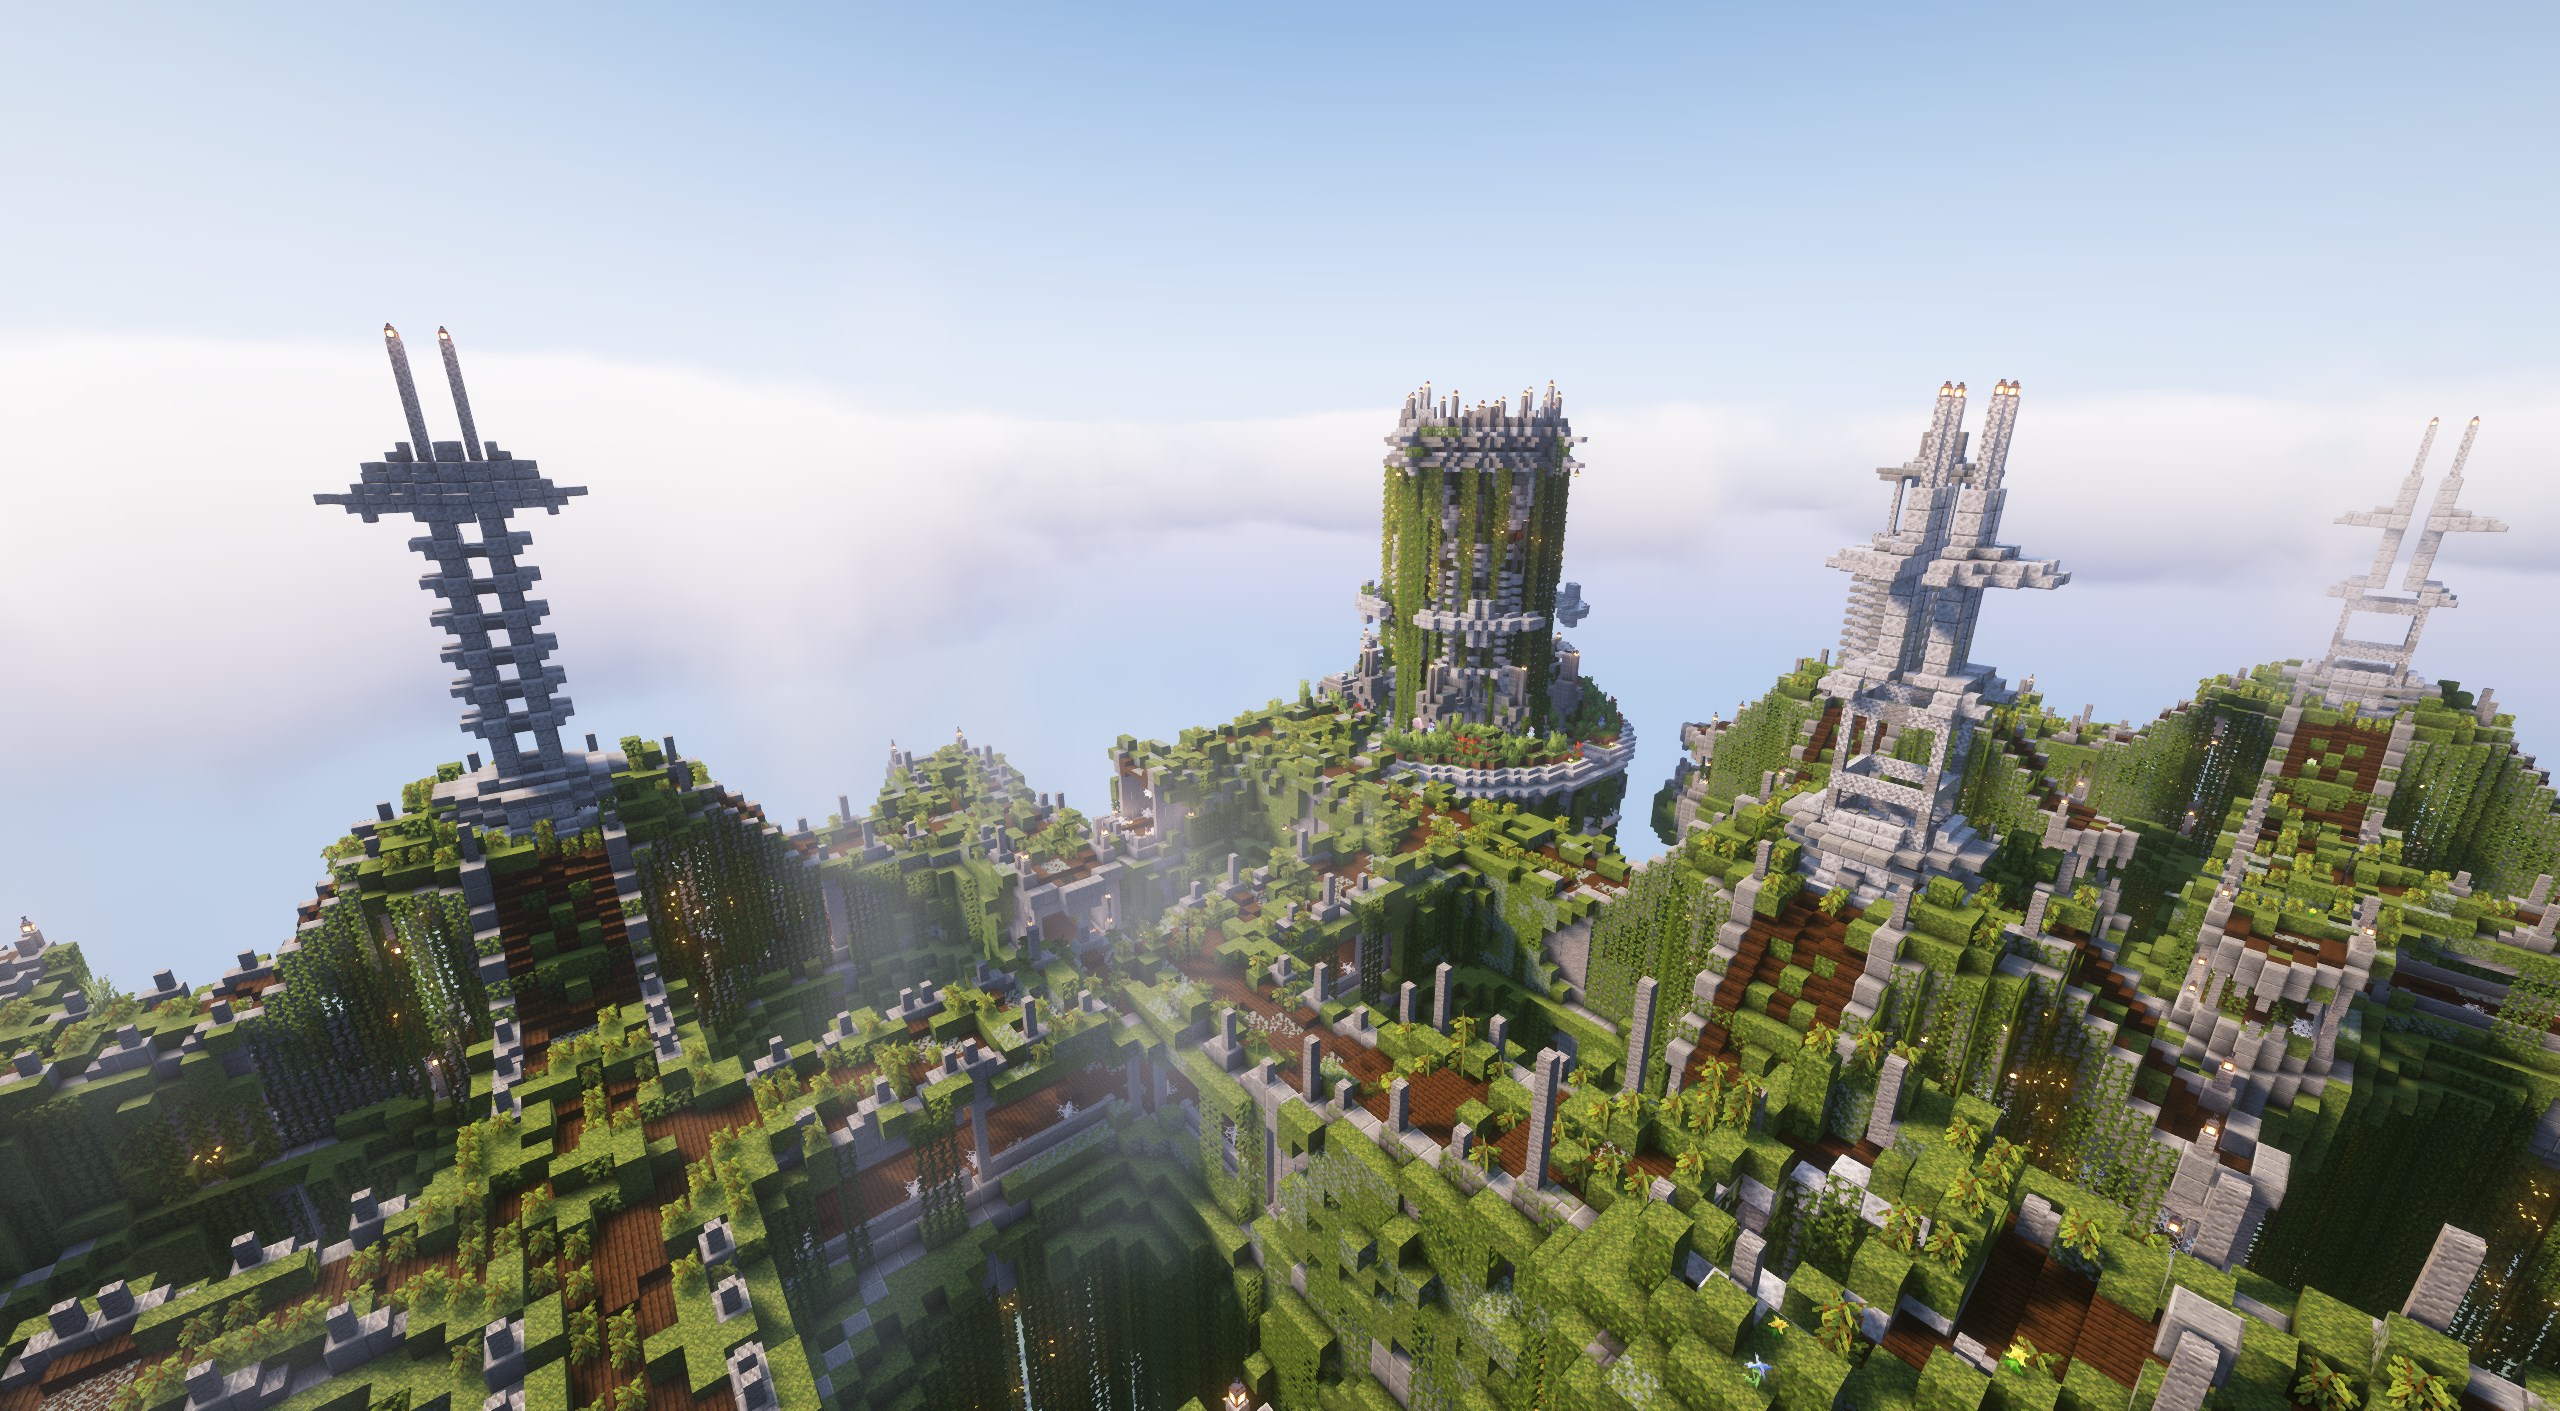
#### Asflors Village

Discover timeless villages woven into the world's fabric, guarding ancient secrets, legendary items, and a unique quest.
<figure><img src="https://4156755274-files.gitbook.io/~/files/v0/b/gitbook-x-prod.appspot.com/o/spaces%2Fm9CYtM6NlzIRCHfJH6Ei%2Fuploads%2Fbzn8dRnsSypzRExgpU8d%2Fjavaw_NWWigiyGeB.jpg?alt=media&#x26;token=e3d41a0e-5bcd-4484-9a42-534ad1562edc" alt=""><figcaption></figcaption></figure>

***

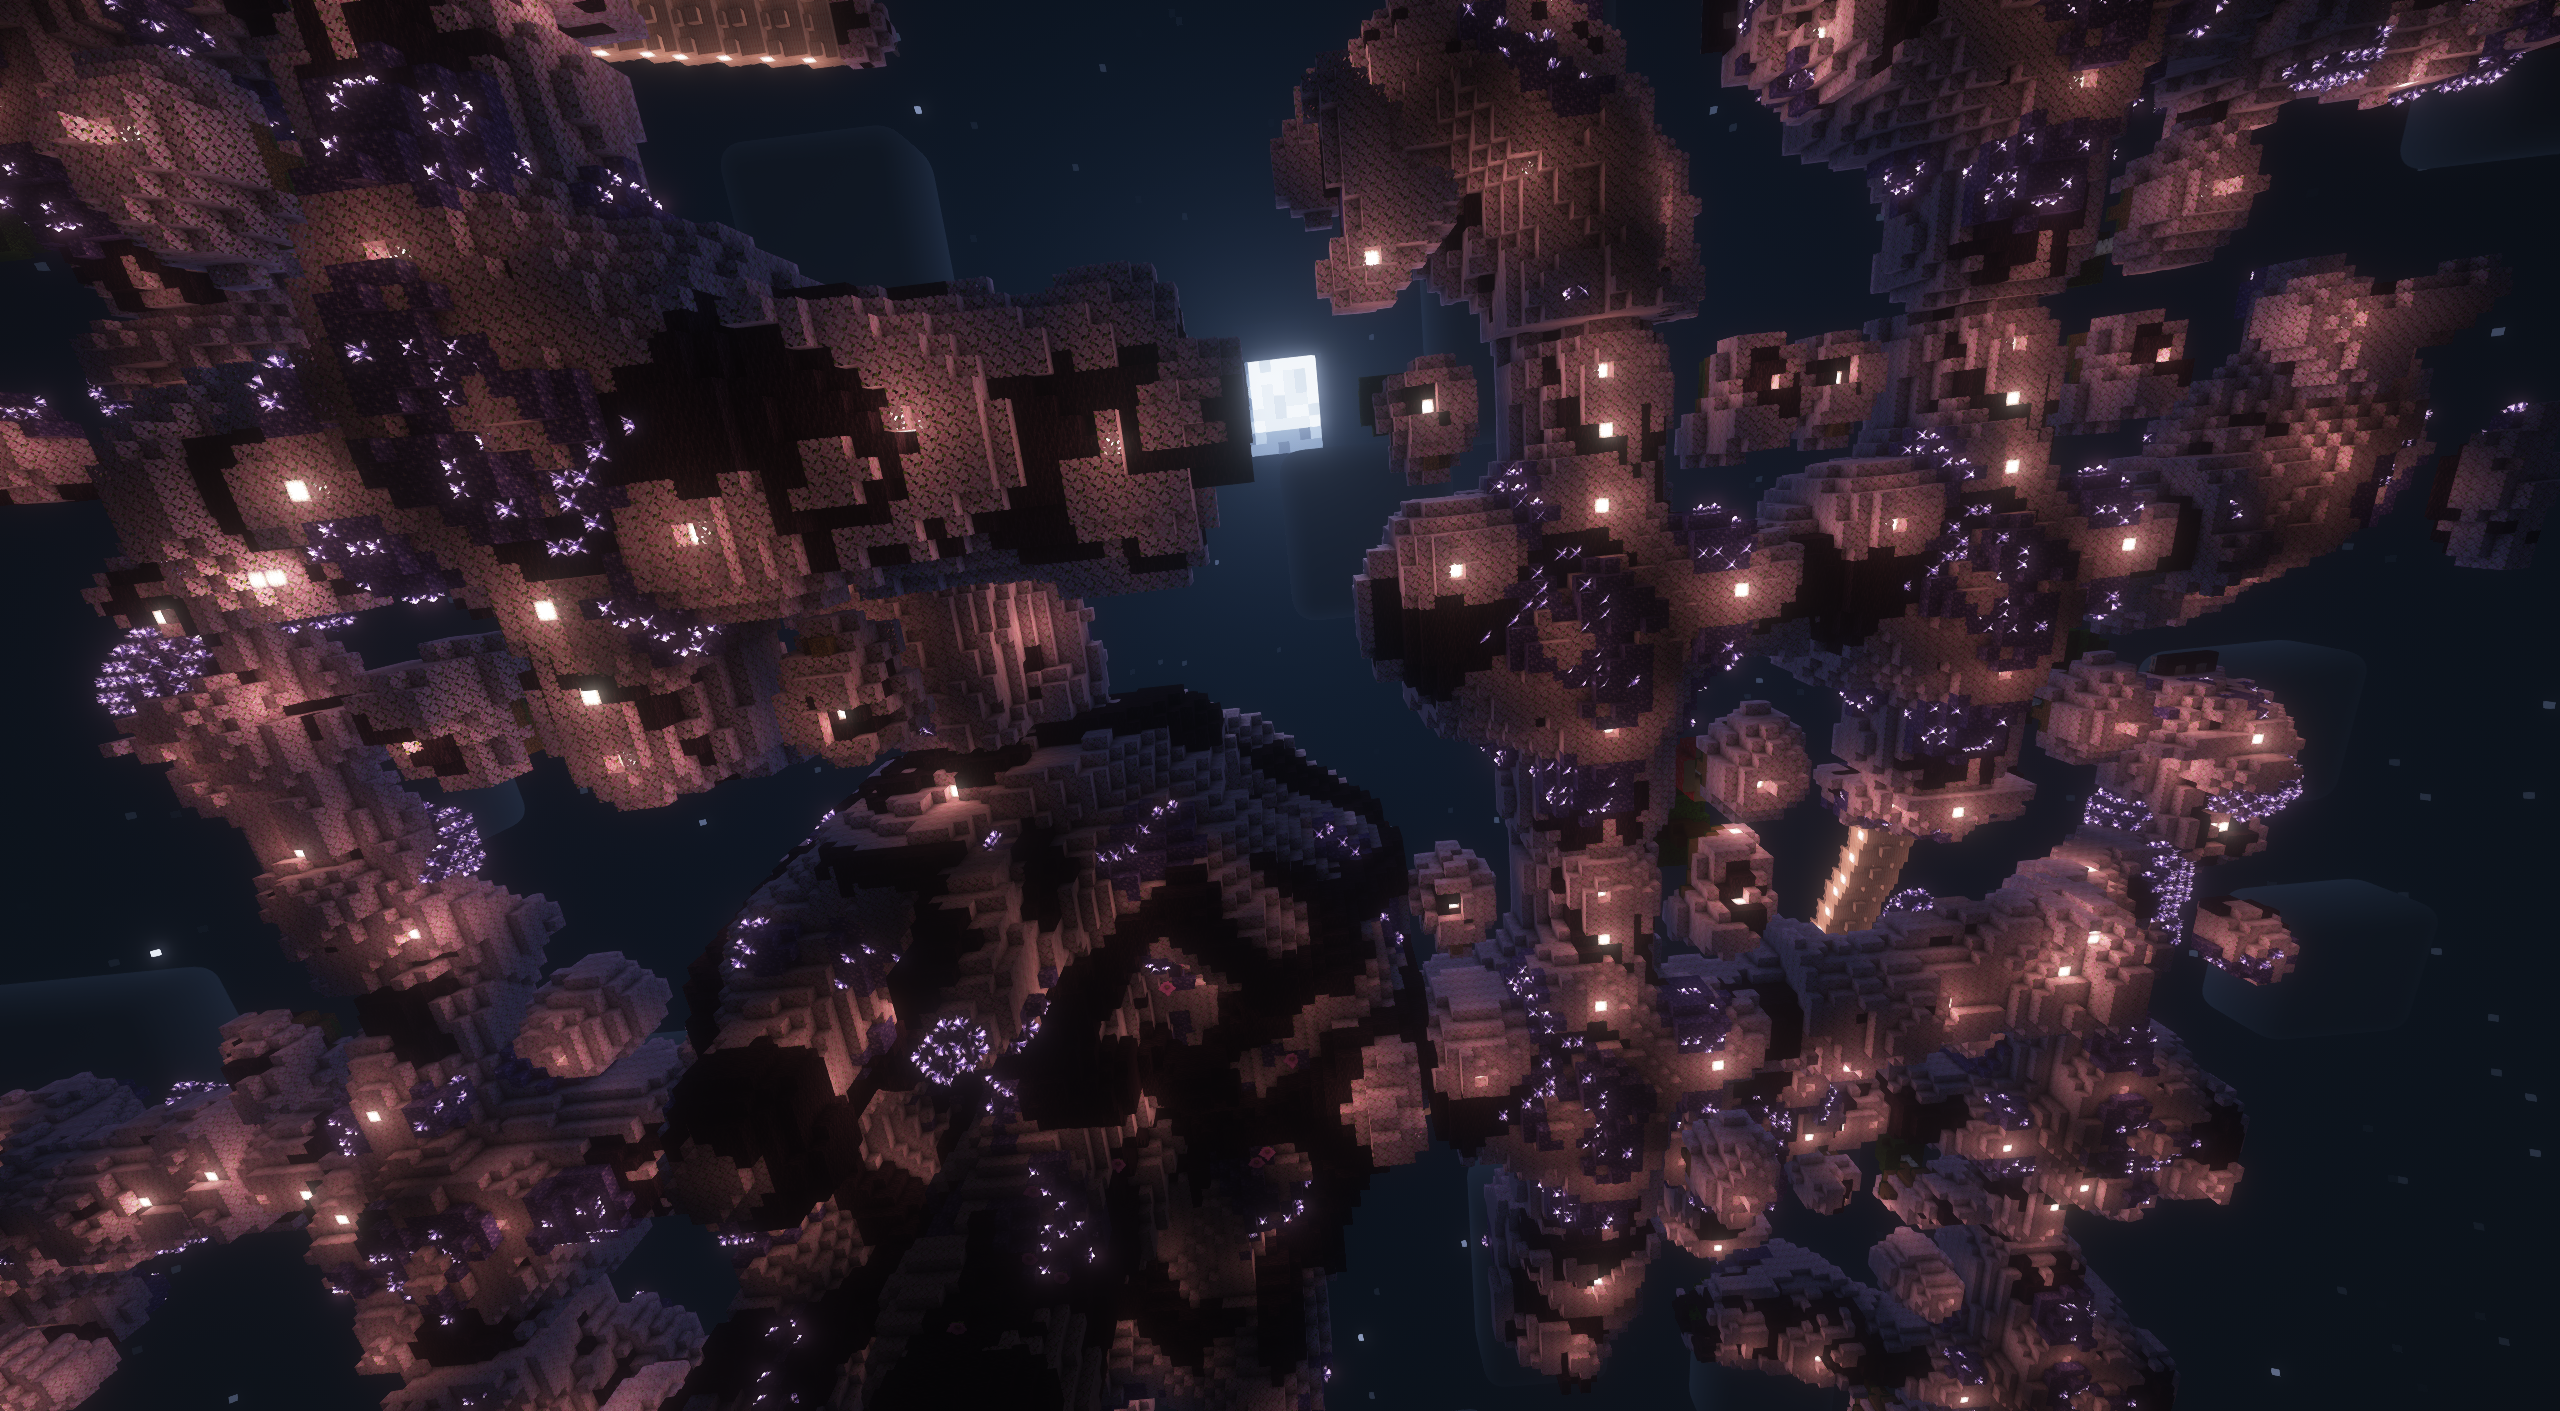
#### Alfheim

A colossal, vibrant pink tree gracing the world's surface, holding symbolic significance and a wide variety of rewards.

<figure><img src="https://4156755274-files.gitbook.io/~/files/v0/b/gitbook-x-prod.appspot.com/o/spaces%2Fm9CYtM6NlzIRCHfJH6Ei%2Fuploads%2FSf4SJeQIPlYnTmEeDQgP%2Falfheim.png?alt=media&#x26;token=184fb998-dc74-47ba-91f9-a97bd62e6cff" alt=""><figcaption></figcaption></figure>

***

#### Asgard

A magnificent, challenging structure suspended high in the sky, central to Yggdrasil's narrative and home to the legendary Gungnir.

<figure><img src="https://4156755274-files.gitbook.io/~/files/v0/b/gitbook-x-prod.appspot.com/o/spaces%2Fm9CYtM6NlzIRCHfJH6Ei%2Fuploads%2F1qONhem6kyDC06g7ZI15%2Fjavaw_1RfYXhlhJS.jpg?alt=media&#x26;token=d21d5cb8-4f78-4065-8fe9-2b2d0506ccfa" alt=""><figcaption></figcaption></figure>

***

#### Helheim

A dark, extremely difficult realm deep beneath the earth, crucial to Hel's story and offering unique enchantments and a loyal pet.

<figure><img src="https://4156755274-files.gitbook.io/~/files/v0/b/gitbook-x-prod.appspot.com/o/spaces%2Fm9CYtM6NlzIRCHfJH6Ei%2Fuploads%2F7haBlWfmLBmMlRHEs7JQ%2Fyggrasil-4-helheim-crossroad.jpg?alt=media&#x26;token=d8c507a9-4e04-4344-aeb2-e9802d20fe3a" alt=""><figcaption></figcaption></figure>

***

#### Runic Alfheim

A visually distinct variant of Alfheim found within the Runic Dimension, sharing its core structure and rewards.

<figure><img src="https://4156755274-files.gitbook.io/~/files/v0/b/gitbook-x-prod.appspot.com/o/spaces%2Fm9CYtM6NlzIRCHfJH6Ei%2Fuploads%2FXG8OBg3YRAuK73lAc3to%2FDiscord_R9oYRpUPoy.jpg?alt=media&#x26;token=376f5d92-5a73-45dd-b672-549efc4ce71f" alt=""><figcaption></figcaption></figure>

***

#### Runic Island

A rare island floating high in the Overworld skies, acting as a gateway to the Runic Dimension and holding its own secrets.

<figure><img src="https://4156755274-files.gitbook.io/~/files/v0/b/gitbook-x-prod.appspot.com/o/spaces%2Fm9CYtM6NlzIRCHfJH6Ei%2Fuploads%2FlK7fxEtAM4ZpvzgI9imc%2Frunic_fracture.jpg?alt=media&#x26;token=2fb1a443-8c5b-4d8d-938b-12065d0c27cd" alt=""><figcaption></figcaption></figure>

***

#### Runic Labyrinth

An immense and intricate underground maze located in the Runic Dimension, offering hours of exploration and legendary bows.

<figure><img src="https://4156755274-files.gitbook.io/~/files/v0/b/gitbook-x-prod.appspot.com/o/spaces%2Fm9CYtM6NlzIRCHfJH6Ei%2Fuploads%2FIP1aO7z0q2W76QuT4cE9%2Fjavaw_oZNiVXlh7M.png?alt=media&#x26;token=b74947b9-dc91-4a00-9d19-6f45fbcd696a" alt=""><figcaption></figcaption></figure>

***

#### Dokkalfar Ruins

Small, fragmented ruins found frequently within the Runic Dimension, providing vital portals back to the Overworld.

<figure><img src="https://4156755274-files.gitbook.io/~/files/v0/b/gitbook-x-prod.appspot.com/o/spaces%2Fm9CYtM6NlzIRCHfJH6Ei%2Fuploads%2FXZtZ7XpACGXzmvjy950l%2Fjavaw_eqPK22X8sb.jpg?alt=media&#x26;token=6be289a2-d46b-4b43-a69e-2d6d0e61afca" alt=""><figcaption></figcaption></figure>

***

#### Cubeoid

Mysterious cube structures pulsating with magic within the Runic Dimension, presenting moderate challenges and interesting rewards.

<figure><img src="https://4156755274-files.gitbook.io/~/files/v0/b/gitbook-x-prod.appspot.com/o/spaces%2Fm9CYtM6NlzIRCHfJH6Ei%2Fuploads%2Flh0IS6wlaFQzy1grfBYO%2FDiscord_1suao3czCO.png?alt=media&#x26;token=cbe43330-ebc2-4f21-9bdd-91f44e86dcf7" alt=""><figcaption></figcaption></figure>

***

#### Glaosheimr Village

Small, peaceful villages nestled in cherry grove biomes, offering a tranquil refuge rather than legendary loot.

<figure><img src="https://4156755274-files.gitbook.io/~/files/v0/b/gitbook-x-prod.appspot.com/o/spaces%2Fm9CYtM6NlzIRCHfJH6Ei%2Fuploads%2FDHJkSK380yLF3z2M22LB%2Fglaosheimr.webp?alt=media&#x26;token=7eb97bc3-03ad-4e34-bf16-91a7e0c0d75d" alt=""><figcaption></figcaption></figure>

***

#### Steles (Structure Markers)

Mini-structures like Helbloms, Lifbloms, Neogards, Zenflors, Vorobloms, and Proto-Islands act as markers or starting points to help locate their associated major structures.

<figure><img src="https://4156755274-files.gitbook.io/~/files/v0/b/gitbook-x-prod.appspot.com/o/spaces%2Fm9CYtM6NlzIRCHfJH6Ei%2Fuploads%2FGteglj0dOxG8A0bYHKvq%2Fyggrasil-4-zenflors-plains.jpg?alt=media&#x26;token=660f6411-a282-4e90-a802-f12496e882ea" alt=""><figcaption></figcaption></figure>

</details>

<details>

<summary>Dungeons+ (11)</summary>

### Standard Dungeon Types

> **Cold Dungeon**: The skeleton's bone cold abode
>
> **Mouldy Dungeon**: This is your standard zombie spawner dungeon.
>
> **Webbed Dungeon**: This dungeon could almost be mistaken for a small fortress... a spider's fortress.
>
> *\[Found in: Plains, Hills, Savannahs, Tiagas]*

### Unique Dungeon Types

> **Infested Dungeon**: This mountain dungeon has been overtaken by an infestation! make sure you watch your step!
>
> **Lush Dungeon**: The lush jungles & caves provide a nice home for these cave spiders. Be careful however as the dungeon is very small & cramped.
>
> **Deepwater Dungeon**: These are usually found below the depths of the ocean and in dripstone caves.
>
> **Frozen Dungeon**: Wet and cold, this snowy dungeon brings with it a formidable stench from all of the strays.
>
> **Dusty Tomb**: Mostly dry and sandy. The husk and parched are not very welcoming.
>
> **Scorched Tomb**: Deep in the badlands these will be found. Dungeons full of zombies, skeletons and loot for those who do a little searching!
>
> **Muddy Dungeon**: Can be found in the swampy areas of your world and is a haven to many bogged and slimes.

### Other structures

> **Dungeon Ruins**: We don't know how they got here, only that someone has been here already!

</details>

<details>

<summary>Dungeons and Taverns (40)</summary>

![End Lighthouse](https://cdn.modrinth.com/data/tpehi7ww/images/01f5dd70006b0639e09890fdd75baf77a9d97ae1_350.webp)

### End Lighthouse

Structures spawning in the End acting as Ends version of Taverns. you can find maps here for End Castles and obtain End Ship Keys

![Piglin Camp](https://cdn.modrinth.com/data/tpehi7ww/images/048b4a06f670fb68af5071cc20a957e2ad06dc55_350.webp)

### Piglin Camp

Piglin Camps are somewhat common structures holding gold ore and charts to Hamlets

![Wells](https://cdn.modrinth.com/data/tpehi7ww/images/0f032349878692e3c5218dfab21180e0da499b76_350.webp)

### Wells

why should the desert be the only place to have unnecessary wells?

![End Castle](https://cdn.modrinth.com/data/tpehi7ww/images/19676b2abab74995c20e2c58c0ce9aefef845320_350.webp)

### End Castle

Ends version of a Stronghold and Endcity Hybrid. you can find Gravity, Wax Wings, End Ship Keys, End Crystals and other things here. can be found either with an End Castle Map or Eyes of Ender

![Jungle Ruins](https://cdn.modrinth.com/data/tpehi7ww/images/1d3502e3f6267f51f31f3052d1d777dc545404e2_350.webp)

### Jungle Ruins

You aren't a fan of the small Jungle temple? maybe search for Jungle ruins then. Bogged spawn here and you can find the Photosynthesis Enchantment here

![Swamp Villages](https://cdn.modrinth.com/data/tpehi7ww/images/1ea33d4b7466cfd9f0636087384758fd2b25c7c7_350.webp)

### Swamp Villages

Find villages in swamp with... witches? seems like getting that mending librarian isn't going to be that easy.

![End Ships](https://cdn.modrinth.com/data/tpehi7ww/images/202ffb9ceb01135ef35984c1a38fbaf6e397c24c_350.webp)

### End Ships

Lone Endships spawning within the end containing a vault needing an End Ship Vault Key. Those vaults always hold Elytra. Maybe even enchanted with Wax Wings

![Nether Ports](https://cdn.modrinth.com/data/tpehi7ww/images/22984905a1e5e41ef1bb07d77a1df18471448be3_350.webp)

### Nether Ports

Nether Ports are a Nether Skeleton structure that always generates at lava level with a central structure and ports with towers spawning around it, it contains trial spawner and vaults with the Swift Soar enchantments and 1 Chart for the Nether Keep

![Toxic Lair](https://cdn.modrinth.com/data/tpehi7ww/images/23969057f32124591f61c69feec516320fcf6965_350.webp)

### Toxic Lair

Swamp Structure found in swamp biomes. Surface area has ruins with suspicious gravel but the inside leads to an underground structure with a miniboss and several trial spawner/vaults and ominous vaults. you can find Antidote, Piercing/Multishot bows here

![Catacombs](https://cdn.modrinth.com/data/tpehi7ww/images/2631fec62920fc343d12792ffa4e6c706e40b5f7_350.webp)

### Catacombs

Underground Deepslate structure that spawns, in cold biomes, under y level 0. No notable loot besides skulls if you like skulls.

![Illager Camp](https://cdn.modrinth.com/data/tpehi7ww/images/3937be1a8289a32bbd780e87519a318d65d1e8f5_350.webp)

### Illager Camp

A small somewhat rare camp with a few decorations spreaded around the main campfire, has a chest with a chart for a pillager outpost

![Stray Fort](https://cdn.modrinth.com/data/tpehi7ww/images/3bbba50a435ad7ed89ee55bcb822a247ad7aa8b1_350.webp)

### Stray Fort

Rare structure that generates in cold biomes and spawns more strays than usual during the night. You can find a chart for the Lone Citadel here.

![Triden Trail Monument](https://cdn.modrinth.com/data/tpehi7ww/images/3e411b7bb17c947f4715407df9559f8918ffd51a_350.webp)

### Triden Trail Monument

Grant Prismarine structure not spawning guardians naturally but from trial spawner here, you can obtain tridents, heart of the sea and other goodies here

![Hamlets](https://cdn.modrinth.com/data/tpehi7ww/images/4385ab6f0aaa5494a2ce78daa3c9550717ac336f_350.webp)

### Hamlets

Hamlets are a Piglin structure with a Piglin village and apartment complex inside its underground part. They contain magma slime trial spawner and vaults that hold charts for Piglin Outstations

![Jungle Villages](https://cdn.modrinth.com/data/tpehi7ww/images/4425a4ee3314d84b0bbe764d87f105a10fa132dc_350.webp)

### Jungle Villages

Spawning in Jungles are now jungle villages

![Shrines](https://cdn.modrinth.com/data/tpehi7ww/images/64c4350272cc09de1a25bba15761d9aa4a9268ff_350.webp)

### Shrines

Shrines leading down to 1-5 themed combat arenas that all follow 1 theme per shrine, amound of copper bulbs indicate how many rooms there are. you can find Shrine Keys, Ominous Shrine keys and Traveler here. Ominous vaults are only in lv 5 shrines

![Trial Dungeon](https://cdn.modrinth.com/data/tpehi7ww/images/6707a793e0532760e0305bda777d97a87841a4f4_350.webp)

### Trial Dungeon

Underground structure with 1 guranteed Spawner and 1-8 Trial spawner, adabt to cave gen with the same system as cave chambers and also spawn with vaults that require Cave Chamber Keys. the spawner there do give those out sometimes.

![Stray Outlook](https://cdn.modrinth.com/data/tpehi7ww/images/6ed1a07b8d320546fb91dcf485eb07c44d860dfb_350.webp)

### Stray Outlook

rare structure that spawns in cold biomes with either spruce or stone walls. you can obtain a Stray Fort Chart here

![Illager Hideout](https://cdn.modrinth.com/data/tpehi7ww/images/7d92bafda8ae0586a777a3fc4acc12e16c67f1ef_350.webp)

### Illager Hideout

A rare underground Dungeon that is filled with Illagers. a challenge for late game player who seek a challenge

![Illager Manor](https://cdn.modrinth.com/data/tpehi7ww/images/88b960cf4fc20d3789536b4d2760c551468b82ef_350.webp)

### Illager Manor

Illager manor is a gigantic Dark oak/spruce wood structure spawning in old grown taigas or pine forest biomes. they are even rarer than woodland mansions but they do have the Illagers Bane enchantment.

![Piglin Donjon](https://cdn.modrinth.com/data/tpehi7ww/images/8bfbfce290261f31598eaf1de798306d5d67b999_350.webp)

### Piglin Donjon

The Donjon is a Megastructure spawning rarely in crimson forest biomes containing several room types of the various bastion remnants and container crates filled with gold. also look out for hidden vault rooms. Ontop is a Coloseum for Vault keys

![Taverns](https://cdn.modrinth.com/data/tpehi7ww/images/93dc2790ee15a172f5e7a9100790dedde9ea6b35_350.webp)

### Taverns

Taverns are places where you find beds and a Trader selling maps to some of the dungeons or ruins of this datapack. you need to level the villager, while they are inside the tavern, up to aprentice, to make them a tavern cartographer.

![Ruined Towns](https://cdn.modrinth.com/data/tpehi7ww/images/947381c26c275d20f5d454232a6631d7b860077b_350.webp)

### Ruined Towns

Ruined Towns are ruins from the past with rubble everywhere with suspicious gravel holding mostly just junk but maybe some sherds and other tressures

![Nether Keep](https://cdn.modrinth.com/data/tpehi7ww/images/96086c166b12883a39462eb9aac4780de50c410a_350.webp)

### Nether Keep

This Mega Structure is an giant tower spawning inside the nether, containing 3 blaze spawner rooms with their own treasure chests. bridges hold trialspawner and arenas to obtain keys for the vault inside. you can obtain a chart for the Sealing Halls here.

![Remnants](https://cdn.modrinth.com/data/tpehi7ww/images/9a91bc406081d0b2c581a44494092409e7e92e88_350.webp)

### Remnants

Remnants are rare enviromental ruins, not different from wild ruins but MUCH MUCH rarer. one of them is a classic village that is abandoned

![Bunker](https://cdn.modrinth.com/data/tpehi7ww/images/9b5e943cf03211d00ce7e5cfb4e073697c29e335_350.webp)

### Bunker

A somewhat rare structure that resembles surface exposed strongholds, they have a bigger room variety and dont have an end portal chamber

![Sealing Halls](https://cdn.modrinth.com/data/tpehi7ww/images/9e58da0a70bd3f4eb6fa4953ea74fd24a849d501_350.webp)

### Sealing Halls

Acting as the Nether Skeletons Equaliment to the Piglin Donjon, this structure is the rarest DnT Nether structure and you can find all DnT Nether Enchantments here as well as a trial spawner with Ominous Consequences.

![Piglin Outstation](https://cdn.modrinth.com/data/tpehi7ww/images/a2135e0e814549f1a7d9ea84c59e477a0f815b2a_350.webp)

### Piglin Outstation

Piglin Outstation are a rare Piglin Structure that are very inspired by the "Horde of the Bastion" Outpost in Minecraft legends as well as the vault rooms in Minecraft Dungeons Ancients Raids. They contain Vaults with charts for the Piglin Donjon.

![Undead Crypts](https://cdn.modrinth.com/data/tpehi7ww/images/a84b93256dddb096694ccfd34738936ae74d2ca1_350.webp)

### Undead Crypts

Another underground Dungeon with alot of bones, skulls and other stuff with 1 spawner room

![Creeping Crypt](https://cdn.modrinth.com/data/tpehi7ww/images/ad9884f56eb019873c793c52e9c114601244a83f_350.webp)

### Creeping Crypt

Creeping Crypts are an structure found in taiga biomes, filled with creeper, gunpowder, suspicious gravel and if you are lucky, even an creeper spawner alongside the other trial spawner spawning creepr and undead

![Cave Chambers](https://cdn.modrinth.com/data/tpehi7ww/images/b379c30b40de87102652f6548fe83d43c1939bce_350.webp)

### Cave Chambers

Cave Chambers are the wild ruins of the underground. they spawn with a working fake cave system around them to integrate themself naturally in the underground worldgen. sometimes they have Vaults that require Cave Chamber Keys. some have trial spawners.

![Nether Skeleton Towers](https://cdn.modrinth.com/data/tpehi7ww/images/c1ff164f87997bfd8a5606fa6c1517a2ca07e931_350.webp)

### Nether Skeleton Towers

Those Encampments spawn with skeletons and wither skeletons and hold chest to other biome types of the Nether Skeleton Tower and 1 chest with a chart for a Nether Port. Mobs do not respawn.

![Firewatch towers](https://cdn.modrinth.com/data/tpehi7ww/images/c55944ee3b90dafe32c7a2e09617620bc844e8e8_350.webp)

### Firewatch towers

They are atmospheric builds to make the world feel more lived in. you can use them as a small base or just to find a nights rest

![Mangrove Swamp Hut](https://cdn.modrinth.com/data/tpehi7ww/images/da8d00e00d485cddb7c6b169353d9909da528019_350.webp)

### Mangrove Swamp Hut

the witches moved into the mangrove swamp with 3 different hut styles

![Witch Villa](https://cdn.modrinth.com/data/tpehi7ww/images/e9a0259483552bd24cb362c080bc226d0179c001_350.webp)

### Witch Villa

Spawning in swamp biomes and Mangrove Swamps those structure act as witches woodland mansion with their own experiments and own backyard

![Conduit ruin](https://cdn.modrinth.com/data/tpehi7ww/images/f0c858562dd576e46e7453c05740db388ded2db2_350.webp)

### Conduit ruin

A way to teach player how to build a conduit with hints in the chest in the prismarine ring as well as being an archeological site

![Underground House](https://cdn.modrinth.com/data/tpehi7ww/images/f2daf721dee07c2bf5f60826aeeda01dc849a5c0_350.webp)

### Underground House

'tis but a terraria reference

![Wild Ruins](https://cdn.modrinth.com/data/tpehi7ww/images/f5a7844f166925a55ad285c3d2a1c3963f2c01ac_350.webp)

### Wild Ruins

Under wild ruins fall things like small camps, huts and dead redstone golems, they are environmental and supposed to add to making the world feel more lived in

![Badlands Miner Outpost](https://cdn.modrinth.com/data/tpehi7ww/images/fa8e297e7b0250921b5c81fb344b30c69342d924_350.webp)

### Badlands Miner Outpost

This unique Outpost is more about the mining operations in Badlands. a good way to get gold and tnt

![Lone Citadel](https://cdn.modrinth.com/data/tpehi7ww/images/fdd1d51faa37fc24d2583a9a8348a2c296ebb5e2_350.webp)

### Lone Citadel

Probably Dungeons and Taverns biggest structure yet. Recreating the Lone Fortress from Minecraft Dungeons and bringing it to vanilla. Breezes and Strays are at home here. you can obtain the Might Enchantment and Aerials Bane here

</details>

<details>

<summary>Eden Structures (39)</summary>

Cherry Village\
Jungle Village\
Swamp Village\
Ocean Village\
Underground Village\
Sky Village\
Ruined village\
Mountain villager statue\
Ocean villager statue\
Desert villager statue\
Witch circle\
Shroom cave\
Big Birch Tree\
Big Dark Oak Tree\
Big Cherry Tree- Windmill\
Graveyard\
Desert Dungeon\
better Vanilla Dungeon\
Sky Dungeon\
Armory\
4 Mini-Dungeons\
Skyrtle\
Mesa Village\
Birch Village\
Spider Den\
Deep Blue Labs\
Deep Blue Lab Ruins\
Trader Outposts\
Magic Tower\
Deep Blue City\
Skyhold\
Ocean Ships\
Sky Decor\
Pillager Village\
Fossils\
Far Watch

</details>

<details>

<summary>Base Structures (27)</summary>

**Fortified Village**\
A well-defended village with strong walls and multiple buildings.\
Rarity: Common

**Fortified Desert Village**\
A fortified village adapted for desert environments, with protective structures.\
Rarity: Common

**Spire**\
A tall, narrow structure often found in various biomes.\
Rarity: <mark style="color:blue;">Rare</mark>

**Glacial Hut**\
A small, isolated hut found in icy biomes, providing shelter from the cold.\
Rarity: <mark style="color:green;">Uncommon</mark>

**Giant Bee Hive**\
A large hive structure found underground, home to many bees.\
Rarity: <mark style="color:green;">Uncommon</mark>

**Oak Cabin**\
A cozy, small cabin found underground, built from oak.\
Rarity: <mark style="color:green;">Uncommon</mark>

**Mining Outpost**\
An underground outpost for mining operations, with various mining equipment.\
Rarity: <mark style="color:green;">Uncommon</mark>

**Old Refinery**\
A dilapidated refinery found underground, with remnants of old machinery.\
Rarity: <mark style="color:blue;">Rare</mark>

**Sunken Tower**\
A partially submerged tower found underground, often in water-filled caves.\
Rarity: <mark style="color:blue;">Rare</mark>

**Witch Hut**\
An old hut inhabited by a witch, containing magical items and potions.\
Rarity: <mark style="color:blue;">Rare</mark>

**Frosted Dungeon**\
A cold, dungeon-like structure filled with traps and treasures.\
Rarity: <mark style="color:blue;">Rare</mark>

**Mage Tower**\
A grand tower occupied by mages, featuring magical items and enchantments.

* **Mage Tower Spring**\
  A variant of the Mage Tower with spring-themed decorations.\
  Rarity: <mark style="color:blue;">Rare</mark>
* **Mage Tower Summer**\
  A summer-themed variant of the Mage Tower, with vibrant decorations.\
  Rarity: <mark style="color:blue;">Rare</mark>
* **Mage Tower Autumn**\
  An autumn-themed Mage Tower, with seasonal decorations and items.\
  Rarity: <mark style="color:blue;">Rare</mark>
* **Mage Tower Winter**\
  A winter-themed Mage Tower with icy decorations and items.\
  Rarity: <mark style="color:blue;">Rare</mark>

**Mage Complex**\
A large, complex structure for mages with multiple towers and magical features.\
Rarity: <mark style="color:green;">Uncommon</mark>

**Desert Outpost**\
A small outpost in the desert, featuring defensive structures and supplies.\
Rarity: <mark style="color:blue;">Rare</mark>

**Valley Lodge**\
A lodge located in a valley, providing shelter and amenities.\
Rarity: <mark style="color:blue;">Rare</mark>

**Igloo**\
A small, igloo-shaped structure found in cold biomes, providing basic shelter.\
Rarity: <mark style="color:blue;">Rare</mark>

**Rubble Desert**\
A desert structure consisting of rubble and ruins, with scattered artifacts.\
Rarity: <mark style="color:blue;">Rare</mark>

**Rubble Forest**\
A forest structure in ruins, covered with rubble and vegetation.\
Rarity: <mark style="color:blue;">Rare</mark>

**Rubble Jungle**\
A jungle structure in ruins, overgrown with plants and debris.\
Rarity: <mark style="color:blue;">Rare</mark>

**Rubble Mesa**\
A mesa structure in ruins, with scattered rubble and remnants.\
Rarity: <mark style="color:blue;">Rare</mark>

**Rubble Mountain**\
A mountainous structure in ruins, covered with debris and vegetation.\
Rarity: <mark style="color:blue;">Rare</mark>

**Rubble Savannah**\
A savanna structure in ruins, with scattered rubble and dry vegetation.\
Rarity: <mark style="color:blue;">Rare</mark>

</details>

<details>

<summary>Ruins &#x26; Outcasts (15)</summary>

**Boat**\
A small, simple boat found on bodies of water. It provides some loot.\
Rarity: Common

**Firetower**\
A tall structure. It is typically located in high or open areas.\
Rarity: <mark style="color:green;">Uncommon</mark>

**Jungle Ruin**\
Ancient ruins located in jungle biomes, and has overgrown vegetation and crumbling stone structures. These ruins often contain hidden treasures and artifacts.\
Rarity: <mark style="color:green;">Uncommon</mark>

**Outcast Villager Desert**\
A desert outpost inhabited by outcast villagers. It features makeshift shelters and supplies suited for desert survival.\
Rarity: <mark style="color:green;">Uncommon</mark>

**Outcast Villager Grassy**\
A grassy outpost with a structure inhabited by outcast villagers. It includes makeshift homes and amenities suited for a more temperate environment.\
Rarity: <mark style="color:green;">Uncommon</mark>

**Ruin Grassy**\
Overgrown ruins located in grassy biomes. These ruins are partially reclaimed by nature and may contain remnants of past civilizations.\
Rarity: <mark style="color:green;">Uncommon</mark>

**Northern Ruin**\
Ancient ruins found in northern or cold biomes. These structures are often weathered by harsh climates and may include remnants of past inhabitants.\
Rarity: <mark style="color:green;">Uncommon</mark>

**Swamp Ruin**\
Ruins located in swamp biomes, often submerged or partially covered in water and mud. They feature dilapidated structures surrounded by swamp vegetation.\
Rarity: <mark style="color:green;">Uncommon</mark>

**Taiga Ruin Surface**\
Ruins found on the surface in taiga biomes. These structures are typically made of materials suited for cold environments and are often partially covered in snow or ice.\
Rarity: <mark style="color:green;">Uncommon</mark>

**Taiga Ruin Underground**\
Ruins located underground in taiga biomes. These subterranean structures may be accessed through surface entrances or cave systems.\
Rarity: <mark style="color:green;">Uncommon</mark>

**Abandoned Camp**\
An old, abandoned campsite featuring remnants of past activity such as tents, campfires, and supplies. It reflects a once-active settlement now left in disarray.\
Rarity: Common

**Abandoned Chapel**\
A dilapidated chapel, often found in various biomes, showcasing crumbling walls and remnants of religious artifacts or symbols.\
Rarity: <mark style="color:green;">Uncommon</mark>

**Dense Forest Ruin**\
Ancient ruins located in dense forest biomes, covered in thick vegetation and often difficult to access. These ruins are overgrown and partially hidden.\
Rarity: <mark style="color:green;">Uncommon</mark>

**Graveyard**\
A somber structure found in various biomes, featuring gravestones and tombs. It often contains remains and memorials.\
Rarity: <mark style="color:blue;">Rare</mark>

**Old Manor**\
A large, historic manor found in various biomes, showing signs of age and neglect. It may contain old furniture, hidden rooms, and relics of its past inhabitants.\
Rarity: <mark style="color:blue;">Rare</mark>

</details>

### Biomes

<details>

<summary>Air (4)</summary>

Skylands\
Floating islands in the sky, with variations for different seasons like Autumn, Spring, Summer, and Winter

* **Skylands (Autumn)**\
  A variant of Skylands with autumnal colors and falling leaves.\
  Rarity: Common
* **Skylands (Spring)**\
  A variant of Skylands with vibrant spring colors and blooming flowers.\
  Rarity: Common
* **Skylands (Summer)**\
  A variant of Skylands with lush summer vegetation and warm temperatures.\
  Rarity: <mark style="color:red;">Unknown</mark>
* **Skylands (Winter)**\
  A variant of Skylands with snow-covered terrain and a chilly atmosphere.\
  Rarity: <mark style="color:green;">Uncommon</mark>

</details>

<details>

<summary>Surface (84)</summary>

**Alpha Islands**\
A tropical island biome with lush vegetation and shallow waters.\
Rarity: <mark style="color:blue;">Super Rare</mark>

**Alpha Islands (Winter)**\
A snowy variant of Alpha Islands with frozen water and snow-covered trees.\
Rarity: <mark style="color:blue;">Super Rare</mark>

**Alpine Grove**\
A cold forest biome with tall pine trees and frosted ground.\
Rarity: <mark style="color:green;">Uncommon</mark>

**Alpine Highlands**\
High-altitude biome with snowy peaks and sparse vegetation.\
Rarity: Super Common

**Amethyst Canyon**\
A canyon biome with exposed amethyst geodes and rugged terrain.\
Rarity: <mark style="color:green;">Uncommon</mark>

**Amethyst Rainforest**\
A dense, vibrant rainforest filled with amethyst crystals.\
Rarity: Common

**Ancient Sands**\
A dry desert biome with ancient ruins and sandstone formations.\
Rarity: <mark style="color:green;">Uncommon</mark>

**Arid Highlands**\
A dry, elevated biome with sparse vegetation and rugged terrain.\
Rarity: Super Common

**Ashen Savanna**\
A scorched savanna biome with charred trees and dry grass.\
Rarity: <mark style="color:green;">Uncommon</mark>

**Basalt Cliffs**\
Sheer cliffs made of basalt, with little vegetation and harsh terrain.\
Rarity: <mark style="color:green;">Uncommon</mark>

**Birch Taiga**\
A taiga biome with tall birch trees and a cold climate.\
Rarity: Common

**Blooming Plateau**\
A highland biome covered in flowers and grass, with a pleasant climate.\
Rarity: Common

**Blooming Valley**\
A lush valley filled with a variety of flowers and vibrant plant life.\
Rarity: Common

**Brushland**\
A warm, dry biome with low shrubs and scattered trees.\
Rarity: Super Common

**Bryce Canyon**\
A desert biome featuring tall, thin spires of red rock and deep canyons.\
Rarity: <mark style="color:green;">Uncommon</mark>

**Caldera**\
A volcanic crater biome with hot springs and unique vegetation.\
Rarity: <mark style="color:green;">Uncommon</mark>

**Cloud Forest**\
A mystical forest biome often shrouded in fog, with tall trees and rich flora.\
Rarity: <mark style="color:blue;">Rare</mark>

**Cold Shrubland**\
A chilly biome with sparse shrubs and a cold climate.\
Rarity: Common

**Desert Canyon**\
A dry canyon biome with deep valleys and towering rock formations.\
Rarity: <mark style="color:red;">Unknown</mark>

**Desert Oasis**\
A rare desert biome with a central water source surrounded by lush vegetation.\
Rarity: Common

**Desert Spires**\
A desert biome with tall, thin rock formations and barren terrain.\
Rarity: <mark style="color:blue;">Rare</mark>

**Emerald Peaks**\
A mountainous biome with abundant emeralds and steep cliffs.\
Rarity: <mark style="color:blue;">Rare</mark>

**Forested Highlands**\
A biome with dense forests at high altitudes, featuring diverse tree species.\
Rarity: Super Common

**Fractured Savanna**\
A dry biome with large cracks in the ground and sparse vegetation.\
Rarity: <mark style="color:green;">Uncommon</mark>

**Frozen Cliffs**\
A cold biome with icy cliffs and snow-covered terrain.\
Rarity: <mark style="color:green;">Uncommon</mark>

**Glacial Chasm**\
A deep, icy biome with massive glaciers and frigid temperatures.\
Rarity: <mark style="color:green;">Uncommon</mark>

**Granite Cliffs**\
Rugged cliffs made of granite, with sparse vegetation and steep drops.\
Rarity: <mark style="color:green;">Uncommon</mark>

**Gravel Beach**\
A coastal biome with extensive gravel beaches and shallow water.\
Rarity: Super Common

**Gravel Desert**\
A barren desert biome with large expanses of gravel and minimal vegetation.\
Rarity: Common

**Haze Mountain**\
A misty mountainous biome with steep slopes and dense fog.\
Rarity: <mark style="color:green;">Uncommon</mark>

**Highlands**\
A temperate biome with rolling hills and diverse flora.\
Rarity: Super Common

**Hot Shrubland**\
A warm biome with sparse shrubs and dry soil.\
Rarity: Common

**Ice Marsh**\
A cold, swampy biome with frozen water and snow-covered vegetation.\
Rarity: Common

**Jungle Mountains**\
A dense jungle biome with steep, mountainous terrain.\
Rarity: <mark style="color:green;">Uncommon</mark>

**Lavender Forest**\
A forest biome filled with lavender plants and vibrant purple hues.\
Rarity: <mark style="color:green;">Uncommon</mark>

**Lavender Valley**\
A lush valley covered in lavender, with a mild climate.\
Rarity: Common

**Lush Desert**\
An ultra rare desert biome with surprising patches of greenery and water sources.\
Rarity: <mark style="color:red;">Unknown</mark>

**Lush Valley**\
A fertile valley biome with abundant plant life and water sources.\
Rarity: <mark style="color:green;">Uncommon</mark>

**Mirage Isles**\
A tropical island biome that appears and disappears like a mirage.\
Rarity: <mark style="color:green;">Uncommon</mark>

**Moonlight Grove**\
A mystical forest biome with glowing plants and a serene atmosphere.\
Rarity: <mark style="color:green;">Uncommon</mark>

**Moonlight Valley**\
A tranquil valley illuminated by glowing plants and a soft moonlight ambiance.\
Rarity: Common

**Mountain Steppe**\
A high-altitude biome with dry grass and rocky terrain.\
Rarity: <mark style="color:red;">Unknown</mark>

**Orchid Swamp**\
A wetland biome filled with orchids and other vibrant plants.\
Rarity: Common

**Painted Mountains**\
A colorful mountainous biome with unique rock formations and bright colors.\
Rarity: <mark style="color:blue;">Rare</mark>

**Red Oasis**\
A small, fertile area in a desert biome, rich with vegetation and water.\
Rarity: <mark style="color:green;">Uncommon</mark>

**Rocky Jungle**\
A dense jungle biome with rocky outcrops and lush vegetation.\
Rarity: Common

**Rocky Mountains**\
A rugged mountainous biome with steep cliffs and sparse trees.\
Rarity: Common

**Rocky Shrubland**\
A dry, rocky biome with sparse shrubs and little vegetation.\
Rarity: <mark style="color:green;">Uncommon</mark>

**Sakura Grove**\
A forest biome with cherry blossom trees and vibrant pink flowers.\
Rarity: Common

**Sakura Valley**\
A peaceful valley filled with cherry blossom trees and mild weather.\
Rarity: <mark style="color:green;">Uncommon</mark>

**Sandstone Valley**\
A desert biome with extensive sandstone formations and dry terrain.\
Rarity: <mark style="color:green;">Uncommon</mark>

**Savanna Badlands**\
A harsh, dry biome with eroded cliffs and sparse vegetation.\
Rarity: Common

**Savanna Slopes**\
A biome with gentle, sloping hills and savanna vegetation.\
Rarity: <mark style="color:green;">Uncommon</mark>

**Scarlet Mountains**\
A mountainous biome with red-tinted stone and steep cliffs.\
Rarity: <mark style="color:green;">Uncommon</mark>

**Shield Clearing**\
A cold, open biome with sparse vegetation and a flat landscape.\
Rarity: <mark style="color:green;">Uncommon</mark>

**Shield**\
A biome characterized by rocky terrain and scattered forests.\
Rarity: Super Common

**Shrubland**\
A dry biome with low shrubs and occasional trees.\
Rarity: Common

**Siberian Grove**\
A cold biome with dense forests and snowy ground.\
Rarity: <mark style="color:blue;">Rare</mark>

**Siberian Taiga**\
A snowy taiga biome with tall pine trees and a cold climate.\
Rarity: Common

**Snowy Badlands**\
A cold biome with barren, snow-covered land and minimal vegetation.\
Rarity: <mark style="color:green;">Uncommon</mark>

**Snowy Cherry Grove**\
A wintery biome with cherry blossom trees covered in snow.\
Rarity: <mark style="color:red;">Unknown</mark>

**Snowy Maple Forest**\
A cold forest biome with maple trees and snowy ground.\
Rarity: <mark style="color:blue;">Rare</mark>

**Snowy Shield**\
A frigid biome with icy terrain and sparse vegetation.\
Rarity: <mark style="color:green;">Uncommon</mark>

**Steppe**\
A cold, grassy biome with expansive, open terrain.\
Rarity: Super Common

**Stony Spires**\
A biome with tall, jagged rock formations and minimal vegetation.\
Rarity: <mark style="color:green;">Uncommon</mark>

**Temperate Highlands**\
A temperate biome with rolling hills and diverse plant life.\
Rarity: Super Common

**Tropical Jungle**\
A hot, dense jungle biome with a rich variety of plant and animal life.\
Rarity: Common

**Valley Clearing**\
A flat valley biome with open terrain and scattered vegetation.\
Rarity: Common

**Volcanic Crater**\
A volcanic biome with an active crater, lava flows, and unique flora.\
Rarity: <mark style="color:green;">Uncommon</mark>

**Volcanic Peaks**\
A high-altitude volcanic biome with rugged, lava-scarred terrain.\
Rarity: <mark style="color:green;">Uncommon</mark>

**Warm River**\
A river biome with warm temperatures and lush vegetation along the banks.\
Rarity: Common

**Warped Mesa**\
A desert biome with distorted, colorful rock formations and minimal vegetation.\
Rarity: <mark style="color:blue;">Rare</mark>

**White Cliffs**\
A coastal biome with striking white cliffs and rocky beaches.\
Rarity: <mark style="color:green;">Uncommon</mark>

**White Mesa**\
A desert biome with white sandstone mesas and sparse vegetation.\
Rarity: <mark style="color:green;">Uncommon</mark>

**Windswept Spires**\
A high-altitude biome with towering rock formations and strong winds.\
Rarity: <mark style="color:green;">Uncommon</mark>

**Wintry Forest**\
A cold forest biome with snow-covered trees and a frosty landscape.\
Rarity: Common

**Wintry Lowlands**\
A chilly biome with low, snow-covered terrain and sparse vegetation.\
Rarity: <mark style="color:red;">Unknown</mark>

**Yellowstone**\
A diverse biome with geothermal features and colorful landscapes.\
Rarity: Super Common

**Yosemite Cliffs**\
A dramatic biome with steep, towering cliffs and diverse vegetation.\
Rarity: <mark style="color:green;">Uncommon</mark>

**Yosemite Lowlands**\
A biome with rolling hills and a mix of forest and grassland.\
Rarity: <mark style="color:green;">Uncommon</mark>

</details>

<details>

<summary>Underground (9)</summary>

**Andesite Caves**\
Caves with walls and floors made primarily of andesite, featuring underground rock formations.\
Rarity: Common

![](https://3522175436-files.gitbook.io/~/files/v0/b/gitbook-x-prod.appspot.com/o/spaces%2FrcgtxEHRbgBRPbt4a4vb%2Fuploads%2FX63NFkRLzhUyXUm9TgLj%2Fimage.png?alt=media\&token=49acda82-e349-46f6-842a-48d906c363e6)

**Desert Caves**\
Caves found in desert regions, with sandy and dry interiors.\
Rarity: <mark style="color:green;">Uncommon</mark>

**Diorite Caves**\
Caves with diorite walls and floors, featuring smooth, light-colored stone.\
Rarity: Common

**Fungal Caves**\
Caves filled with large mushrooms and other fungal growths.\
Rarity: Common

**Granite Caves**\
Caves with granite walls and floors, known for their rough and colorful appearance.\
Rarity: Common

**Ice Caves**\
Cold caves covered in ice and frost, with slippery surfaces and frozen features.\
Rarity: Common

**Infested Caves**\
Caves overrun with cave spiders and cobwebs, creating a hazardous environment.\
Rarity: Common

**Thermal Caves**\
Caves with hot, lava-filled interiors and volcanic features.\
Rarity: <mark style="color:green;">Uncommon</mark>

**Underground Jungle**\
A lush underground biome with dense plant life and hidden features.\
Rarity: <mark style="color:blue;">Rare</mark>

</details>

<details>

<summary>Deep (5)</summary>

**Crystal Caves**\
Deep caves filled with vibrant crystals and glowing mineral formations.\
Rarity: Common

<img src="https://3522175436-files.gitbook.io/~/files/v0/b/gitbook-x-prod.appspot.com/o/spaces%2FrcgtxEHRbgBRPbt4a4vb%2Fuploads%2FJElEiRNkRwD02XTFkDHS%2Fimage.png?alt=media&amp;token=942964df-c6d6-4ac5-b281-46877f749fbb" alt="" data-size="original">

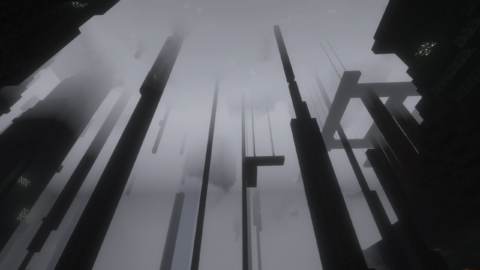
**Deep Caves**\
Caves located deep underground with various rock types and challenging terrain.\
Rarity: Common
<img src="https://3522175436-files.gitbook.io/~/files/v0/b/gitbook-x-prod.appspot.com/o/spaces%2FrcgtxEHRbgBRPbt4a4vb%2Fuploads%2FebFFDzLYzP6uWHMP4Nxr%2Fimage.png?alt=media&amp;token=bf25ca90-7949-43b8-9bf1-877af7785e0f" alt="" data-size="original">

**Frostfire Caves**\
Caves with a mix of ice and lava, featuring both frozen and fiery elements.\
Rarity: <mark style="color:green;">Uncommon</mark>

![](https://3522175436-files.gitbook.io/~/files/v0/b/gitbook-x-prod.appspot.com/o/spaces%2FrcgtxEHRbgBRPbt4a4vb%2Fuploads%2FqAsdAgklmXqf7S0GTZ5S%2Fimage.png?alt=media\&token=6e549194-a8a7-4093-990e-4cbbb3c45cfb)

**Mantle Caves**\
Caves found in the Earth's mantle with high temperatures and unique mineral formations.\
Rarity: <mark style="color:green;">Uncommon</mark>

![](https://3522175436-files.gitbook.io/~/files/v0/b/gitbook-x-prod.appspot.com/o/spaces%2FrcgtxEHRbgBRPbt4a4vb%2Fuploads%2FuDMKrAcabqmRjFzQDMrn%2Fimage.png?alt=media\&token=9a230a88-579b-4a1d-b7a3-7793a311bf15)

**Tuff Caves**\
Caves with tuff rock formations, featuring rugged and unique underground landscapes.\
Rarity: Common

![](https://3522175436-files.gitbook.io/~/files/v0/b/gitbook-x-prod.appspot.com/o/spaces%2FrcgtxEHRbgBRPbt4a4vb%2Fuploads%2Fx4r1DKyuLtEcrQkzu1lO%2Fimage.png?alt=media\&token=aa5a6dd7-e83a-41b1-990d-62576df04460)

</details>

{% hint style="info" %}
Found a deeper caverns hole through bedrock? Check out The Underneath cave biomes [here](/dim/the-underneath#deeper-cave-biomes).
{% endhint %}

### Overworld Sub-Dimensions

<details>

<summary>Runic Sub-dimension</summary>

Connected with the Yggdrasil Structures.

<figure><img src="https://4156755274-files.gitbook.io/~/files/v0/b/gitbook-x-prod.appspot.com/o/spaces%2Fm9CYtM6NlzIRCHfJH6Ei%2Fuploads%2FAO4skAchqvJAPjhSGEs6%2Fyggrasil-4-runic_island.jpg?alt=media&#x26;token=f632494b-c087-453d-b85f-b89d1ce6510f" alt=""><figcaption></figcaption></figure>

The primary path to the Runic Dimension involves the Runic Island, which often requires completing steps tied to the Asflors village questline.

#### The Quest Path:

Start in Asflors (Optional) Locate an Asflors village. Initiate the quest. This questline is designed to eventually grant you the key needed to open the main entrance of the Runic Island.Obtain the Runic Island Entrance KeyAs part of the Asflors quest :Locate the unique house with a green roof within the Asflors village.Search the roof's foliage for a hidden chest. This chest contains both a treasure map leading to the Runic Island and the Rune of Breaking (the entrance key).Travel to the Runic Island:Use the map to find the island floating in the sky. You can also find the Runic Island Stele for getting the map.Enter the Runic IslandUse the Rune of Breaking on the sealed main entrance door.Figtht!Inside the Runic Island, you'll likely encounter a trial spawner room. Defeating the monsters summoned here rewards you with a vault key (Key usable for another quest)The key is related to the Asflors quest but not strictly necessary for reaching the Runic Dimension portal.Find the PortalAfter clearing the main combat area within the Runic Island, search trapdoors. These lead down to the chamber containing the active portal to the Runic Dimension. Enter the portal.

#### Alternative Entry (Secret Passages):

It is possible to ***bypass step three, four and five*** by discovering one of the five secret passages leading into the Runic Island. These are hidden and finding them requires exploration.

### <mark style="color:orange;">Structures within the Runic Dimension</mark>

This unique dimension hosts several distinct structures:

* Runic Labyrinth
* Runic Alfheim
* Cubeoid
* Dokkalfar Ruins

### <mark style="color:orange;">Exiting the Runic Dimension</mark>

There are two primary ways to return to the normal world:

1. Via a Runic Island: Copies of Runic Islands appear in the Runic Dimension at the exact same coordinates as their counterparts in the normal world. If you entered through a Runic Island, you can return to its dimensional counterpart and use the portal there.
   1. *Note: If you discovered secret passages on your first visit to the Overworld Runic Island, you can potentially use those same passages on the Runic Dimension version to bypass the entrance mechanism.*
2. Via Dokkalfar Ruins: Locate Dokkalfar Ruins structures within the Runic Dimension. These small ruins contain active portals that lead back to the normal world.

</details>

<details>

<summary>Deep Blue</summary>

</details>

{% content-ref url="/pages/2S5ovMSp37GJsJwZF0Vn" %}
[The Underneath](/dim/the-underneath)
{% endcontent-ref %}

{% content-ref url="/pages/McalPAc6JHa9xaHc6r9D" %}
[Orbit](/dim/overworld/hub-dimension-old/orbit)
{% endcontent-ref %}

{% content-ref url="/pages/vJF4BTMcuqfMODoBchxz" %}
[The Middle Lands](/dim/overworld/hub-dimension-old/the-middle-lands)
{% endcontent-ref %}

{% content-ref url="/pages/1WUsQcWBEQxfZQGVyx6H" %}
[Pacifica](/dim/overworld/hub-dimension-old/orbit/pacifica)
{% endcontent-ref %}

{% content-ref url="/pages/6Pzw6pM4L8rPGAwYJJZb" %}
[Ancient Civilization](/dim/overworld/hub-dimension-old/orbit/ancient-civilization)
{% endcontent-ref %}

### Trivia

* The mortal realm, similar to the Overworld in traditional Minecraft, but with enhanced features and richer lore. ColdMC's new Overworld serves as the hub where all adventures begin.
* Also referred to as, Midgard, Earth realm, Wilderness.


# Zones


# The Known World: Midgard

### Trivia

* Midgard is the designation for the familiar Earth as humans know it. In this cosmology, the nations of the Earth realm (Astral Conclave, Banished Ancients, ...) are a central "pond" or quadratic crater surrounded by the Antarctic Ice Walls.
* It is viewed as a quarantine zone or a "nursery" civilization that has been deliberately isolated from the greater world to develop independently or for protection.

### Inhabitants

* Standard human civilization ([The Unenlightened](/entities/npcs/f-rank/the-unenlightened) and [Villagers](/entities/npcs/f-rank/villagers)).
* Standard Monsters existing in dark places (like the [Ghoul](/entities/monsters/f-class/ghoul), [Sculk Lurkerer](/entities/monsters/f-class/sculk-lurkerer), [Mechanical Abomination](/entities/monsters/f-class/mechanical-abomination), [Phantom Whisperer](/entities/monsters/f-class/phantom-whisperer))&#x20;

### Zone Boundaries

It is encircled by [The Ice Walls](/dim/overworld/zones/the-ice-walls) around the XZ coordinates (±7000, ±7000) from XZ: (0, 0), which acts as the barrier preventing travel to the outer rings.

{% hint style="warning" %}
To pass through the ice wall boundary, you need to defeat Leviathan (or any other boss in [The Ice Walls](/dim/overworld/zones/the-ice-walls)).
{% endhint %}


# The Ice Walls

### Trivia

* The Ice Walls are the massive glacial barriers that separate the different "rings" of the world. The primary ice wall is just the first of several.&#x20;
* Travel through this wall is impossible except through specific "Gates" which is breaches or artificially maintained passages that lead to the outer lands.
* Located around the XZ coordinates (±7000, ±7000) from XZ: (0, 0)

### Leviathan's Gate

This is one of the first and primary passages through the First Ice Wall, located roughly in the East.

* Places: It leads to the Eastern Continents, specifically lands like Pitatia and Syrindian Scandinavia.
* Inhabitants: The region just beyond this gate is settled by a mix of human groups who exited the known world, including lands of NPCs like the Dutch, Nordic, and Romani populations who established colonies like "Syrindia". These societies often live in relative harmony compared to the Known World Midgard, having integrated with the wider realm.
* Trivia: It is named "Leviathan" often due to its boss' massive scale and association with the many Serpents of Earthly Waters which is mythological guardians that patrol the passage.

### Dyatlov Portal

A more mysterious entry point, often linked to the real-world Dyatlov Pass incident. In this lore, the incident was not an accident but a breach into a hidden portal near the ice barrier.

* Places: It connects to "The Lands of Deception" or subterranean realms sometimes associated with reptilian entities or ancient, non-human civilizations like Asgard. It is a place of high danger, acting as a trap or a hidden backdoor rather than a trade route.
* Trivia: Unlike the physical "Gates" (which are gaps in the ice), the Dyatlov Portal is often described as a rift.

### Summer Gate

Located to the Southwest, this is a seasonal passage created by warm currents that melt a path through the ice during specific cycles.

* Trivia: It is not permanently open. The "Summer’s Gate" only opens during the [Peak Solar Cycle](/dim/overworld/world-events/peak-solar-cycle) world event of the outer systems, allowing warm water to flow in and ships to flow out.
* Places: It typically leads toward the Atla or Lemurian sectors which is tropical or lush regions immediately outside the freezing barrier, often described as a paradise compared to the frozen wall itself.


# The World Beyond

### **Trivia**

* The area immediately outside [The Ice Walls](/dim/overworld/zones/the-ice-walls) is often collectively called "Atlas" or "The World Beyond." This is the Second Ring of the Earth realm.

### **Locations**

It contains dozens of new continents such as Asgard, Liberia, Hancock, and the Ancestral Lands. The sun that warms Midgard also partially warms this ring, but it may have its own celestial bodies (moons or smaller suns).

### **Inhabitants**

This zone is inhabited by "Breakaway Civilizations", advanced human societies that escaped [The Known World: Midgard](/dim/overworld/zones/the-known-world-midgard) in the past (e.g., Atlantis, Hyperborea) and extraterrestrial or silicon species that knows of the inner world.

### Zone Boundaries

Starts after [The Ice Walls](/dim/overworld/zones/the-ice-walls) around the XZ coordinates (±7000, ±7000) from XZ: (0, 0).

It is encircled by the [Mountains Rings](/dim/overworld/zones/mountains-rings) around the XZ coordinates \
(±20 000, ±20 000) from XZ: (0, 0), which acts as the barrier preventing travel to [The Far World](/dim/overworld/zones/the-far-world).


# Mountains Rings

### Trivia

* Separating [The Ice Walls](/dim/overworld/zones/the-ice-walls) from [The Far World](/dim/overworld/zones/the-far-world).
* Instead of just ice, this barrier is a colossal, circular mountain range that physically walls off the inner rings from the outer cosmos. It is significantly higher and more impassable than [The Ice Walls](/dim/overworld/zones/the-ice-walls).
* Located around the XZ coordinates (±20 000, ±20 000) from XZ: (0, 0)

### Environment

It is a region of "high strangeness," featuring thin air, extreme gravity anomalies, and the Skycaverns that is massive tunnel systems inhabited by flying creatures ("Glidelings") and hermetic orders of monks or watchers.


# The Far World

### Trivia

* Beyond [Mountains Rings](/dim/overworld/zones/mountains-rings) lies the Third Ring, often called Akupara or simply "The Far Lands".
* This is a vast, darker, and colder expanse that stretches toward the true edge of the local Earth realm. The physics here may become unstable, and the "Sun" of Midgard looks like a distant star of many.
* The entities here are often god-like or monstrous ("Titans" or "The Herobrine").&#x20;
* It includes locations like Hades Bridge, the Sea of Poseidon.
* Requires less travelers tea herbs for boarding the following realms because they are closer: the Lands of Seth, Anunnaki Lands, the Abyssal Sea, Shangri-La, Free Islands, Osiris, Camino Kundalini, etc.
* It represents the limit of comprehensible existence before one reaches the cosmic ocean that surrounds the Earth realm.


# Mechanics

### Introduced Mechanics

* [Towns & Land Claiming](/dim/overworld/mechanics/towns-and-land-claiming)
* [Nations](/dim/overworld/mechanics/nations)
* [Villaging](/dim/overworld/mechanics/villaging)


# Towns & Land Claiming

A town is a player-made group that owns land, protects builds, and organizes residents under a mayor, and most of a normal player’s gameplay happens inside towns.

### Joining or starting a town <a href="#joining-or-starting-a-town" id="joining-or-starting-a-town"></a>

From a player perspective, the first “town decision” is whether to join an existing town or create one. Both choices change where you can build safely and how much land you can control.

* To **start** a town, you use a command like `/town new <name>` while having enough money; the chunk you stand in becomes the **home block** and town spawn.
* To **join** a town, you either accept an invite (`/town add <yourname>`) or use `/town join <townname>` if that town is open to anyone.
* Joining a town increases that town’s available claimable chunks (“townblocks”), meaning more land the mayor can expand into.

### Town growth and claiming land <a href="#town-growth-and-claiming-land" id="town-growth-and-claiming-land"></a>

Towns grow by claiming townblocks, which are fixed-size chunks of land on a grid (by default 16×16 from bedrock to build height). Claims must usually touch existing town land unless they are special “outposts.”

* The main command is `/town claim`, with variants for shapes like squares or circles, or automatic filling/auto-claim around you.
* How many townblocks a town can have depends on resident count and/or configured town levels; each new resident usually unlocks more claims.
* Towns can also **buy extra** townblocks beyond the normal limit using `/town buy bonus <amount>` if the special events allows it, paying an increasing cost per extra block.

### Home block, spawn and outposts <a href="#home-block-spawn-and-outposts" id="home-block-spawn-and-outposts"></a>

The **home block** is the central chunk where the town was created, and it defines the main spawn and distance rules. Outposts are separate claimed chunks far away from the main town area.

* The mayor can move the spawn inside the home block with `/town set spawn`, or move the home block to another claimed tile with `/town set homeblock`.
* Outposts let towns claim land far out in the wilderness or other worlds if outposts are enabled and you have the right permission node.
* Players can teleport to outposts with `/town outpost <number/name>`, and outpost limits are controlled by town size.

### Personal plots inside the town <a href="#personal-plots-inside-the-town" id="personal-plots-inside-the-town"></a>

Every townblock can be **public land** (owned by the town) or a **personal plot** owned by a resident. Mayors control what goes on sale; residents choose what to buy and own.

* Mayors set plot prices with `/town set plotprice` and put specific chunks for sale using `/plot fs [cost]` while standing in them.
* Residents buy land with `/plot claim` and can later give it up using `/plot unclaim` if they no longer want it.
* There are **plot groups** (multiple plots managed as one) and **districts** (named areas of town for organization and map labels).

### Plot types (what a plot is “for”) <a href="#plot-types-what-a-plot-is-for" id="plot-types-what-a-plot-is-for"></a>

A plot’s **type** changes what players can do on it and how taxes/costs work. Basic players mostly care about what each type allows or restricts.

* **Default**: Normal house/build plot; no special rules beyond permissions.
* **Shop** (`/plot set shop`): Used for player shops; mayors can set default shop price and extra shop tax.
* **Embassy** (`/plot set embassy`): Can be owned by anyone, even players without a town, and keeps ownership if they leave their home town.
* **Wilds** (`/plot set wilds`): Allows breaking certain “resource” blocks like trees and ores without tearing up terrain; good for farms/quarries.
* **Inn** (`/plot set inn`): Lets any player use beds here as spawn even if they don’t own the plot; often used as public hotels.
* **Jail** (`/plot set jail`): Used when towns have jailing/bail systems; dying as an outlaw/enemy in that town can send you here.
* **Farm** (`/plot set farm`): Only allows placing/breaking configured crop/plant blocks, plus killing configured farm animals.
* **Arena** (`/plot set arena`): Always has PVP and friendly fire enabled, with options to prevent gear durability loss.
* **Bank** (`/plot set bank`): Used where banking is restricted to these plots; deposits/withdrawals might only work here during economic crisis events.

### 🛠️ Plot permissions and protection <a href="#plot-permissions-and-protection" id="plot-permissions-and-protection"></a>

Protection is mainly handled per-plot through **perm lines** which control who can build, break, use switches, or use items. This is what stops griefing and unauthorized access.

* The four **actions** are Build, Destroy, Switch (chests, doors, buttons, etc.), and Itemuse (pearls, boats, minecarts, etc.)
* The four **groups** are Friend/Resident, Town, Ally, and Outsider; each can be allowed or denied for each action.
* Mayors set defaults for **unowned town plots** with `/town set perm ...`, residents set defaults for their own plots with `/resident set perm ...`.
* Any specific plot can override defaults using `/plot set perm ...`, and there are toggles per-plot for `pvp`, `mobs`, `explosion`, and `fire` via `/plot set ...` flags.

### Trusted players and advanced access <a href="#trusted-players-and-advanced-access" id="trusted-players-and-advanced-access"></a>

Beyond the normal permission groups, towns and plot owners can **trust** specific players to act like co-owners on land. This is useful for shared bases or building teams.

* Towns can trust a player in **all town-owned plots** with `/town trust add <name>`, giving them full build/destroy/switch/itemuse there.
* Individual plot owners can trust per-plot with `/plot trust add <name>`, which lets that player act like the owner on that chunk.
* There are also fine-grained per-plot overrides (e.g., allowing someone only to Switch but not Build) using the `/plot set perm` commands.

### Taxes, upkeep, and town money <a href="#taxes-upkeep-and-town-money" id="taxes-upkeep-and-town-money"></a>

From a player’s perspective, the main money concerns are **daily taxes**, **plot taxes**, and what happens if the town cannot pay upkeep.

* Town mayors set **resident tax** with `/town set taxes` (flat amount or percentage of balance) and **plot tax** with `/town set plottax` per plot.
* If you cannot pay flat resident tax, you are kicked from the town; if you cannot pay plottax, you lose your plots back to the town.
* Towns pay **upkeep** from the town bank each “Towny day”; if they cannot pay, they can be removed or go **bankrupt** depending on settings.

### Bank usage for players <a href="#bank-usage-for-players" id="bank-usage-for-players"></a>

Players use the town bank indirectly for claims, upkeep, and taxes. Depositing helps the town grow and survive.

* Any resident can deposit using `/town deposit <amount>`; only the mayor and certain ranks can withdraw with `/town withdraw <amount>`.
* Towns can have a **bank cap** so you cannot stuff infinite money into a town to avoid other plugins’ death/penalties.
* Sometimes there is a limit bank actions to **bank plots**, so you must stand on a bank plot to deposit or withdraw.

### Overclaiming and losing land <a href="#overclaiming-and-losing-land" id="overclaiming-and-losing-land"></a>

Sometimes there is an event that enable **overclaiming**, where other towns can slowly steal land from towns that are holding more claims than they are allowed.

* A town becomes “overclaimed” when it has more claimed townblocks than its current limit (e.g., after losing residents).
* Nearby towns can use a takeover command on bordering plots (for example `/town takeoverclaim`) to capture them, one at a time, until the victim town is no longer overclaimed.

### Ruins, reclaiming, and grief windows <a href="#ruins-reclaiming-and-grief-windows" id="ruins-reclaiming-and-grief-windows"></a>

When a town fails upkeep or is deleted, during most of the time it can enable a **ruin** state instead of instant deletion.

* In ruin, town land **can be griefed and looted**, but other towns cannot claim it yet; the town is controlled by an NPC mayor.
* Over time, more plots in a ruined town automatically open their perms so anyone can build/destroy, giving a looting window to players.
* Former members (or sometimes anyone, depending on config) may be able to **reclaim** the town using a paid `/town reclaim` command within a configured time.

### Maps, borders, and navigation <a href="#maps-borders-and-navigation" id="maps-borders-and-navigation"></a>

Towny gives several tools to visualize where town land starts and ends.

* `/towny map`, `/towny map big`, and `/towny map hud` show claimed chunks around you, including plot types and names.
* Resident modes like `/res toggle map`, `/res toggle plotborder`, or `/res toggle townborder` can constantly show borders in chat or with particles as you move.

### Wilderness vs town land <a href="#wilderness-vs-town-land" id="wilderness-vs-town-land"></a>

Outside of any town, you are in the **wilderness**, which has its own rules per world. Town land is usually much safer. Town land usually stays as players leave it.


# Pwarps


# Nations

A nation is a group of towns under one capital town, with shared diplomacy, bonuses, and sometimes shared wars and taxes. From a player’s perspective, nations mainly matter for perks, allies/enemies, extra taxes, joining a larger political group around your town to gain more land, cheaper upkeep, stronger protection, shared spawn, and allies in PVP or war, at the cost of extra taxes and sometimes stricter rules for towns.

### What a nation is for <a href="#what-a-nation-is-for" id="what-a-nation-is-for"></a>

Nations give mechanical bonuses and political structure on top of towns. You interact with nations primarily through your town, not as an individual nomad.

* A nation is formed by a town that becomes the **capital**, and that town’s mayor becomes the nation leader.
* Nations can ally or enemy other nations, join war events, and provide bonuses to all member towns (more claims, cheaper upkeep, more outposts, etc.).
* Nations have their own **bank**, **spawn**, and **taxes** that affect all towns inside the nation.

### Joining, leaving and seeing nations <a href="#joining-leaving-and-seeing-nations" id="joining-leaving-and-seeing-nations"></a>

As a regular player, your town mayor handles most nation decisions, but you still use some nation commands. Your town can only belong to one nation at a time.

* Towns join nations with commands like `/nation add <town>` or `/town join <nation>` depending on setup; only mayors or people with rank permission can do this.
* Towns can leave nations with `/nation leave`, unless special systems like conquest prevent leaving.
* You can list all nations with `/nation list` and inspect a particular one with `/nation <name>` to see its towns, allies, enemies, taxes, and leader.

### Nation spawn and movement <a href="#nation-spawn-and-movement" id="nation-spawn-and-movement"></a>

Nations get a **nation spawn** that players from member towns can use, and sometimes other players if the nation is public.

* You travel to a nation’s spawn with `/nation spawn` (your own nation) or `/nation spawn <nation>` for other nations if allowed and not an enemy.
* Public nation spawns can be open to almost anyone.

### Alliances, enemies and PVP <a href="#alliances-enemies-and-pvp" id="alliances-enemies-and-pvp"></a>

From a player perspective, the biggest nation-side social feature is **alliances and enemies**. These relationships affect friendly fire and permission behavior across towns.

* Two nations can ally so their towns are friendly: allies typically cannot hurt each other with PVP and can get extra rights on each other’s plots if perms allow “ally.”
* Nations can set enemy relations that may allow PVP, sieges, or special war mechanics depending on other plugins.
* Some nations require alliances to be mutual (both sides must agree), preventing one-sided “fake ally” relations.

### NationZone (extra-protected ring) <a href="#nationzone-extra-protected-ring" id="nationzone-extra-protected-ring"></a>

Nations can generate a **NationZone**, an area of wilderness around their member towns that only nation members can modify. This protects the surroundings of nation towns from griefing.

* NationZones are like wilderness where only people from that nation can build/destroy blocks.
* The radius of NationZones increases as the nation’s population (or town count) increases; bigger nations get a wider protective ring.
* Mayors can sometimes toggle NationZone around their town, and admins can override sizes for particular towns.

### Nation-level perks for towns <a href="#nation-level-perks-for-towns" id="nation-level-perks-for-towns"></a>

Joining a nation gives concrete mechanical bonuses to all towns in it, which scale with nation size.

* Towns can receive **bonus townblocks** beyond what they’d get alone, letting them claim more land.
* Town upkeep can be **cheaper**: nations can reduce daily upkeep cost for member towns with configurable multipliers.
* Towns in a nation can get a higher **outpost limit**, letting them claim more remote outposts.
* Nation-level settings can also increase surrounding NationZones, giving better protection near towns.

### Nation leader and ranks (player view) <a href="#nation-leader-and-ranks-player-view" id="nation-leader-and-ranks-player-view"></a>

The mayor of the capital town acts as **nation leader** and controls most nation-level features. As a normal player, you experience this through ranks you might receive.

* Nation leaders can assign **nation ranks** such as assistants or custom roles using `/nation rank add <player> <rank>`.
* Ranks control who can invite towns, manage diplomacy, set nation taxes, or change other settings.
* Leaders can also set titles and surnames for residents in member towns (e.g., decorative prefixes and suffixes in chat) with `/nation set title` and `/nation set surname`.

### Nation taxes and money <a href="#nation-taxes-and-money" id="nation-taxes-and-money"></a>

From a town’s point of view, joining a nation means paying **nation taxes** but getting bonuses back. You see this mostly as a resident through your town’s finances.

* Nation leaders set **nation tax** with `/nation set taxes`; this can be a flat amount per town or a percentage tax.
* Flat nation tax charges each member town’s bank a fixed amount every Towny day; if a town cannot pay, it can be kicked from the nation.
* Percentage nation tax charges based on town money; if a town has no money, it pays nothing and is not auto-kicked, up to configured caps.
* Nations can also set an extra **conquered tax** on towns that are in a conquered state, making them pay more each day.

### Nation bank and caps <a href="#nation-bank-and-caps" id="nation-bank-and-caps"></a>

The nation bank holds money for taxes, war, and other costs. As a regular player, you may be able to contribute but not withdraw.

* Residents of member towns can usually deposit into the nation bank using `/nation deposit <amount>`; only the leader and authorized ranks can withdraw.
* Levels can limit how much money nations store using a **nation bank cap**, stopping nations from being used as infinite safe storage.

### Distance and joining rules <a href="#distance-and-joining-rules" id="distance-and-joining-rules"></a>

Nations can have **distance rules** that decide which towns are allowed to join based on how far they are from the capital or other member towns.

* There can be a maximum distance from the capital town that any town is allowed to join, preventing super-spread nations.
* Alternative rules can allow membership if a town is close enough to any existing member town, forming chains of connected towns across the world.

### Sanctioned towns and restrictions <a href="#sanctioned-towns-and-restrictions" id="sanctioned-towns-and-restrictions"></a>

Nations can **sanction** specific towns, blocking them from joining. This is a nation-level filter on who is allowed in.

* Sanctioned towns cannot join the nation via joining commands.
* Players from sanctioned towns also cannot `/nation spawn <nation>` to that nation if it is public.

### Conquered towns and nation control <a href="#conquered-towns-and-nation-control" id="conquered-towns-and-nation-control"></a>

Some war systems can place towns into a **conquered** status under a nation; this changes what the town can do.

* Conquered towns cannot leave their nation using `/nation leave` until their conquered duration expires.
* Nations can charge **conquered tax** daily to those towns; failure to pay can push them into bankruptcy.


# Villaging

ColdMC's overworld features Realistic Villagers! It greatly extends the functionality of villagers by adding interaction, marriage, children genetics, and more!

<figure><img src="https://3522175436-files.gitbook.io/~/files/v0/b/gitbook-x-prod.appspot.com/o/spaces%2FrcgtxEHRbgBRPbt4a4vb%2Fuploads%2FxhK5BnEMNidTEfXgdkp5%2Fv2.jpg?alt=media&amp;token=2281d1c2-4872-4473-be07-36faeea72ca7" alt=""><figcaption></figcaption></figure>

By interacting with the villagers your reputation will increase. When you reach X reputation, you can give them a wedding ring to get married. Once married, you can procreate, establish the home where the villager will live and even manage their combat targets. Giving gifts is the best way to raise reputation. If you want to divorce a villager, you can do so within the main GUI, but this will reduce a large amount of reputation. To avoid this, you can ask the cleric villager for divorce papers. You can give as a gift a weapon (sword/axe/bow/crossbow) and they'll use it to defend themselves when necessary, the same with armor. This makes raids more entertaining.

Watch the tutorial videos if you want to see exactly how it works:

#### Villagers

{% embed url="<https://www.youtube.com/watch?v=riCCbYFc59E>" %}

#### Villager Whistle

{% embed url="<https://www.youtube.com/watch?v=X_HYSSARDbg>" %}

#### Villager Reviving

{% embed url="<https://www.youtube.com/watch?v=JgKikIrixDQ>" %}


# Overworld Farming (old)

### 🌱 Getting Started

#### 1. Obtaining Seeds

To start farming, you need seeds for the custom crops.

* **Craft:** Use Arkenstone to combine seeds to new seeds in the [Advanced Crafting Station](/items/stations/early-stations/advanced-crafting-station).
* **The Market:** You can usually buy seeds from the server market or a specific farming merchant NPC.
* **Wild Grass:** Breaking tall grass has a rare chance to drop custom seeds.

#### 2. Planting

Planting custom crops is similar to vanilla Minecraft but with a twist.

* **Soil:** Most crops need **Farmland** (tilled soil).
* **Watering:** Unlike vanilla crops that just need water nearby, custom crops often require **daily watering**.
  * The soil might dry out if not watered, pausing growth.
  * Use a **Watering Can** (see below) to keep them hydrated.

***

### 💧 Watering & Equipment

Keeping your crops hydrated is the key to a good harvest.

#### Watering Cans

You cannot just use a bucket. You need a specialized **Watering Can**.

* **How to Fill:** Right-click a water source to fill the can. You will see a durability bar or message indicating how full it is.
* **How to Use:** Right-click your crops to water them.
* **Tiers:** Better watering cans (Iron, Gold, Diamond) hold more water and may water a larger area (e.g., 3x3) at once.

#### Sprinklers

Automate your farm with **Sprinklers**!

* Place a sprinkler in the center of your field.
* It requires a water source (often a cauldron or tank nearby) to function.
* It will automatically water crops within its radius, saving you time.

***

### 🍂 Seasons & Greenhouses

Crops may be sensitive to the time of year.

#### Seasons

* Some crops only grow in specific seasons (Spring, Summer, Autumn, Winter).
* If you plant a "Summer" crop in "Winter," it will die or refuse to grow.
* Check the seed lore (hover over the item) to see its required season.

#### Greenhouses

Want to grow crops year-round? Build a **Greenhouse**.

* Glass structures can create a controlled environment.
* Crops planted inside a valid greenhouse area ignore seasonal requirements, allowing you to farm winter crops in summer.

***

### 🚜 Harvesting & Pot/Trees

#### Harvesting

* When a crop is fully grown, right-click or break it to harvest.
* **Quality:** Some crops have "Quality" stars (⭐). Better fertilizer and care can yield higher quality crops that sell for more money.
* **Regrowth:** Some crops (like tomatoes or berries) might regrow after harvesting without needing to be replanted.

#### Trees & Pots

* **Fruit Trees:** You can plant saplings that grow into custom fruit trees (like Apple or Orange trees). Right-click the ripe fruit to pick it without cutting down the tree.
* **Pots:** Some decorative or smaller crops can be planted in **Pot** blocks for aesthetic farming inside your house.

***

### 💡 Tips for Success

* **Fertilizer:** Use custom fertilizers to speed up growth or increase the chance of high-quality drops.
* **Crows:** Watch out! Crows or pests might attack your crops. Scarecrows act as a defense.


# Water Fishing (old)

### 🌱 Getting Started

#### 1. Obtaining Seeds

To start farming, you need seeds for the custom crops.

* **The Market:** You can usually buy seeds from the server market or a specific farming merchant NPC.
* **Wild Grass:** On some servers, breaking tall grass has a rare chance to drop custom seeds.

#### 2. Planting

Planting custom crops is similar to vanilla Minecraft but with a twist.

* **Soil:** Most crops need **Farmland** (tilled soil).
* **Watering:** Unlike vanilla crops that just need water nearby, custom crops often require **daily watering**.
  * The soil might dry out if not watered, pausing growth.
  * Use a **Watering Can** (see below) to keep them hydrated.

***

### 💧 Watering & Equipment

Keeping your crops hydrated is the key to a good harvest.

#### Watering Cans

You cannot just use a bucket. You need a specialized **Watering Can**.

* **How to Fill:** Right-click a water source to fill the can. You will see a durability bar or message indicating how full it is.
* **How to Use:** Right-click your crops to water them.
* **Tiers:** Better watering cans (Iron, Gold, Diamond) hold more water and may water a larger area (e.g., 3x3) at once.

#### Sprinklers

Automate your farm with **Sprinklers**!

* Place a sprinkler in the center of your field.
* It requires a water source (often a cauldron or tank nearby) to function.
* It will automatically water crops within its radius, saving you time.

***

### 🍂 Seasons & Greenhouses

Crops may be sensitive to the time of year.

#### Seasons

* Some crops only grow in specific seasons (Spring, Summer, Autumn, Winter).
* If you plant a "Summer" crop in "Winter," it will die or refuse to grow.
* Check the seed lore (hover over the item) to see its required season.

#### Greenhouses

Want to grow crops year-round? Build a **Greenhouse**.

* Glass structures can create a controlled environment.
* Crops planted inside a valid greenhouse area ignore seasonal requirements, allowing you to farm winter crops in summer.

***

### 🚜 Harvesting & Pot/Trees

#### Harvesting

* When a crop is fully grown, right-click or break it to harvest.
* **Quality:** Some crops have "Quality" stars (⭐). Better fertilizer and care can yield higher quality crops that sell for more money.
* **Regrowth:** Some crops (like tomatoes or berries) might regrow after harvesting without needing to be replanted.

#### Trees & Pots

* **Fruit Trees:** You can plant saplings that grow into custom fruit trees (like Apple or Orange trees). Right-click the ripe fruit to pick it without cutting down the tree.
* **Pots:** Some decorative or smaller crops can be planted in **Pot** blocks for aesthetic farming inside your house.

***

### 💡 Tips for Success

* **Fertilizer:** Use custom fertilizers to speed up growth or increase the chance of high-quality drops.
* **Crows:** Watch out! On some servers, crows or pests might attack your crops. Scarecrows act as a defense.
* **Texture Pack:** This plugin relies heavily on a server resource pack. If you see "purple and black" blocks, ensure your server resource pack is enabled in your multiplayer settings.


# ChestShop

**ChestShop** allows players to create physical shops using a chest and a sign. You can use these shops to buy items from other players or sell your own items to them.

### 🛒 How to Use a Shop (As a Customer)

When you see a shop sign, you can interact with it to trade.

#### Controls

* **Right-Click** the sign to **BUY** items from the shop.
* **Left-Click** the sign to **SELL** items to the shop.

#### Reading the Sign

A shop sign has 4 lines of information. Understanding them is key to knowing if you are getting a good deal.

* **Line 1:** The owner's name.
* **Line 2:** The **quantity** of items involved in one click (e.g., `1`, `64`).
* **Line 3:** The price.
  * **B** stands for **Buy** (You pay money to get the item).
  * **S** stands for **Sell** (You give the item to get money).
* **Line 4:** The name of the item.

> **Example Sign:** `PlayerName` `64` `B 100 : S 20` `Diamond`
>
> *This means: You can **Buy** 64 Diamonds for $100, or you can **Sell** 64 Diamonds back to the shop for $20.*

***

### 🏪 How to Create a Shop (As a Shop Owner)

To set up your own shop, you need a chest, a sign, and the items you want to trade.

#### Step 1: Place the Chest

Place a standard chest on the ground. Put the items you want to sell inside it. *(Note: If you are only buying items from players, you can leave the chest empty, but it must have slots available).*

#### Step 2: Place the Sign

Hold a **Sign** and place it on the chest (hold `Shift`/`Crouch` to place it without opening the chest). You can also place the sign on the wall directly above the chest.

#### Step 3: Write the Sign Information

You must format the sign exactly like this:

| Line  | Content         | Explanation                                                            |
| ----- | --------------- | ---------------------------------------------------------------------- |
| **1** | *(Leave Empty)* | The plugin will automatically fill this with your username.            |
| **2** | `Amount`        | The number of items to buy/sell at once (e.g., `1`, `64`).             |
| **3** | `Prices`        | See **Price Syntax** below.                                            |
| **4** | `Item Name`     | The official name of the item (e.g., `Diamond`, `Cobblestone`) or `?`. |

#### Price Syntax (Line 3)

This line determines if people can buy, sell, or both.

* **Selling to players only:** `B <price>` (Example: `B 100` means players pay 100 to buy from you).
* **Buying from players only:** `S <price>` (Example: `S 10` means you pay players 10 to take their items).
* **Both:** `B <buyprice> : S <sellprice>` (Example: `B 100 : S 10`).

{% hint style="info" %}
If you don't know the exact item name (e.g., is it `Oak_Log` or `Oak_Wood`?), put the item inside the chest and write `?` on **Line 4**. The system will autofill the correct name from the chest contents.
{% endhint %}

***

### 🛠️ Important Commands

* `/iteminfo` Hold an item in your hand and type this command to see its correct ID or name for the shop sign.
* `/shopinfo` Look at a shop sign and type this to view details about the shop.

### ⚠️ Common Mistakes

* **The "B/S" Confusion:** Remember that **B** is what the *customer* does (Buy from you). **S** is what the *customer* does (Sell to you).
* **Out of Stock:** If your chest is empty, players cannot buy from you (even if the sign is correct). You will get a notification when your shop is out of stock.
* **Full Chest:** If your chest is full, players cannot sell items to you.


# Spawners

**Smart Spawners** are an advanced version of classic monster spawners. Instead of spawning hundreds of mobs that cause lag, these spawners work virtually. They generate loot and experience inside a menu (GUI) for you to collect instantly.

### ⚙️ How It Works

When you place a Smart Spawner, it will not spawn mobs into the world. Instead, it simulates the spawning process.

* **Activation:** You must be within range (usually 16 blocks) for the spawner to work.
* **Visuals:** When active, you will see flame particles or effects on the spawner to indicate it is running.
* **Storage:** All mob drops and XP are stored inside the spawner itself.

### 🖱️ Using the Spawner

To interact with a spawner, simply **Right-Click** it. This opens the Spawner Menu.

#### The Menu (GUI)

Inside the menu, you will see several options:

1. **Collect Loot:** Click the loot icon to move all generated items into your inventory.
2. **Collect XP:** Click the experience bottle to absorb the stored XP.
3. **Statistics:** View how many mobs have "spawned" and how much loot is waiting.

***

### ⏫ Upgrading & Stacking

You can improve your spawners to make them more efficient.

#### Stacking Spawners

Instead of placing 10 Zombie Spawners in a room, you can **stack** them into a single block.

* **How to Stack:** Hold a spawner of the same type in your hand and **Right-Click** an existing spawner.
* **Benefit:** The stack size increases (e.g., "Zombie Spawner x5"), multiplying the loot and XP generation rates without taking up extra space.

#### Upgrading Stats

Some servers allow you to upgrade specific stats of the spawner using money or XP. Check the "Upgrades" button in the menu to see if you can boost:

* **Spawn Rate:** Decreases the time between spawns.
* **Loot Amount:** Increases the items dropped per mob.

***

### ⛏️ Moving Spawners

If you need to move your spawner, you cannot break it with a normal pickaxe.

* **Requirement:** You **must** use a pickaxe with the **Silk Touch** enchantment.
* **Warning:** If you break a spawner without Silk Touch, it may break permanently and give you nothing (or just XP).
* **Inventory:** When properly mined, the spawner (and sometimes its stack) will go directly into your inventory.

***

### 📜 Commands

| Command          | Description                                                    |
| ---------------- | -------------------------------------------------------------- |
| `/spawners`      | Opens the main spawner help menu or GUI.                       |
| `/spawners list` | Shows a list of all your placed spawners and their locations . |
| `/spawners shop` | (If enabled) Opens the shop to buy new spawners.               |

### 💡 Tips

* **Lag Free:** Because no physical mobs spawn, you can place these in your base without worrying about noise or entity cramming limits.
* **Hoppers:** You can often place a hopper underneath a Smart Spawner to automatically pull loot out of its internal storage into a chest.
* **AFK:** You still need to be near the spawner for it to work. Build an AFK spot within 16 blocks of your spawner stack.


# Generators

#### Crafting a Generator

To start your journey, you need to craft your first generator in the [Advanced Crafting Station](/items/stations/early-stations/advanced-crafting-station).

#### Placing a Generator

Once crafted, the generator will appear in your inventory.

* Place it down like a normal block on your island or plot.
* The generator will immediately start dropping items on top of itself.

***

### ⚙️ Managing Your Generators

#### Upgrading Generators

Better generators produce more valuable items. You can upgrade your existing generators to the next tier without breaking them.

* **How to Upgrade:** Hold `Shift` (Crouch) and **Right-Click** the generator.
* A menu will appear showing the cost to upgrade. If you have the funds, confirm the upgrade.

#### Generator Limits

To keep the world balanced, every player has a **Generator Limit** (a maximum number of generators they can place).

***

### 💰 Making Money

Once your generators are producing items, you need to sell them.

1. **Manual Selling:**
   * Collect the items from your generators.
   * Type `/sell` (to sell what you are holding)
2. **Sell Wands (If available):**
   * If you have a **Sell Wand**, you can hit a chest filled with generator drops to sell everything inside instantly.

***

### 📜 Commands List

Here are the essential commands you need to master the Generator system:

| Command       | Description                                         |
| ------------- | --------------------------------------------------- |
| `/gens`       | Opens the main Generator menu.                      |
| `/gens shop`  | Opens the shop to buy new generators.               |
| `/sell`       | Sells all sellable items in your inventory.         |
| `/pickupgens` | Toggles "Pickup Mode" to easily pick up generators. |
| `/gens worth` | Checks the sell price of the item you are holding.  |

### 💡 Tips for Success

* **AFK is Key:** Generators work while you are online. Many players build "AFK pools" to stay online and collect drops automatically.
* **Hoppers are amazing:** Place a hopper underneath your generator leading into a chest. This automatically collects the drops so you don't have to stand there constantly.
* **Tier up fast:** It is almost always better to have **one high-tier generator** than ten low-tier ones. Save your money to upgrade as soon as possible


# Locations

<figure><img src="https://3522175436-files.gitbook.io/~/files/v0/b/gitbook-x-prod.appspot.com/o/spaces%2FrcgtxEHRbgBRPbt4a4vb%2Fuploads%2FA3JpvkFgWCYcNxdxo8Vq%2F9ce27ff7.png?alt=media&amp;token=dceb4204-e3b8-4d51-b464-f9935ff9dd75" alt=""><figcaption></figcaption></figure>


# Firstia

### Early Game Foundation (Levels 1–20) <a href="#early-game-foundation-levels-120" id="early-game-foundation-levels-120"></a>

The early game hubs establish the **core patterns** that all later hubs follow. Every settlement contains five universal amenities: a library (knowledge), a teleportation beacon (travel), a bank vault (security), a pet stable (companion bonding), and an adventurers' guild (community). These elements remain consistent throughout all 16 major hubs, creating a sense of **reliable infrastructure** as players progress upward.

### Firstia (Levels 1–10): The Welcoming Beginning

**Core Amenities**

Firstia introduces players to hub mechanics through warmth and accessibility. The **First Ledger Library** is a sprawling stone building where Chronicler Moss teaches basic lore through glowing texts that respond to active quests. The **Wayspire of Dawn** stands as an iconic crystalline obelisk—the first teleportation beacon most players encounter. The **Copperdeep Vault** beneath the town square offers generous 100-slot capacity with zero withdrawal fees, establishing the principle that early banking is encouraged. The **Paws & Packs Yard** allows new adventurers to bond with first companions (wolves, rabbits, hawks), and **Captain Elowen Brighthand** runs the Adventurers' Guild with patient teaching about combat mechanics (stuns, interrupts, basic formations).

**Signature District: Market of Lucky Scraps**

This open-air bazaar from **Scrap Merchant Dolo** sells starter relics that level with players for up to 10 levels. These items—Novice Axes, Leather Vests, Starter Charms granting +1% XP—feel personal because they grow with the player rather than becoming immediately obsolete. The market's color-coded stalls teach newcomers that shopping and gearing are core gameplay loops.

**Unique NPC: Relic Master Vex**

Vex trades **player stories for cosmetics**. Completing thematic early quests (surviving your first dungeon, crafting your first item) unlocks cosmetic rewards—dyed armor, unique tabards, personality items—that make new characters feel distinct rather than generic. This NPC philosophy carries throughout the game: **stories matter as much as stats**.

**Surrounding Zones and Dungeons**

Firstia's three zones teach progression escalation. **Verdant Hollow** (levels 1–8) offers safe grasslands where Trembling Boars and Grass Hoppers teach basic combat. Landmarks include the Lost Well Site (a 4-5 room micro-dungeon) and Shepherd's Shrine (a rest point). **Copper Thicket** (levels 3–10) introduces forest navigation with Timber Wolves (coordinated packs) and Thorned Sprites (ranged magic). The Thicket Forester's Camp offers daily hunting contracts, and Ancient Stump provides healing sprouts (collectible items).

**Firstprowler Cavern** is the main dungeon (levels 6–10, 3 floors). The dungeon teaches underground traversal, echo mechanics, and pillar-based positioning. The final boss **Cavern Mother** is a large armored crab with 150 HP that teaches timing through her **Shell Harden** ability (50% damage reduction followed by a vulnerability window). Defeating her grants the **Crusteel Helm** (blue-rarity head armor), **Molt Shards** (crafting materials), and the **Firstprowler's Key** (cosmetic key unlocking a treasure room with the Cavern Explorer's Cape and 100 bonus gold).


# Noviceton

### Noviceton (Levels 4–11, Small Hub): The Beloved Waypoint

**Core Amenities**

Noviceton prioritizes teaching over grandeur. The **Pocket Stack** is a cramped but cozy library where **Librarian Pip** (a perpetually tired gnome) somehow remembers every book's location. The **Pebblegate Sigil** teleports with a 5-second cast time, slower than Firstia but iconic. The **Tinlock Strongbox** holds only 50 inventory slots but features faster access. The **Little Hitch** teaches basic pet commands, and **Guildwarden "Old" Rurik** specializes in overlooked mechanics: cleansing debuffs, interrupting spells, environmental control.

**Signature District: Fix-It Row**

This street of humble repair shops charges 20% less durability loss than other towns. **Master Tinker Forge** sells low-cost repair kits, and daily "Salvage & Repair" contracts grant bonus repair resources. This makes Noviceton the **maintenance hub**—players develop affection for this simple, practical district.

**Unique NPC: Bounty Caller Mack**

Mack's rotating noticeboard displays 5 daily **mechanic-teaching bounties**: "Stun 5 Boars," "Cleanse 3 Poison Debuffs," "Interrupt 4 Enemy Spells," "Heal 100 HP with an item," "Use Environment to Kill An Enemy." Completing all 5 grants a "Mechanic Mastery" badge and 50 gold. This system ensures players internalize game mechanics through **fun rather than tutorials**.

**Surrounding Zones and Dungeons**

**Pebblerun Pastures** (levels 4–9) teaches safe farming with passive Sheep and hostile Cattle. The Miller's Mill landmark and Stone Circle micro-dungeon (3-4 earth elementals, reward chest with farming supplies) introduce gathering mechanics. **Rustlebrush Woods** (levels 6–11) presents forest traversal with quick squirrel creatures and ranged Thorn Wisps. The Ranger Station offers daily hunting contracts, and Old Oak provides meditation buffs.

**Tinlock Mine Depths** (levels 7–11, 4 floors) introduces torch mechanics (light resource management) and dwarven architecture. The final boss **Foreman Gornak** is a dwarf-like golem of fused stone and metal (180 HP) with **Molten Breath** (damage + stun) and **Ground Slam** (AoE knockback + stun). Drops include **Tinstone Gauntlets** (level 9 hands armor), **Raw Tin Ore** (crafting material), and **Miner's Lamp** (cosmetic light source granting +5% visibility in dark zones).


# Secondia

### Secondia (Levels 10–20): The Rival Cities

**Core Amenities**

Secondia introduces **faction choice** mechanics through its river-divided design. The **Hall of Second Pages** library spans both banks via wooden bridge, with Alchemist Texts on one side and Armor Treatises on the other. Choosing a side for a week grants its bonus: alchemists gain +20% potion efficiency, armorers gain +15% durability. The **Twin-Arc Conduit** teleports via both obelisks simultaneously (visually striking). The **Two-Key Reserve** splits vault access based on chosen faction. The **Caravan Menagerie** offers faction-specific companions: Trading Camels (carrying capacity), Swift Horses (movement speed), Wise Owls (XP bonuses).

**Signature District: Alchemist-Armorer Rivalry**

West bank hosts **Alchemist Master Lyssa** with bubbling vats and hanging herbs. East bank features **Armorsmith Chief Grenn** with hammer strikes and hot metal. Weekly quests pit factions against each other. Switching sides costs 500 gold (representing political fallout), encouraging commitment. This design makes **choosing a faction feel meaningful** rather than arbitrary.

**Unique NPC: Merchant Lord Vaxis**

Vaxis buys and sells **rare contract opportunities**. Multi-step trading chains (gather Tin Ore → trade for Copper → sell for 50% markup) grant both gold and **Merchant Guild reputation**, unlocking better prices (5% vendor discount), black-market access (rare cosmetics), and personal sell orders. This teaches **economic progression** beyond simple combat.

**Surrounding Zones and Dungeons**

**Silverwound River Valley** (levels 10–15) splits by river with multiple crossing points. River Sprites, Salmon-Folk, and Water Elementals teach aquatic combat. The River Crossroads Inn provides "Traveler's Meal" buffs (+10% gold, 30 minutes), and Silver Spring (a crystalline spring with 2-3 water nymphs) rewards Pure Water crafting material and cosmetics.

**Thornwood Thicket** (levels 12–18) challenges navigation with narrow passages and dead ends. Thorn Walkers (plant creatures), Aggressive Deer (stamina-draining), and Spore Clouds (environmental damage) teach environmental awareness. The Forester's Lodge offers clearing contracts, and Ancient Grove provides meditation lore.

**Quartzpeak Quarry** (levels 15–20, 5 ascending floors) teaches climbing mechanics and introduces the **phase system**. The final boss **Warden Thak** has three phases, each reducing a different damage resistance type. Phase 1 (physical resistance) requires magic attacks; Phase 2 (magical resistance) requires physical attacks; Phase 3 (both resistances up) requires environmental damage or specific mechanics. This boss **teaches adaptation**. Drops include **Quartzstone Plate** (level 18 chest armor, +5% defense), **Refined Crystals** (advanced crafting), and **Thak's Crown** (cosmetic crystalline helm).


# Tertia

### Mid-Game Expansion (Levels 20–50) <a href="#mid-game-expansion-levels-2050" id="mid-game-expansion-levels-2050"></a>

Mid-game hubs introduce **specialization paths** and parallel progression options. Players can focus on crafting, trading, exploration, or challenge-seeking without feeling left behind.

### Tertia (Levels 18–28): The Trial Hub

**Core Amenities**

Tertia's three-terrace structure mirrors the Trial Triad system. The **Third Chamber Athenaeum** spans three floors (history, practical knowledge, rare lore). The **Triskel Waypost** is a three-armed obelisk with branching teleportation paths. The **Triune Treasury** offers three vault chambers (Standard/Secure/Archive) with different fee structures. The **Feather & Fang Stables** offers phoenix (fire damage), wolves (tactical formations), and dragons (small wyverns, high HP).

**Signature District: Trial Triad**

Three repeatable short solo trials (5-minute challenges) teach distinct playstyles: **Trial of Offense** (high DPS, limited defense, reward: +5% damage passive), **Trial of Defense** (survival focus with hard-hitting enemies, reward: +5% damage reduction passive), **Trial of Utility** (puzzle-solving with creative ability usage, reward: +5% ability cooldown reduction). Players complete all three and select a permanent "Triad Blessing" passive. Repeatable weekly for bonus gold.

**Unique NPC: Riddlemaster Thox**

Thox's **hidden knowledge quests** involve cryptic riddles and investigations scattered across Tertia's terraces. Completing his 15-level quest chain reveals **secret passages**, hidden vendor locations, and exclusive cosmetics. This system rewards **exploration and curiosity** over pure combat.

**Surrounding Zones and Dungeons**

**Ironwood Forest** (levels 18–23) has metallic-looking trees and ore seams. Iron Wolves, Ore Elementals, and Logging Automatons (mechanical) teach resource farming. Ironwood Lumber Camp offers harvesting contracts, and Ancient Ironwood (1000-year tree) provides temporary "Ancient Strength" buff (+15% physical damage, 1 hour).

**Mistkeep Caverns** (levels 20–25) use bioluminescent fungi and mist effects. Mistwalkers (evasive, low HP), Fungal Spores (ranged, status effects), and Cavern Lurkers (ambush predators) teach timing and awareness. Mistkeep Archive (3-room micro-dungeon) rewards Spore Essence (potion component) and glowing cosmetics.

**Skyridge Peak Monastery** (levels 22–28, 4 floors) ascends a mountain shrine with altitude and weather mechanics. The final boss **Sky Warden Lysara** is a humanoid wyvern rider with a summoning phase system: Phase 1 (solo combat vs. Lysara), Phase 2 (Lysara summons 2 wyverns, requiring crowd control), Phase 3 (Lysara enters a powered-up form requiring specific environmental triggers—using mountain air vents for stun, water streams for damage reset). Drops include **Skyward Chestplate** (level 25 body armor, +8% wind resistance), **Storm Scales** (advanced crafting material), and **Lysara's Feather Crown** (cosmetic winged helm).


# Primus Outpost

### Primus Outpost (Levels 22–30, Small Hub): The Frontier

**Core Amenities**

Primus is a military frontier fort. The **Field Archive "Primus Shelf"** contains wilderness survival texts. **Archivist Kel** offers daily "Field Study" quests gathering intelligence. The **Forward Lantern** beacon has a 3-second cast and provides a scouting preview of destinations. The **Lockbox Bunker-7** holds 40 slots (suggesting a military supply chain). The **Tether Pens** offers scout companions: Ranger Hawks (reveal hidden enemies), Tracking Dogs (follow trails), Scout Rodents (scout dungeons ahead).

**Signature District: Corrupted Grove Border**

The fort stands adjacent to a **Corrupted Grove** where dark magic twisted nature. In-town edge access (safe) lets players gather corruption samples, plant purification seeds (restoration quests healing the grove), or investigate the corruption's origin (long questline teasing endgame content). This creates **long-term investment** in a zone's healing.

**Unique NPC: Map Table Master Cray**

**Cray's** magical table reveals **fog-of-war in one adjacent zone per day** when players bring **scout tokens** (earned through exploration). Revelations include enemy locations, hidden treasure, secret passages, and quest objectives. Players develop **daily rituals** around token usage, deepening engagement.

**Surrounding Zones and Dungeons**

**Twisted Grove** (levels 22–26) has corrupted trees, dark vines, and bioluminescent corruption. Corrupted Sprites (hostile plants), Shadow Wolves (dark-aligned), and Rot Elementals (poison, area denial) teach evasion. Grove's Heart (landmark) triggers an environmental story scene.

**Forsaken Sentinel Tower** (levels 24–30, 5 floors) requires environmental puzzle-solving to ascend ruined chambers. The final boss **Sentinel Prime** is an ancient magical construct protecting the tower (300 HP). Abilities include **Arcane Beam** (narrow line damage), **Temporal Stasis** (freezes one player for 5 seconds), **Runic Explosion** (massive AoE requiring immediate distance). Defeating Sentinel grants **Sentinel's Plate** (level 27 armor, +12% magical resistance), **Runestone Shard** (crafting material), and **Tower Key** (grants permanent fast-travel point to tower summit).


# Quarnton

### Quarnton (Levels 28–40): The Crafting Capital

**Core Amenities**

Quarnton's four-pointed design emphasizes weapon specialization. The **Quartstone Codex Hall** is a four-pointed-star library with each point focusing on a weapon path (Blunt, Blade, Polearm, Ranged). **Keeper Mors** helps players understand philosophical differences between weapons. The **Fourwinds Obelisk** has four cardinal-direction teleportation paths with unique visual effects. The **Quadrant Vault** is four-chambered, with seasonal bonuses (items stored during their season gain +10% value).

**Signature District: Four-Forge Ward**

Four grand forges operated by master smiths represent weapon specialization:

* **Baldric's Blunt Forge**: Axes, hammers, mauls (high damage, slow attacks, crowd control focus)
* **Veridian's Blade Smithy**: Swords, daggers, curved blades (balanced damage/speed, DPS focus)
* **Haste's Polearm Yard**: Spears, halberds, glaives (high reach, coordination-focused)
* **Marksman's Bowyard**: Bows, crossbows, guns (ranged, tactical positioning)

Each forge sells weapon-specific upgrades and crafting materials. **Weapons have their own level progression separate from character level**, encouraging specialization and repeated farming.

**Unique NPC: Quadrant Arena Master Vexx**

Vexx operates the **Quadrant Arena**, a timed wave-based system with 15 waves (90 seconds each). Leaderboards reset seasonally. Top 100 players earn "Elite Fighter" titles, top 50 earn unique armor transmogs, top 10 earn cosmetic mounts. Personal-best rewards grant +1% bonus gold for 1 week per rank achieved, incentivizing repeated attempts.

**Surrounding Zones and Dungeons**

Quarnton's zones emphasize crafting material farming. **Metalwood Groves** (levels 28–35) have ore-rich trees and mineral deposits. Metal Treants, Ore Veins (harvestable objects), and Crystalline Beetles (ranged) reward ore and wood. **Molten Valleys** (levels 32–38) feature active volcanic zones with heat mechanics (players take damage standing still, must keep moving). Lava Elementals, Molten Golems, and Flame Sprites reward volcanic materials. **Forgemaster's Rift** (main dungeon, levels 35–40, 6 floors) ascends a volcanic mountain inside the earth. The final boss **Ancient Magma Titan** (400 HP) has a phase system alternating between **Lava Pool Phase** (stands in lava, high defense, low damage output) and **Rampage Phase** (mobile, massive damage, vulnerable). Drops include **Magma Plate** (level 38 armor, +15% fire damage output), **Crystallized Magma** (rare crafting material), and **Volcanic Crown** (cosmetic helm with flame effects).


# Quintara

### Quintara (Levels 38–50): The Trade Capital

**Core Amenities**

Quintara's five-wing structure emphasizes complexity and prestige. The **Fivefold Scriptoria** has five wings (History, Magic, Nature, Civilizations, Prophecy). **Head Scribe Orim** runs research assignments unlocking lore progressively. The **Pentacle Meridian Gate** requires a 2-second attunement ritual before teleporting (unique animation). The **Aurum Quint Vault** is most secure yet (80 slots) with "insurance" protecting stored items from loss.

**Signature District: Fivefold Bazaar**

The **Bazaar Commission** enables **player-backed contracts** with NPC-managed escrow:

* Players post custom crafting commissions with detailed specifications
* Sellers accept commissions and craft to order
* Automatic payment upon completion (5% commission fee)
* Reputation system: high-reputation crafters get priority and premium rates

This is the **safest place to hire crafting work**, preventing scams through NPC arbitration.

**Unique NPC: Merchant Prince Valorax**

Valorax controls five trading houses and offers **exclusive contracts** granting:

* Black Bazaar access (exclusive vendors, rare items)
* Discount codes redeemable anywhere in Quintara
* Titles: "Valorax's Favorite" (+5% merchant discounts), "Trade Lord" (custom cosmetics)
* Special auctions where rare items sell to highest bidder

Valorax's quests feature **moral ambiguity**, adding storytelling depth and choice consequences.

**Surrounding Zones and Dungeons**

**Merchant Roads** (levels 38–44) are trade routes patrolled by bandits and merchant caravans. Road Bandits, Caravan Guards (friendly NPCs), and Smugglers (questgivers for illegal trade chains) teach faction alignment. **Grand Bazaar Outskirts** (levels 42–48) sprawl with tent settlements and trading posts. Bazaar Merchants (NPCs selling rare goods), Mercenaries (hostile), and Treasure Hunters teach commerce mechanics. **The Merchant's Vault** (main dungeon, levels 44–50, 7 floors) is a bank-turned-dungeon guarded by sentient treasure and ancient vaults. The final boss **Treasurer Mallory** (450 HP) is a humanoid banker with **Gold Summon** (summons 3-4 animated coin elementals), **Vault Slam** (massive AoE damage, forces players away), and **Exchange Rate** (swaps one player's stats with another temporarily, requiring quick thinking). Drops include **Vault Keeper's Chest Armor** (level 48, +18% item carrying capacity), **Merchant's Mark** (crafting material enabling cosmetic gold overlays), and **Valoria Token Preview** (cosmetic hint at endgame city).


# Midway Crossing

### Late-Game Mastery (Levels 50–82) <a href="#late-game-mastery-levels-5082" id="late-game-mastery-levels-5082"></a>

Late-game hubs introduce **zone-spanning mechanics** and regional interconnection. Players realize they've mastered local play and must now master world-scale play.

### Midway Crossing (Levels 45–55, Small Hub): The Caravan Stop

**Core Amenities**

Midway Crossing sits at the literal crossroads of north-south and east-west roads. The **Halfway Reading Room** specializes in "traveler's lore" and reveals safe routes. The **Crossbeam Gate** teleports instantly with a brief vertigo animation. The **Split-Coin Vault** offers currency exchange between regional economies. The **Bridge-End Stables** offers caravan companions: Endurance Mules (slow, high cargo), Swift Camels (moderate speed/cargo), Elegant Coaches (slow, provide rest buffs).

**Signature District: Crossing Kitchens**

Three master chefs from five nations offer daily meals providing **one of three player-chosen buffs** (picked at day's start):

1. **Hearty Stew**: +15% XP gain (1 hour)
2. **Merchant's Feast**: +10% gold gain (1 hour)
3. **Ranger's Provisions**: +10% all resistances (1 hour)

The kitchens become a **community gathering space**, with players returning daily for meals and socializing.

**Unique NPC: Caravan Master Bex**

**Bex** organizes **guided caravan runs** where grouped players (5+) travel to distant destinations with NPC guards. The 15-minute journey features:

* Optional random encounters (avoidable or fightable)
* Scenic storytelling and environmental narratives
* Guaranteed safe arrival
* Bonus rewards for full groups

This creates **epic travel feelings** and fosters community bonds.


# Sexton

### Sexton (Levels 52–64): The Harbor City

**Core Amenities**

Sexton's lighthouse aesthetic transforms the hub into a navigation center. The **Sextant Archive** is a circular library designed like a ship's wheel (six sections). **Keeper Thorne** specializes in maritime lore and underwater mythology. The **Compass Spire** is a lighthouse beacon visible across the ocean. The **Deep-Current Depository** is accessed via water lock (brief descending bubble animation). Items stored during high tide gain +5% value bonus.

**Signature District: Harbor Registry**

This bureaucratic yet essential district manages **ship routes** and **underwater dungeon access**. **Harbor Master Cass** offers:

* **Ship Route Licenses**: Unlock fast-travel water routes (10-minute trips between major cities)
* **Diving Permits**: Grant access to deep-sea zones based on level and safety quests
* **Tide Schedule Consultations**: Reveal when undersea caves open (in-game day/night cycles)

This district **entirely reshapes how players traverse the world** post-level 52.

**Unique NPC: Thalassarch Morwen**

Morwen maintains **Tide Schedules**—mystical timetables opening/closing underwater passages based on lunar cycles. Morwen offers:

* Tide-keeping quests (restore tidal monuments, commune with sea spirits)
* Exclusive underwater cosmetics (merfolk costumes, shell armor skins)
* **Midnight Reef access** (secret underwater zone open only during new moons)

**Surrounding Zones and Dungeons**

**Coral Kingdoms** (levels 52–58) feature living coral reefs with bioluminescent creatures. Sea Serpents, Coral Guardians (stationary, area denial), and Tide Elementals teach underwater traversal. **Abyssal Shallows** (levels 56–62) descend into darker waters with less light. Deep Dwellers (rare, high HP), Anglerfish (predators), and Leviathan Calves (mini-bosses) reward deep-sea materials.

**The Sunken Citadel** (main dungeon, levels 58–64, 8 floors) is an ancient underwater city. The final boss **Tidal Lord Meridian** (500 HP) has a **Tidal Surge Phase** (deals massive damage, players must hide behind environmental pillars), **Pressure Phase** (decreases oxygen, time-limited encounter), and **Awakening Phase** (summons 5-6 minor water elementals requiring crowd control). Drops include **Tidal Armor** (level 62, +20% water resistance, grants 5-minute underwater breathing), **Sunken Runes** (crafting material), and **Depths Crown** (cosmetic crown made of sea glass).


# Septimus

### Septimus (Levels 60–72): The Seven-Gated City

**Core Amenities**

Septimus is physically divided by seven thematic gates. The **Seven Seals Library** has seven wings, each sealed behind a symbolic door. **Head Keeper Aelion** runs gate-quests that unlock wing access progressively. The **Heptagon Wayring** requires attunement to one of seven elemental aspects before teleporting (attunement lasts 1 hour, grants minor bonuses). The **Sevenfold Lock** has seven distinct locks (magical, mechanical, biological, etc.) requiring puzzle-solving each session to open.

**Signature District: Seven-Gated City**

Each gate leads to a distinct micro-region:

1. **Gate of Crypts** (death/undead theme): Skeletal creatures, ancient tombs, resurrection mechanics
2. **Gate of Dunes** (desert/time theme): Sand elementals, temporal distortion, mirage mechanics
3. **Gate of Fens** (nature/growth theme): Plant creatures, poisonous swamps, symbiosis quests
4. **Gate of Cliffs** (stone/endurance theme): Stone golems, altitude mechanics, climbing challenges
5. **Gate of Flames** (fire/passion theme): Fire elementals, lava zones, heat mechanics
6. **Gate of Tides** (water/change theme): Water creatures, current mechanics, transformation quests
7. **Gate of Stars** (magic/divinity theme): Magical beings, celestial themes, prophecy quests

Clearing all seven gate-quests grants a **Weekly Treasure Chest** (worth \~3000 gold).

**Unique NPC: Gatekeeper Seris**

Seris manages the seven-gate chain, granting:

* **Seris's Blessing** (permanent +2% all stats)
* **Inner Sanctum access** (exclusive merchant selling rare items)
* **Gate-Walker title** (cosmetic badge)
* **Weekly chest key** (opens chest worth \~3000 gold)

**Surrounding Zones and Dungeons**

Seven surrounding zones mirror the gates (Crypt Hollows, Shifting Sands, Verdant Marshes, Ironpeak Ridge, Volcanic Wastes, Tidal Swamps, Starlit Peaks). **The Eternal Sanctum** (main dungeon, levels 68–72, 10 floors) requires solving all seven gate mechanics simultaneously. The final boss **The Gatekeeper Prime** (600 HP) cycles through seven elemental phases, each requiring distinct mechanics from its corresponding gate. This boss is a **culmination of everything learned in Septimus**.


# Octavia

### Octavia (Levels 70–82): The Music City

**Core Amenities**

Octavia is a music-and-magic metropolis. The **Octave Conservatory of Lore** is designed like a concert hall with eight alcoves (magical schools). **Maestro Scholar Venn** runs the library as a performance space. The **Eightfold Harmonic Beacon** has eight tuning forks that hum at different frequencies. Teleportation triggers unique musical animations per destination.

**Signature District: Conservatory of Resonance**

**Resonance enchants** add **sound-based procs** to equipment:

* **Silence Enchant**: Silences enemies (3 seconds, 30-second cooldown)
* **Tremor Enchant**: AoE stun (small radius, 45-second cooldown)
* **Harmony Shield Enchant**: Protective barriers scaling with nearby allies
* **Song of Healing Enchant**: Passive heal-over-time increasing with group size

These enchants shift playstyle toward **group synergy** and musical metaphors.

**Unique NPC: Resonance Theorist Esha**

**Esha** creates **custom resonance blends** combining effects. Crafting requires:

* Rare materials (harvested from Octavia zones)
* Time investment (real days)
* Reputation with Esha (scholarly quests)

Her work is the **most prestigious enchantment source**, making her quests highly valued.

**Surrounding Zones and Dungeons**

**Harmonic Groves** (levels 70–76) resonate with musical frequencies. Sound Sprites (auditory creatures), Echo Wolves (coordinated pack attacks), and Dissonant Elementals teach timing to music pulses. **Crescendo Canyons** (levels 74–80) have towering cliffs and acoustic chambers. Sound Giants (ranged sonic damage), Harmony Guardians (support enemies healing allies), and Discord Entities (chaotic, unpredictable behavior) reward rare enchantment materials.

**The Grand Concert Hall** (main dungeon, levels 76–82, 8 floors representing a symphony's movements) is a concert stage. The final boss **Maestro Lyrisande** (650 HP) is a beautiful creature that uses **Symphony Phases**:

* **Prelude Phase**: Solo combat, moderate difficulty
* **Forte Phase**: Increases damage output and summons 3-4 harmonic servants
* **Crescendo Phase**: Massive AoE damage, requires players to synchronize their actions (pressing abilities in specific order)
* **Finale Phase**: Combines all previous mechanics, final climactic encounter

Drops include **Resonant Vestments** (level 80 body armor, grants resonance aura affecting nearby players), **Lyrisande's Lute** (cosmetic instrument), and **Concert Hall Access** (permanent ability to summon a concert hall arena for cosmetic duels).


# Nonas

### Endgame Ascension (Levels 82–120) <a href="#endgame-ascension-levels-82120" id="endgame-ascension-levels-82120"></a>

Endgame hubs transition to **world-ending content**. Hubs become preparation chambers for absolute final encounters. The progression feels mythic.

### Nonas (Levels 80–92): The Shadow City

**Core Amenities**

Nonas is dimly-lit, operating through shadows and secrets. The **Ninth Mirror Repository** records knowledge in mirrors rather than books. **Keeper Salus** oversees a **reputation system** where ethical choices affect standing. The **Nullstep Beacon** is nearly invisible in shadow; players attune once before it becomes accessible. The **Silent Reserve** requires stealth to enter; storage items generate no sound or magical aura.

**Signature District: Oathkeeper's Tower**

The **Ninth Mirror** is a massive scrying mirror where NPCs swear oaths. **Tower Master Kess** manages:

* Witnessing NPC oaths (binding their behavior)
* Oaths grant in-game bonuses if upheld
* Breaking oaths causes NPC hostility
* Players can swear oaths themselves, gaining buffs but risking penalties if broken

This creates **moral weight** and storytelling depth.

**Unique NPC: Respec Broker Valen**

**Valen** offers **free weekly respecs** if players complete **stealth contracts** (infiltrating locations, stealing items, gathering intelligence). Contracts are thematic and fun, not tedious. Successful completion grants bonus rewards.

This makes Nonas the **character rebuilding hub** for experimentation.

**Surrounding Zones and Dungeons**

**Shadow Woodlands** (levels 80–86) have darkness mechanics and stealth-based encounters. Shadow Wolves, Wraith Trees, and Void Spiders reward rare stealth materials. **The Umbral Abyss** (levels 84–91) descends into near-total darkness with only minimal light. Void Entities (nearly invisible), Darkness Manifestations (shapeshifting), and Nightmare Creatures teach advanced combat in limited visibility.

**The Void Oracle's Sanctum** (main dungeon, levels 87–92, 9 floors) is accessed only in darkness. The final boss **The Void Oracle** (700 HP) is incorporeal and uses **Shadow Clones** (creates 2-3 copies that must be individually targeted), **Void Rifts** (dimensional portals), and **Reality Tear** (massive AoE requiring group coordination). Drops include **Void-Touched Armor** (level 90, grants temporary invisibility once per 60 seconds), **Mirrors of Truth** (cosmetic items revealing hidden cosmetics), and **Oracle's Foresight** (gives players a "reroll" ability once per month).


# Lastia

### Lastia (Levels 92–99): The End of the Road

**Core Amenities**

Lastia marks the literal edge of mapped territory. The **Terminal Index** records every quest and NPC encountered. **Keeper Thom** specializes in "memorial research," revisiting earlier content with new depth. The **Last Doorway** is an ominous portal beyond which lies only uncharted space. The **Endlock Vault** (120 slots) enables item inheritance for New Game+.

**Signature District: Memorial Quarter**

Lastia honors completed questlines through:

* **Fallen Heroes Monument**: Statues of questline antagonists and allies
* **Pilgrim's Archive**: Registry of players reaching Lastia
* **Echo Chambers**: Magical recreation of key story moments
* **Legacy Stone**: Where players record messages for future playthroughs

Emotionally resonant and beloved for **providing closure**.

**Unique NPC: Gatekeeper Hazmat**

**Hazmat** oversees the **Hazard Preview Lab**, where players experience scaled-down versions of final zone mechanics:

* Test extreme environmental hazards (heat, radiation, temporal distortion)
* Practice against high-level enemy archetypes
* Learn zone layouts before committing
* Earn "hazard resistance" achievements

Essential for **endgame preparation**.

**Surrounding Zones and Dungeons**

**The Twilight Wastes** (levels 92–97) are barren and dangerous, with reality distortion effects. Corrupted Giants, Time Wraiths, and Reality Fractals teach adaptation to multiple threat types. **The Fractured Peak** (levels 95–99) is the world's highest mountain, climbing toward the final dungeon. Ancient Dragons (rare, world-boss difficulty), Temporal Entities (time manipulation mechanics), and Dimensional Guardians reward fragments of endgame secrets.

**The World's Threshold** (main dungeon, levels 96–99, 12 floors) is the final pre-endgame dungeon. The final boss **The Gatekeeper Between** (800 HP) is reality itself, requiring mastery of all previous combat mechanics. This boss is a **skill check** ensuring players are ready for ultimate content.


# Decim

### Decim (Levels 99–104): The Calculation City

**Core Amenities**

Decim is perfectly ordered and measured. The **Decimal Vault-Library** indexes everything numerically. **Keeper Mathis** specializes in theoretical knowledge and offers calculation-based quests. The **Tenfold Ascension Spire** has ten tiers representing progression levels. Climbing grants cosmetic rewards. The **Perfect Seal Treasury** (100 slots) optimizes items based on slot positioning (fire items in fire compartments gain fire bonuses).

**Signature District: The Arcanuum**

The **Arcanuum** is a restricted district accessible only to levels 99–104. Inside:

* Exclusive vendors selling theoretical items
* Perfect crafting stations (items with zero flaws, optimal stats)
* Research chambers for advanced knowledge
* **Conclave Chamber** where elite players gather

Feels exclusive and **rewards reaching the final stretch**.

**Unique NPC: Arcanarch Ilyth Merrow**

Ilyth offers the **Signature Ability Acquisition System**:

* Players choose one of ten **Signature Abilities** (ultimate class powers)
* Each ties to an arcane school and playstyle
* Acquiring requires proving mastery of that school
* Abilities grant permanent bonuses and unlock new playstyles

Makes level 99–104 feel like a **major transition toward final tier**.

**Surrounding Zones and Dungeons**

**The Calculated Wastes** (levels 99–103) are mathematically perfect landscapes. Perfect Golems, Arithmetic Constructs, and Logic Entities teach pattern recognition. **The Abstraction Peak** (levels 102–104) exists partially in abstract space. Theoretical Beings, Concept Manifestations, and Pure Ideas (incredibly rare, high difficulty) reward legendary materials.

**The Convergence Point** (main dungeon, levels 100–104, 10 floors) represents the peak of calculated theory. The final boss **The Infinite Equation** (900 HP) has a complex phase system requiring solving mathematical puzzles while combat occurs, demanding **focus and intelligence**.


# Celestia

### Celestia (Levels 104–112): The Preparation Heaven

**Core Amenities**

Celestia is transcendent, floating on magical terraces. The **Starbound Archive** organizes knowledge by constellation. **Keeper Selaena** specializes in cosmic lore and multiversal hints. The **Celestial Orrery Gate** cycles based on in-game star positions (3–10 second waits). The **Aetherbank** made of starlight holds items that gain stat boosts during celestial events.

**Signature District: Grand Observatory**

The heart of Celestia facilitates **raid preparation**:

* **Consumable Bulk Crafting**: Discount vendors selling raid consumables in bulk
* **Resistance Audits**: NPCs test and advise on optimal resistances
* **Encounter Briefings**: Lore-masters explain raid boss mechanics
* **Raid Training**: Optional tutorial raids for learning coordination

**Luminary-General Seraphine** manages:

* Raid group assembly from player rosters
* DPS calculators and role optimization
* Trial raids (practice encounters, reduced difficulty)
* Raid certifications proving mechanic mastery

High-level players spend significant time perfecting their craft here.

**Surrounding Zones and Dungeons**

**Starlit Expanse** (levels 104–109) are cosmic grasslands with celestial creatures. Star Sprites, Constellation Sentries, and Cosmic Whales teach celestial mechanics. **The Void Between Stars** (levels 109–112) is nearly empty space. Void Entities, Cosmic Horrors, and Dimensional Tears (environmental hazards) reward ultimate materials.

**The Celestial Fortress** (main dungeon, levels 106–112, 8 floors) is a sky citadel. The final boss **The Ascended Prime** (950 HP) is a transcendent being with **Cosmic Alignment Phases** (requires specific positioning relative to cosmic bodies), **Void Rifts** (environmental obstacles), and **Primacy Attack** (massive AoE, requires raid coordination).


# Valoria

### Valoria (Levels 112–120): The Final Hero-Capital

**Core Amenities**

Valoria is the ultimate endgame hub and war academy. The **Valorium Great Library** holds master tomes under mystical lock. **Keeper Valorian** is the oldest NPC, having witnessed civilizations rise and fall. The **Victory Meridian** is a triumphant teleportation gateway with celestial fanfare. The **Crown Reserve** (150 slots) prevents item loss through "prestige" mechanics. The **Herald's Kennels** offers **Mythic Companions** (Titans, Primordial Beasts, Ascended Spirits) granting permanent stat bonuses.

**Signature Districts: War Academy & Grand Senate**

**War Academy**: **Academy Commander Vor** oversees:

* Advanced raid training
* Mythic raid unlocks (absolute hardest content)
* Eternal leaderboards
* Prestige cosmetics for top performers

**Grand Senate**: **Senator Kaelith** oversees:

* Faction wars (territory control)
* Council meetings (top players vote on game-world changes)
* Diplomatic quests (faction alliances, espionage)
* World-shaping events (player actions influence the game world)

**Unique NPC: Warlord-Scholar Kael Varos**

Kael is the ultimate endgame NPC:

* **Mythic Crafting**: Creates the strongest items, requiring immense material and personal quests
* **Ultimate Bounties**: World-boss hunts and raid challenges with exceptional rewards
* **Prestige Cosmetics**: Exclusive cosmetics available only through mastery quests
* **Immortalization System**: Top players can become permanent NPCs in Valoria, becoming quest-givers and lore fixtures

This creates **legendary status** and long-term goals beyond typical level caps.

**The Five Ultimate Dungeons**

Valoria is surrounded by five absolute peak-difficulty dungeons:

1. **The Infinite Archive** (5 floors, boss: Knowledge Incarnate - a sentient library that manifests as a boss)
2. **The Celestial Fortress** (8 floors, boss: The Ascended Prime - transcendent being)
3. **The Abyssal Throne** (10 floors, boss: Leviathan Prime - world-devouring creature)
4. **The Burning Citadel** (7 floors, boss: Phoenix of Eternity - eternal fire)
5. **The Void's End** (12 floors, boss: The Void Above - the final threat)

Each requires mastery of previous dungeons and coordinated raid groups of 8–20 players. Defeating all five grants the title **"Savior of Worlds"** and exclusive cosmetics marking players as true endgame legends.


# World Events


# Peak Solar Cycle


# Timed Events

### The 10 Major World Events <a href="#the-10-major-world-events" id="the-10-major-world-events"></a>

**Spring Awakening (Days 1–30)**

The cycle begins with **Thawspring Thaw** (Days 1–5), where winter melts and crops grow 50% faster. This gentle introduction teaches new players about seasonal mechanics. **Verdancy Festival** (Days 6–10) transforms hubs into carnival-like celebration zones with festival games, cosmetics, and +25% quest bonuses. **Moonbloom Midnight** (Days 11–15) introduces nocturnal creatures and moon magic, with special midnight hunts and lunar crafting opportunities.

**Summer Abundance (Days 31–60)**

**Golden Harvest Rush** (Days 31–40) makes farming peak, with crop maturation 40% faster, extended daylight, and special merchant contracts that turn harvested materials into gold. **Celestial Convergence** (Days 41–50) enables sky-based content through levitation zones, celestial creatures, and floating market areas above hubs. **Midsummer's Revelry** (Days 51–60) emphasizes social content with romance quests, community gatherings, and perpetually long days perfect for casual play.

**Autumn Transition (Days 61–90)**

**Harvest Moon Festival** (Days 61–75) is the longest and most beloved event, with 50% crop bonus yields, 20% higher agricultural selling prices, and unprecedented cosmetic availability. This event celebrates abundance before winter arrives. **Bloodmoon Rising** (Days 76–85) dramatically shifts tone—the sky turns blood-red, undead creatures emerge everywhere, dark magic becomes 30% stronger, and rare drops increase by 15%. This is the game's most dangerous event, with creatures gaining +20% damage. **Veil Thinning** (Days 86–90) bridges the chaos, introducing peaceful spirits, lore fragments, and memory-based quests that reward non-violence.

**Winter & Renewal (Days 91–120)**

**Frostfall Freeze** (Days 91–100) transforms the world into a harsh, snow-covered landscape requiring cold-resistance gear or warming items. Movement is 15% slower, and zones deal 5% cold damage per minute without protection. Despite harshness, this event rewards well-prepared players with 25% bonus loot. **Yuletide Revelry** (Days 101–110) provides warmth and comfort—cities are elaborately decorated, gift-giving becomes central, cosmetics abound, and charity quests reward generous players with titles and exclusive items. **New Moon Silence** (Days 111–115) creates darkness and introspection, where meditation grants XP bonuses and dark magic is amplified. Finally, **Renewal's Dawn** (Days 116–120) concludes the cycle with a spectacular dawn, seasonal reflections, and legacy-recording quests that immortalize player achievements.

### Mechanical Depth Per Event <a href="#mechanical-depth-per-event" id="mechanical-depth-per-event"></a>

Each event features:

**Environmental Transformations**: Visual and mechanical zone changes (temperatures, weather, creature spawns, traversal obstacles). Events like Frostfall actually make zones dangerous if unprepared, while Midsummer enables extended play sessions.

**Unique Quest Chains**: Each event has 3-5 exclusive quests available only during that event, encouraging players to return to hubs multiple times throughout the year. Some quests are repeatable daily (Golden Harvest Rush's farming quests), while others are one-time story elements (Bloodmoon's multi-stage rift-sealing quest).

**Farming Windows**: Events create resource-gathering opportunities. Moonbloom Midnight provides moonflowers (high value, scarce), Harvest Moon supplies bulk crops (high volume, moderate value), and Frostfall offers winter furs (high value, limited quantity). Smart players farm event-specific materials and save them for when demand peaks.

**NPC Behavior Shifts**: NPCs become noticeably different during events. During Harvest Moon, farmers host celebratory feasts and offer wage quests. During Bloodmoon, hunters congregate at zone entrances seeking group support. During Yuletide, even cynical NPCs become charitable. These shifts make the world feel alive and responsive.

**Cosmetic Access**: Each event offers 5-15 unique cosmetics available only during that event (or repeatable annually). Cosmetics range from 50-500 gold, with exclusive sets rewarding event completion. This creates seasonal collecting incentives.

### Strategic Depth for Different Player Archetypes <a href="#strategic-depth-for-different-player-archetypes" id="strategic-depth-for-different-player-archetypes"></a>

**Farmers**: Golden Harvest Rush and Harvest Moon Festival are peak farming seasons. Intelligent farmers plant during Thawspring (fast growth), harvest during Golden Harvest (bonus yields + 20% prices), and preserve crops in special containers for winter sales when prices spike due to scarcity.

**Crafters**: Each event provides unique materials. Celestial Convergence offers sky-materials for flying-themed items, Frostfall provides furs for winter gear, Bloodmoon supplies dark-magic components. Smart crafters stockpile event-specific materials and craft during slow seasons.

**Warriors & Combat Players**: Bloodmoon Rising is their moment—difficult enemies, rare drops, and combat-focused quests. Frostfall Freeze also challenges combat builds with harsh conditions and dangerous creatures. These players farm materials during Bloodmoon and prepare gear before Frostfall.

**Social & Roleplay Players**: Verdancy Festival, Midsummer's Revelry, and Yuletide Revelry are their highlights, with dances, ceremonies, romantic quests, and community gathering. These events create natural roleplay scenarios.

**Explorers & Lore Seekers**: Veil Thinning and Renewal's Dawn reward exploration of memory fragments and lore investigation. Moonbloom Midnight opens sky-zones and floating areas. These players accumulate cosmetics and titles through event completion.

**Hardcore/Endgame Players**: Bloodmoon Rising and Frostfall test skill. Celestial Convergence enables raid preparation during Celestia hub events. The event cycle creates pacing for raid progression—players prepare during peaceful events, challenge themselves during dangerous ones.

### Cross-Event Synergies <a href="#cross-event-synergies" id="cross-event-synergies"></a>

The event system creates emergent gameplay patterns:

* **Winter Preparation**: Players spend Golden Harvest Rush and Harvest Moon farming grain, preserving crops, and gathering furs in anticipation of Frostfall's scarcity.
* **Cosmetic Collection Goals**: Players track which events provide which cosmetics and plan ahead to acquire full sets.
* **Material Markets**: Smart players buy materials when abundant and cheap (Harvest Moon crops at normal prices), then sell when scarce and valuable (during Frostfall, when farmers can't grow).
* **Narrative Momentum**: The progression from spring's hope (Verdancy) through summer's abundance (Harvest Rush) to autumn's gratitude (Harvest Moon) to winter's hardship (Frostfall) to winter's warmth (Yuletide) creates emotional narrative arc even in a game without traditional story.

### Event Calendar at a Glance <a href="#event-calendar-at-a-glance" id="event-calendar-at-a-glance"></a>

**Days 1–5**: Thawspring Thaw (gentle awakening, +50% crop growth)\
**Days 6–10**: Verdancy Festival (celebrations, +25% quest XP/gold)\
**Days 11–15**: Moonbloom Midnight (nocturnal creatures, moon magic +15%)\
**Days 31–40**: Golden Harvest Rush (farming peak, +40% maturation, +20% crop prices)\
**Days 41–50**: Celestial Convergence (sky content, levitation zones, +20% celestial magic)\
**Days 51–60**: Midsummer's Revelry (social events, romance quests, community focus)\
**Days 61–75**: Harvest Moon Festival (peak abundance, +50% crop yields, +20% agricultural prices)\
**Days 76–85**: Bloodmoon Rising (dangerous, undead creatures, dark magic +30%, +15% rare drops, more lootpouch drops)\
**Days 86–90**: Veil Thinning (spirits, lore fragments, peaceful ghost encounters)\
**Days 91–100**: Frostfall Freeze (extreme cold, -15% movement, +5% cold damage, +25% bonus loot)\
**Days 101–110**: Yuletide Revelry (gifts, charity, community, cosmetic abundance)\
**Days 111–115**: New Moon Silence (darkness, meditation, dark magic +25%)\
**Days 116–120**: Renewal's Dawn (cycle conclusion, reflection, legacy quests)

The 120-day cycle repeats infinitely, ensuring that players experiencing the game at different times encounter different content, while maintaining consistency for returning players. This creates both freshness and predictability—new players discover seasonal content gradually, while veteran players plan their activities around the calendar.


# Vanilla Ore Distribution

Vanilla Ores Info

ColdMC's Vanilla ore distribution

<img src="https://3522175436-files.gitbook.io/~/files/v0/b/gitbook-x-prod.appspot.com/o/spaces%2FrcgtxEHRbgBRPbt4a4vb%2Fuploads%2FnVojViRHmIxSiFWZFApp%2F1-18-ore-distribution.jpeg?alt=media&amp;token=23955e66-b300-41bf-8b50-e18e551f1c4e" alt="" data-size="original">


# List of Structures


# List of Biomes


# Hub Dimension (old)

The mortal realm, similar to the Overworld in traditional Minecraft, but with enhanced features and richer lore. ColdMC's Overworld serves as the hub where all adventures begin.

## Trivia

Also referred to as, Midgard, Earth, Wilderness.

## Resources

<details>

<summary>Mythril Ore</summary>

Mine Requirement: Netherite Tier Pickaxe or higher

Drops: Mythril Ingot

Main Crafts: Mythril Pickaxe

Rarity: <mark style="color:blue;">Rare</mark>

</details>

<details>

<summary>Orichalcum Ore</summary>

Mine Requirement: Netherite Tier Pickaxe or higher

Drops: Orichalcum Ingot

Main Crafts: Orichalcum Pickaxe

Rarity: <mark style="color:blue;">Rare</mark>

</details>

<details>

<summary>Titanium Ore</summary>

Mine Requirement: Netherite Tier Pickaxe or higher

Drops: Titanium Ingot

Main Crafts: Titanium Pickaxe

Rarity: <mark style="color:purple;">Epic</mark>

</details>

<details>

<summary><img src="https://3522175436-files.gitbook.io/~/files/v0/b/gitbook-x-prod.appspot.com/o/spaces%2FrcgtxEHRbgBRPbt4a4vb%2Fuploads%2FEnsS1k5IMQXfXdIFyrvD%2Fdiamond.png?alt=media&amp;token=a5bd81c7-e718-4a75-bb8b-bc591fc18256" alt="" data-size="line"> Vanilla Ores Info</summary>

ColdMC's Vanilla ore distribution

<img src="https://3522175436-files.gitbook.io/~/files/v0/b/gitbook-x-prod.appspot.com/o/spaces%2FrcgtxEHRbgBRPbt4a4vb%2Fuploads%2FnVojViRHmIxSiFWZFApp%2F1-18-ore-distribution.jpeg?alt=media&amp;token=23955e66-b300-41bf-8b50-e18e551f1c4e" alt="" data-size="original">

</details>

***

## Sub-dimensions

{% content-ref url="/pages/2S5ovMSp37GJsJwZF0Vn" %}
[The Underneath](/dim/the-underneath)
{% endcontent-ref %}

{% content-ref url="/pages/vJF4BTMcuqfMODoBchxz" %}
[The Middle Lands](/dim/overworld/hub-dimension-old/the-middle-lands)
{% endcontent-ref %}

{% content-ref url="/pages/McalPAc6JHa9xaHc6r9D" %}
[Orbit](/dim/overworld/hub-dimension-old/orbit)
{% endcontent-ref %}

***

## Biomes (Terralith)

<details>

<summary>Custom Biomes (85)</summary>

**Alpha Islands**\
A tropical island biome with lush vegetation and shallow waters.\
Rarity: <mark style="color:blue;">Super Rare</mark>

**Alpha Islands (Winter)**\
A snowy variant of Alpha Islands with frozen water and snow-covered trees.\
Rarity: <mark style="color:blue;">Super Rare</mark>

**Alpine Grove**\
A cold forest biome with tall pine trees and frosted ground.\
Rarity: <mark style="color:green;">Uncommon</mark>

**Alpine Highlands**\
High-altitude biome with snowy peaks and sparse vegetation.\
Rarity: Super Common

**Amethyst Canyon**\
A canyon biome with exposed amethyst geodes and rugged terrain.\
Rarity: <mark style="color:green;">Uncommon</mark>

**Amethyst Rainforest**\
A dense, vibrant rainforest filled with amethyst crystals.\
Rarity: Common

**Ancient Sands**\
A dry desert biome with ancient ruins and sandstone formations.\
Rarity: <mark style="color:green;">Uncommon</mark>

**Arid Highlands**\
A dry, elevated biome with sparse vegetation and rugged terrain.\
Rarity: Super Common

**Ashen Savanna**\
A scorched savanna biome with charred trees and dry grass.\
Rarity: <mark style="color:green;">Uncommon</mark>

**Basalt Cliffs**\
Sheer cliffs made of basalt, with little vegetation and harsh terrain.\
Rarity: <mark style="color:green;">Uncommon</mark>

**Birch Taiga**\
A taiga biome with tall birch trees and a cold climate.\
Rarity: Common

**Blooming Plateau**\
A highland biome covered in flowers and grass, with a pleasant climate.\
Rarity: Common

**Blooming Valley**\
A lush valley filled with a variety of flowers and vibrant plant life.\
Rarity: Common

**Brushland**\
A warm, dry biome with low shrubs and scattered trees.\
Rarity: Super Common

**Bryce Canyon**\
A desert biome featuring tall, thin spires of red rock and deep canyons.\
Rarity: <mark style="color:green;">Uncommon</mark>

**Caldera**\
A volcanic crater biome with hot springs and unique vegetation.\
Rarity: <mark style="color:green;">Uncommon</mark>

**Cloud Forest**\
A mystical forest biome often shrouded in fog, with tall trees and rich flora.\
Rarity: <mark style="color:blue;">Rare</mark>

**Cold Shrubland**\
A chilly biome with sparse shrubs and a cold climate.\
Rarity: Common

**Desert Canyon**\
A dry canyon biome with deep valleys and towering rock formations.\
Rarity: <mark style="color:red;">Unknown</mark>

**Desert Oasis**\
A rare desert biome with a central water source surrounded by lush vegetation.\
Rarity: Common

**Desert Spires**\
A desert biome with tall, thin rock formations and barren terrain.\
Rarity: <mark style="color:blue;">Rare</mark>

**Emerald Peaks**\
A mountainous biome with abundant emeralds and steep cliffs.\
Rarity: <mark style="color:blue;">Rare</mark>

**Forested Highlands**\
A biome with dense forests at high altitudes, featuring diverse tree species.\
Rarity: Super Common

**Fractured Savanna**\
A dry biome with large cracks in the ground and sparse vegetation.\
Rarity: <mark style="color:green;">Uncommon</mark>

**Frozen Cliffs**\
A cold biome with icy cliffs and snow-covered terrain.\
Rarity: <mark style="color:green;">Uncommon</mark>

**Glacial Chasm**\
A deep, icy biome with massive glaciers and frigid temperatures.\
Rarity: <mark style="color:green;">Uncommon</mark>

**Granite Cliffs**\
Rugged cliffs made of granite, with sparse vegetation and steep drops.\
Rarity: <mark style="color:green;">Uncommon</mark>

**Gravel Beach**\
A coastal biome with extensive gravel beaches and shallow water.\
Rarity: Super Common

**Gravel Desert**\
A barren desert biome with large expanses of gravel and minimal vegetation.\
Rarity: Common

**Haze Mountain**\
A misty mountainous biome with steep slopes and dense fog.\
Rarity: <mark style="color:green;">Uncommon</mark>

**Highlands**\
A temperate biome with rolling hills and diverse flora.\
Rarity: Super Common

**Hot Shrubland**\
A warm biome with sparse shrubs and dry soil.\
Rarity: Common

**Ice Marsh**\
A cold, swampy biome with frozen water and snow-covered vegetation.\
Rarity: Common

**Jungle Mountains**\
A dense jungle biome with steep, mountainous terrain.\
Rarity: <mark style="color:green;">Uncommon</mark>

**Lavender Forest**\
A forest biome filled with lavender plants and vibrant purple hues.\
Rarity: <mark style="color:green;">Uncommon</mark>

**Lavender Valley**\
A lush valley covered in lavender, with a mild climate.\
Rarity: Common

**Lush Desert**\
An ultra rare desert biome with surprising patches of greenery and water sources.\
Rarity: <mark style="color:red;">Unknown</mark>

**Lush Valley**\
A fertile valley biome with abundant plant life and water sources.\
Rarity: <mark style="color:green;">Uncommon</mark>

**Mirage Isles**\
A tropical island biome that appears and disappears like a mirage.\
Rarity: <mark style="color:green;">Uncommon</mark>

**Moonlight Grove**\
A mystical forest biome with glowing plants and a serene atmosphere.\
Rarity: <mark style="color:green;">Uncommon</mark>

**Moonlight Valley**\
A tranquil valley illuminated by glowing plants and a soft moonlight ambiance.\
Rarity: Common

**Mountain Steppe**\
A high-altitude biome with dry grass and rocky terrain.\
Rarity: <mark style="color:red;">Unknown</mark>

**Orchid Swamp**\
A wetland biome filled with orchids and other vibrant plants.\
Rarity: Common

**Painted Mountains**\
A colorful mountainous biome with unique rock formations and bright colors.\
Rarity: <mark style="color:blue;">Rare</mark>

**Red Oasis**\
A small, fertile area in a desert biome, rich with vegetation and water.\
Rarity: <mark style="color:green;">Uncommon</mark>

**Rocky Jungle**\
A dense jungle biome with rocky outcrops and lush vegetation.\
Rarity: Common

**Rocky Mountains**\
A rugged mountainous biome with steep cliffs and sparse trees.\
Rarity: Common

**Rocky Shrubland**\
A dry, rocky biome with sparse shrubs and little vegetation.\
Rarity: <mark style="color:green;">Uncommon</mark>

**Sakura Grove**\
A forest biome with cherry blossom trees and vibrant pink flowers.\
Rarity: Common

**Sakura Valley**\
A peaceful valley filled with cherry blossom trees and mild weather.\
Rarity: <mark style="color:green;">Uncommon</mark>

**Sandstone Valley**\
A desert biome with extensive sandstone formations and dry terrain.\
Rarity: <mark style="color:green;">Uncommon</mark>

**Savanna Badlands**\
A harsh, dry biome with eroded cliffs and sparse vegetation.\
Rarity: Common

**Savanna Slopes**\
A biome with gentle, sloping hills and savanna vegetation.\
Rarity: <mark style="color:green;">Uncommon</mark>

**Scarlet Mountains**\
A mountainous biome with red-tinted stone and steep cliffs.\
Rarity: <mark style="color:green;">Uncommon</mark>

**Shield Clearing**\
A cold, open biome with sparse vegetation and a flat landscape.\
Rarity: <mark style="color:green;">Uncommon</mark>

**Shield**\
A biome characterized by rocky terrain and scattered forests.\
Rarity: Super Common

**Shrubland**\
A dry biome with low shrubs and occasional trees.\
Rarity: Common

**Siberian Grove**\
A cold biome with dense forests and snowy ground.\
Rarity: <mark style="color:blue;">Rare</mark>

**Siberian Taiga**\
A snowy taiga biome with tall pine trees and a cold climate.\
Rarity: Common

**Skylands**\
A floating island biome with diverse terrain and vegetation.

* **Skylands (Autumn)**\
  A variant of Skylands with autumnal colors and falling leaves.\
  Rarity: Common
* **Skylands (Spring)**\
  A variant of Skylands with vibrant spring colors and blooming flowers.\
  Rarity: Common
* **Skylands (Summer)**\
  A variant of Skylands with lush summer vegetation and warm temperatures.\
  Rarity: <mark style="color:red;">Unknown</mark>
* **Skylands (Winter)**\
  A variant of Skylands with snow-covered terrain and a chilly atmosphere.\
  Rarity: <mark style="color:green;">Uncommon</mark>

**Snowy Badlands**\
A cold biome with barren, snow-covered land and minimal vegetation.\
Rarity: <mark style="color:green;">Uncommon</mark>

**Snowy Cherry Grove**\
A wintery biome with cherry blossom trees covered in snow.\
Rarity: <mark style="color:red;">Unknown</mark>

**Snowy Maple Forest**\
A cold forest biome with maple trees and snowy ground.\
Rarity: <mark style="color:blue;">Rare</mark>

**Snowy Shield**\
A frigid biome with icy terrain and sparse vegetation.\
Rarity: <mark style="color:green;">Uncommon</mark>

**Steppe**\
A cold, grassy biome with expansive, open terrain.\
Rarity: Super Common

**Stony Spires**\
A biome with tall, jagged rock formations and minimal vegetation.\
Rarity: <mark style="color:green;">Uncommon</mark>

**Temperate Highlands**\
A temperate biome with rolling hills and diverse plant life.\
Rarity: Super Common

**Tropical Jungle**\
A hot, dense jungle biome with a rich variety of plant and animal life.\
Rarity: Common

**Valley Clearing**\
A flat valley biome with open terrain and scattered vegetation.\
Rarity: Common

**Volcanic Crater**\
A volcanic biome with an active crater, lava flows, and unique flora.\
Rarity: <mark style="color:green;">Uncommon</mark>

**Volcanic Peaks**\
A high-altitude volcanic biome with rugged, lava-scarred terrain.\
Rarity: <mark style="color:green;">Uncommon</mark>

**Warm River**\
A river biome with warm temperatures and lush vegetation along the banks.\
Rarity: Common

**Warped Mesa**\
A desert biome with distorted, colorful rock formations and minimal vegetation.\
Rarity: <mark style="color:blue;">Rare</mark>

**White Cliffs**\
A coastal biome with striking white cliffs and rocky beaches.\
Rarity: <mark style="color:green;">Uncommon</mark>

**White Mesa**\
A desert biome with white sandstone mesas and sparse vegetation.\
Rarity: <mark style="color:green;">Uncommon</mark>

**Windswept Spires**\
A high-altitude biome with towering rock formations and strong winds.\
Rarity: <mark style="color:green;">Uncommon</mark>

**Wintry Forest**\
A cold forest biome with snow-covered trees and a frosty landscape.\
Rarity: Common

**Wintry Lowlands**\
A chilly biome with low, snow-covered terrain and sparse vegetation.\
Rarity: <mark style="color:red;">Unknown</mark>

**Yellowstone**\
A diverse biome with geothermal features and colorful landscapes.\
Rarity: Super Common

**Yosemite Cliffs**\
A dramatic biome with steep, towering cliffs and diverse vegetation.\
Rarity: <mark style="color:green;">Uncommon</mark>

**Yosemite Lowlands**\
A biome with rolling hills and a mix of forest and grassland.\
Rarity: <mark style="color:green;">Uncommon</mark>

</details>

<details>

<summary>Custom Cave Biomes (9)</summary>

**Andesite Caves**\
Caves with walls and floors made primarily of andesite, featuring underground rock formations.\
Rarity: Common

![](https://3522175436-files.gitbook.io/~/files/v0/b/gitbook-x-prod.appspot.com/o/spaces%2FrcgtxEHRbgBRPbt4a4vb%2Fuploads%2FX63NFkRLzhUyXUm9TgLj%2Fimage.png?alt=media\&token=49acda82-e349-46f6-842a-48d906c363e6)

**Desert Caves**\
Caves found in desert regions, with sandy and dry interiors.\
Rarity: <mark style="color:green;">Uncommon</mark>

**Diorite Caves**\
Caves with diorite walls and floors, featuring smooth, light-colored stone.\
Rarity: Common

**Fungal Caves**\
Caves filled with large mushrooms and other fungal growths.\
Rarity: Common

**Granite Caves**\
Caves with granite walls and floors, known for their rough and colorful appearance.\
Rarity: Common

**Ice Caves**\
Cold caves covered in ice and frost, with slippery surfaces and frozen features.\
Rarity: Common

**Infested Caves**\
Caves overrun with cave spiders and cobwebs, creating a hazardous environment.\
Rarity: Common

**Thermal Caves**\
Caves with hot, lava-filled interiors and volcanic features.\
Rarity: <mark style="color:green;">Uncommon</mark>

**Underground Jungle**\
A lush underground biome with dense plant life and hidden features.\
Rarity: <mark style="color:blue;">Rare</mark>

</details>

<details>

<summary>Custom Deep Cave Biomes (5)</summary>

**Crystal Caves**\
Deep caves filled with vibrant crystals and glowing mineral formations.\
Rarity: Common

<img src="https://3522175436-files.gitbook.io/~/files/v0/b/gitbook-x-prod.appspot.com/o/spaces%2FrcgtxEHRbgBRPbt4a4vb%2Fuploads%2FJElEiRNkRwD02XTFkDHS%2Fimage.png?alt=media&amp;token=942964df-c6d6-4ac5-b281-46877f749fbb" alt="" data-size="original">

**Deep Caves**\
Caves located deep underground with various rock types and challenging terrain.\
Rarity: Common

<img src="https://3522175436-files.gitbook.io/~/files/v0/b/gitbook-x-prod.appspot.com/o/spaces%2FrcgtxEHRbgBRPbt4a4vb%2Fuploads%2FebFFDzLYzP6uWHMP4Nxr%2Fimage.png?alt=media&amp;token=bf25ca90-7949-43b8-9bf1-877af7785e0f" alt="" data-size="original">

**Frostfire Caves**\
Caves with a mix of ice and lava, featuring both frozen and fiery elements.\
Rarity: <mark style="color:green;">Uncommon</mark>

![](https://3522175436-files.gitbook.io/~/files/v0/b/gitbook-x-prod.appspot.com/o/spaces%2FrcgtxEHRbgBRPbt4a4vb%2Fuploads%2FqAsdAgklmXqf7S0GTZ5S%2Fimage.png?alt=media\&token=6e549194-a8a7-4093-990e-4cbbb3c45cfb)

**Mantle Caves**\
Caves found in the Earth's mantle with high temperatures and unique mineral formations.\
Rarity: <mark style="color:green;">Uncommon</mark>

![](https://3522175436-files.gitbook.io/~/files/v0/b/gitbook-x-prod.appspot.com/o/spaces%2FrcgtxEHRbgBRPbt4a4vb%2Fuploads%2FuDMKrAcabqmRjFzQDMrn%2Fimage.png?alt=media\&token=9a230a88-579b-4a1d-b7a3-7793a311bf15)

**Tuff Caves**\
Caves with tuff rock formations, featuring rugged and unique underground landscapes.\
Rarity: Common

![](https://3522175436-files.gitbook.io/~/files/v0/b/gitbook-x-prod.appspot.com/o/spaces%2FrcgtxEHRbgBRPbt4a4vb%2Fuploads%2Fx4r1DKyuLtEcrQkzu1lO%2Fimage.png?alt=media\&token=aa5a6dd7-e83a-41b1-990d-62576df04460)

</details>

{% hint style="info" %}
Found a deeper caverns hole through bedrock? Check out the deeper cave biomes [here](/dim/the-underneath#deeper-cave-biomes).
{% endhint %}

***

## Structures

<details>

<summary>Structures (27)</summary>

**Fortified Village**\
A well-defended village with strong walls and multiple buildings.\
Rarity: Common

**Fortified Desert Village**\
A fortified village adapted for desert environments, with protective structures.\
Rarity: Common

**Spire**\
A tall, narrow structure often found in various biomes.\
Rarity: <mark style="color:blue;">Rare</mark>

**Glacial Hut**\
A small, isolated hut found in icy biomes, providing shelter from the cold.\
Rarity: <mark style="color:green;">Uncommon</mark>

**Giant Bee Hive**\
A large hive structure found underground, home to many bees.\
Rarity: <mark style="color:green;">Uncommon</mark>

**Oak Cabin**\
A cozy, small cabin found underground, built from oak.\
Rarity: <mark style="color:green;">Uncommon</mark>

**Mining Outpost**\
An underground outpost for mining operations, with various mining equipment.\
Rarity: <mark style="color:green;">Uncommon</mark>

**Old Refinery**\
A dilapidated refinery found underground, with remnants of old machinery.\
Rarity: <mark style="color:blue;">Rare</mark>

**Sunken Tower**\
A partially submerged tower found underground, often in water-filled caves.\
Rarity: <mark style="color:blue;">Rare</mark>

**Witch Hut**\
An old hut inhabited by a witch, containing magical items and potions.\
Rarity: <mark style="color:blue;">Rare</mark>

**Frosted Dungeon**\
A cold, dungeon-like structure filled with traps and treasures.\
Rarity: <mark style="color:blue;">Rare</mark>

**Mage Tower**\
A grand tower occupied by mages, featuring magical items and enchantments.

* **Mage Tower Spring**\
  A variant of the Mage Tower with spring-themed decorations.\
  Rarity: <mark style="color:blue;">Rare</mark>
* **Mage Tower Summer**\
  A summer-themed variant of the Mage Tower, with vibrant decorations.\
  Rarity: <mark style="color:blue;">Rare</mark>
* **Mage Tower Autumn**\
  An autumn-themed Mage Tower, with seasonal decorations and items.\
  Rarity: <mark style="color:blue;">Rare</mark>
* **Mage Tower Winter**\
  A winter-themed Mage Tower with icy decorations and items.\
  Rarity: <mark style="color:blue;">Rare</mark>

**Mage Complex**\
A large, complex structure for mages with multiple towers and magical features.\
Rarity: <mark style="color:green;">Uncommon</mark>

**Desert Outpost**\
A small outpost in the desert, featuring defensive structures and supplies.\
Rarity: <mark style="color:blue;">Rare</mark>

**Valley Lodge**\
A lodge located in a valley, providing shelter and amenities.\
Rarity: <mark style="color:blue;">Rare</mark>

**Igloo**\
A small, igloo-shaped structure found in cold biomes, providing basic shelter.\
Rarity: <mark style="color:blue;">Rare</mark>

**Rubble Desert**\
A desert structure consisting of rubble and ruins, with scattered artifacts.\
Rarity: <mark style="color:blue;">Rare</mark>

**Rubble Forest**\
A forest structure in ruins, covered with rubble and vegetation.\
Rarity: <mark style="color:blue;">Rare</mark>

**Rubble Jungle**\
A jungle structure in ruins, overgrown with plants and debris.\
Rarity: <mark style="color:blue;">Rare</mark>

**Rubble Mesa**\
A mesa structure in ruins, with scattered rubble and remnants.\
Rarity: <mark style="color:blue;">Rare</mark>

**Rubble Mountain**\
A mountainous structure in ruins, covered with debris and vegetation.\
Rarity: <mark style="color:blue;">Rare</mark>

**Rubble Savannah**\
A savanna structure in ruins, with scattered rubble and dry vegetation.\
Rarity: <mark style="color:blue;">Rare</mark>

</details>

<details>

<summary>Themed Structures (15)</summary>

**Boat**\
A small, simple boat found on bodies of water. It provides some loot.\
Rarity: Common

**Firetower**\
A tall structure. It is typically located in high or open areas.\
Rarity: <mark style="color:green;">Uncommon</mark>

**Jungle Ruin**\
Ancient ruins located in jungle biomes, and has overgrown vegetation and crumbling stone structures. These ruins often contain hidden treasures and artifacts.\
Rarity: <mark style="color:green;">Uncommon</mark>

**Outcast Villager Desert**\
A desert outpost inhabited by outcast villagers. It features makeshift shelters and supplies suited for desert survival.\
Rarity: <mark style="color:green;">Uncommon</mark>

**Outcast Villager Grassy**\
A grassy outpost with a structure inhabited by outcast villagers. It includes makeshift homes and amenities suited for a more temperate environment.\
Rarity: <mark style="color:green;">Uncommon</mark>

**Ruin Grassy**\
Overgrown ruins located in grassy biomes. These ruins are partially reclaimed by nature and may contain remnants of past civilizations.\
Rarity: <mark style="color:green;">Uncommon</mark>

**Northern Ruin**\
Ancient ruins found in northern or cold biomes. These structures are often weathered by harsh climates and may include remnants of past inhabitants.\
Rarity: <mark style="color:green;">Uncommon</mark>

**Swamp Ruin**\
Ruins located in swamp biomes, often submerged or partially covered in water and mud. They feature dilapidated structures surrounded by swamp vegetation.\
Rarity: <mark style="color:green;">Uncommon</mark>

**Taiga Ruin Surface**\
Ruins found on the surface in taiga biomes. These structures are typically made of materials suited for cold environments and are often partially covered in snow or ice.\
Rarity: <mark style="color:green;">Uncommon</mark>

**Taiga Ruin Underground**\
Ruins located underground in taiga biomes. These subterranean structures may be accessed through surface entrances or cave systems.\
Rarity: <mark style="color:green;">Uncommon</mark>

**Abandoned Camp**\
An old, abandoned campsite featuring remnants of past activity such as tents, campfires, and supplies. It reflects a once-active settlement now left in disarray.\
Rarity: Common

**Abandoned Chapel**\
A dilapidated chapel, often found in various biomes, showcasing crumbling walls and remnants of religious artifacts or symbols.\
Rarity: <mark style="color:green;">Uncommon</mark>

**Dense Forest Ruin**\
Ancient ruins located in dense forest biomes, covered in thick vegetation and often difficult to access. These ruins are overgrown and partially hidden.\
Rarity: <mark style="color:green;">Uncommon</mark>

**Graveyard**\
A somber structure found in various biomes, featuring gravestones and tombs. It often contains remains and memorials.\
Rarity: <mark style="color:blue;">Rare</mark>

**Old Manor**\
A large, historic manor found in various biomes, showing signs of age and neglect. It may contain old furniture, hidden rooms, and relics of its past inhabitants.\
Rarity: <mark style="color:blue;">Rare</mark>

</details>

***

## Monster Spawns

<details>

<summary>Ghoul</summary>

Rewarded +0.05 <mark style="color:purple;">stardust</mark>

Power: 8 Health, 2 Damage

Drops:

* Undead Heart
* Ghoul Tissue
* Bone
* Coins

Description: This is an undead monster without a mob crystal. **Ghoul**\
Variants: Undead\
Ghouls are corpses that shamble towards players and attack with a relentless hunger. Their presence can be quite frightening, especially in dark or abandoned places.

Found in: Overworld

Rarity: Common

Class: F

</details>

<details>

<summary>Phantom Whisperer</summary>

Rewarded +0.05 <mark style="color:purple;">stardust</mark>

Power: 7 Health, 3 Damage

Drops:

* <mark style="color:blue;">Strong Soul</mark>
* Pure Soul
* Mob Crystal
* Coins

Description: This is a ghost-type monster with a mob crystal inside that gives it energy to live. Phantom Whisperers are undead archers who attack from a distance with their bows. Their arrows can be dangerous if not avoided.

Found in: Overworld

Rarity: Common

Class: F

</details>

<details>

<summary>Sculk Lurkerer</summary>

Rewarded +0.06 <mark style="color:purple;">stardust</mark>

Power: 12 Health, 3 Damage

Drops:

* Slimy Mucus
* Dark Bone
* Mob Crystal
* Coins

Description: This is an undead monster without a mob crystal. Sculk Lurkerer act alot like a spider.

Found in: Overworld

Rarity: Common

Class: F

</details>

<details>

<summary><strong>Mechanical Abomination</strong></summary>

Mechanicals in Midgard has the ability to silently approach and explode, causing damage to your pets, mounts and animals. Drops Black powder used to create most machines\
Rarity: Common

</details>

**Spider**\
Spiders are aggressive arachnids that can climb walls and are known for their swift attacks. They are often found in dark, secluded areas and can surprise players with their ability to quickly descend from ceilings.\
Rarity: Common

**Enderman**\
Endermen are tall, slender creatures that can teleport and are known for their eerie behavior and ability to pick up blocks. They are highly elusive and can be quite formidable when provoked.\
Rarity: <mark style="color:green;">Uncommon</mark>

**Witch**\
Witches are spell-casters that throw harmful potions and can brew various potions for themselves. They are usually found in dark environments like swamps or caves.\
Rarity: <mark style="color:green;">Uncommon</mark>

**Slime**\
Slimes are gelatinous creatures that bounce around and split into smaller slimes when killed. They are found in swamp biomes and underground in slime chunks.\
Rarity: <mark style="color:green;">Uncommon</mark>

**Magma Cube**\
Magma Cubes are fiery creatures that spawn in Muspelheim but can also appear in certain biomes in Midgard, such as in some conditions or specific events. They bounce and split into smaller cubes when defeated.\
Rarity: <mark style="color:green;">Uncommon</mark>

**Illager**\
Variants: Pillager, Barbarian, Evoker, Vindicators, Pillagers, Ravagers\
Illagers are hostile villagers with various abilities. Evokers can summon vexes and cast spells, Vindicators wield axes, Pillagers use crossbows, and Ravagers are large, powerful beasts often encountered during raids.\
Rarity: <mark style="color:green;">Uncommon</mark> to <mark style="color:blue;">Rare</mark>

**Drowned**\
Drowned are underwater versions of zombies that spawn in oceans or river biomes. They are capable of swimming and attacking players from beneath the water.\
Rarity: Common

**Phantoms**\
Phantoms are flying hostile mobs that spawn in the night sky if a player hasn't slept for several in-game days. They swoop down to attack players and are known for their eerie screeches.\
Rarity: Common

***

## Boss Spawns

#### **Wither (Boss)**

The Wither is a powerful boss mob that is summoned by players using Wither Skeleton skulls and soul sand. It has three heads and attacks with explosive skulls and a withering effect.

Can be summoned anywhere.

#### Empress of Light (Midgard Daylight Variant)

The Empress of Light is a powerful boss that can be summoned in [The Hallow](/dim/the-end#the-hallow) biome. This boss fight is reminiscent of a bullet-hell game, with the Empress using a variety of light-based attacks. The battle is significantly harder during daylight in [Midgard (Overworld)](/dim/overworld/hub-dimension-old), making it a challenging encounter for even seasoned players.

Can be summoned in the [Altar of the Sacred](/dim/the-end#altar-of-the-sacred).

***

## Introduced Mechanics

#### Villagers

{% embed url="<https://www.youtube.com/watch?v=riCCbYFc59E>" %}

#### Villager Whistle

{% embed url="<https://www.youtube.com/watch?v=X_HYSSARDbg>" %}

#### Villager Reviving

{% embed url="<https://www.youtube.com/watch?v=JgKikIrixDQ>" %}


# Orbit

Sub-dimension of Overworld and link to all planets in the space

## Related Links

[#mechanics](#mechanics "mention")

[Space Exploration](/items/tech/space-exploration)

## How to get here

The first thing you need to understand is that survival in space is drastically different from life on Earth. Here’s what you need to know:

#### **1. The Rocket**

* **Essential for Travel:** The Rocket is the most crucial item in space exploration. It allows you to switch between planets and is portable, so you can take it with you wherever you go.

{% hint style="info" %}
Always keep your Rocket handy for easy planet-switching, but remember, it won’t help you survive without proper protective equipment.
{% endhint %}

#### **2. Protective Equipment**

There are three primary ways to survive in the vacuum of space:

**Oxygen Masks and Oxygen Tanks**

* **Oxygen Masks:** Worn as a helmet with infinite durability, but by itself, the mask won’t keep you alive. You’ll need an oxygen tank to go with it.
* **Oxygen Tanks:** Available in three tiers—Light, Medium, and Heavy—each tank holds progressively more oxygen. Keep a tank in your inventory to supply oxygen to your mask.
* **Sustainability:** Oxygen Tanks are not a long-term solution unless you have a Tank Refiller to recharge them.

**Spacesuits**

* **Airtight Enchantment:** This custom enchantment ensures your armor holds pressure in space. You’ll need all four armor pieces (helmet, chestplate, leggings, and boots) enchanted with Airtight to survive.
* **Suit Fabricator:** The easiest way to obtain a fully functional spacesuit. It can create Voyager and Rogue armor sets, which allow for infinite breathing in space with just a few easy-to-find resources.

**Staying for a While: Setting Up a Space Base**

* For longer stays on a planet, you’ll need to set up a base with an energy and oxygen system. Let’s dive into how you can do that.

***

## **Building a Space Base**

If you plan on staying on a planet for an extended period, you’ll need to establish a safe habitat. This involves setting up energy generation, oxygen supply, and other essentials to create a sustainable environment.

#### **1. Power Generation**

* **Solar Panels:** These are your primary source of energy. Solar Panels generate power during the day and store it internally. The stored energy can be used to power various machines.\
  ![](https://3522175436-files.gitbook.io/~/files/v0/b/gitbook-x-prod.appspot.com/o/spaces%2FrcgtxEHRbgBRPbt4a4vb%2Fuploads%2F4jQJtYoOxN2UV4icrN55%2Fimage.png?alt=media\&token=59a89006-0a12-4544-8718-46f98168a2bc)
* **Connection:** To use the energy, connect your Solar Panels to other machines using **Conduits**.\
  ![](https://3522175436-files.gitbook.io/~/files/v0/b/gitbook-x-prod.appspot.com/o/spaces%2FrcgtxEHRbgBRPbt4a4vb%2Fuploads%2FVXNbjFR3asUw1Vbfujng%2Fimage.png?alt=media\&token=10947c49-24cc-4de6-ad51-6d591453ce9b)

#### **2. Oxygen Supply**

* **Oxygen Collector:** This machine gathers oxygen from the surrounding environment, particularly from nearby leaves. It converts power (from your Solar Panels or another power source) into oxygen and stores it within the machine.\
  ![](https://3522175436-files.gitbook.io/~/files/v0/b/gitbook-x-prod.appspot.com/o/spaces%2FrcgtxEHRbgBRPbt4a4vb%2Fuploads%2FvxuOSgKM5PGo7P66felX%2Fimage.png?alt=media\&token=0056acef-81cb-4844-9250-7ac2ea648a31)\ <img src="https://3522175436-files.gitbook.io/~/files/v0/b/gitbook-x-prod.appspot.com/o/spaces%2FrcgtxEHRbgBRPbt4a4vb%2Fuploads%2FTeHRzKQ8cDJa7gZeOGNl%2Fimage.png?alt=media&amp;token=43991213-fc98-4bb7-b8ca-12af6c0448ee" alt="" data-size="original">
* **Oxygen Bubble Distributor:** This machine uses the collected oxygen to create a breathable bubble around your base. It also requires energy to operate.\
  ![](https://3522175436-files.gitbook.io/~/files/v0/b/gitbook-x-prod.appspot.com/o/spaces%2FrcgtxEHRbgBRPbt4a4vb%2Fuploads%2FHGHCmSNhZhCjBI8GWQVy%2Fimage.png?alt=media\&token=d5d850a1-98e6-4d75-a9d7-d2b75fe6d212)

#### **3. Conduits and Connections**

* **Conduits:** These are essential for transferring energy, oxygen, and coolant between machines. Connecting a Solar Panel to your Oxygen Collector and then to the Oxygen Bubble Distributor ensures a steady supply of oxygen in your base.

#### **4. Setting Up Your Base**

* **Step 1:** Place your Solar Panels in a sunny area to generate power.
* **Step 2:** Use Conduits to connect the Solar Panels to the Oxygen Collector.
* **Step 3:** Connect the Oxygen Collector to the Oxygen Bubble Distributor using more Conduits.
* **Step 4:** Ensure your base is within the oxygen bubble created by the Oxygen Bubble Distributor to stay safe and breathe easily.

***

## Resources

<details>

<summary>Lead Ingot</summary>

Mine Requirement: Netherite Tier Pickaxe or higher

Drops: Mythril Ingot

Main Crafts: Mythril Pickaxe

Rarity: <mark style="color:blue;">Rare</mark>

</details>

***

## Biomes

#### Mythril Ore

Rarity: Rare

***

## Structures

#### Mythril Ore

Rarity: Rare

***

## Mob Spawns

#### Mythril Ore

Rarity: Rare

***

## Mechanics

#### Void Fishing

s


# Oort Cloud

Discussed if this should be removed or revamped. (added in b0.114)

Dimensions/planets/dwarf-planets/moons found here include:

The Sun (uninhabitable)

Mercury (Tier 3 Rocket)

Venus (Tier 3 Rocket)

Earth (Overworld, Aluminum Rocket)

The Moon (Aluminum Rocket)

Mars (Tier 2 Rocket)

Asteroids (4)

Jupiter

Enceladus

Titan

Saturn

Uranus

Neptune

Ceres

Pluto


# Spaceport


# Marax


# Pacifica


# Cyberia


# Ancient Civilization

The Ancient Civilization sub dimension of Orbit is the new world of those who died out in The Wastelands. That is why their infrastructure is alike.


# The Middle Lands

Sub-dimension of The Overworld. A sense of disorientation and unease.

## How to get here

A liminal, surreal dimension accessed by using a "Hardsten Destroyer" to get to a "White Hole Structure" found below Hardsten in the Overworld.

***

## Resources

<details>

<summary>Liminal Resources</summary>

Unique "Liminal Resources" with unpredictable properties.

</details>

<details>

<summary>Unknown Ore</summary>

Mine Requirement: Netherite Pickaxe or higher

Drops: Unknown

Main Crafts: Unknown Ingot

Rarity: <mark style="color:red;">???</mark>

</details>

***

## Void Biomes

#### Unease Plains

Rarity: Rare

***

## Structures

#### A Weird, non-Euclidean Structure

Rarity: Rare

***

## Mob Spawns

#### Strange Entity

Rarity: Rare


# Backrooms (Secret)


# The Far Lands

Sub-dimension of The Overworld. A sense of disorientation and unease.

## How to get here

Kill Herobrine.

***

## Resources

<details>

<summary>Far Resources</summary>

Unique "Liminal Resources" with unpredictable properties.

</details>

<details>

<summary>Unknown Ore</summary>

Mine Requirement: Netherite Pickaxe or higher

Drops: Unknown

Main Crafts: Unknown Ingot

Rarity: <mark style="color:red;">???</mark>

</details>

***

## Void Biomes

#### Unease Plains

Rarity: Rare

***

## Structures

#### A Weird, non-Euclidean Structure

Rarity: Rare

***

## Mob Spawns

#### Strange Entity

Rarity: Rare


# The Underneath

Sub-dimension of The Overworld. Also referred to as The Afterdark.

{% hint style="info" %} <code class="expression">"Page is outdated for " + space.vars.VERSION + " (" + space.vars.LAST + ")"</code>
{% endhint %}

## How to get here

* A vast, interconnected cave system located between the Overworld and the Nether, accessed by using a "Hardsten Destroyer" on a "Dark Hole Structure" found below Hardsten in the Overworld.
* Can be accessed through the ancient portal? Or was that the abyss?

Upcoming Features:

* Seven new challenging bosses, like the Bee Queen.
* New minerals and ores unique to the depths.
* Diverse cave biomes with unique mobs.
* Large, sprawling cave structures

***

## Resources

***

## Deeper Cave Biomes
<details>

<summary>Custom Deeper Cave Biomes  (14)</summary>

* **Amethyst Hollow:**
  * Description: A vast, echoing cavern filled with glowing amethyst clusters. Crystal formations line the walls, emitting a soft, ethereal light.
  * Found Here: Abundant amethyst ore, rare crystal shards, unique amethyst-infused mobs, and hidden chambers containing magical artifacts.
* **Andesite Mines:**
  * Description: A network of deep tunnels carved through dense andesite rock.
  * Found Here: Rich deposits of andesite, veins of rare minerals embedded within the andesite, hardy burrowing creatures, and abandoned mining equipment from past expeditions.
* **Coral Coves:**
  * Description: Subterranean pools of bioluminescent water, filled with strange, cave-adapted coral formations.
  * Found Here: Unique aquatic mobs, rare aquatic resources, glowing coral fragments, and hidden underwater passages.
* **Diorite Mines:**
  * Description: Similar to the Andesite Mines, but made of diorite.
  * Found here: large amounts of diorite, rare gems, and unique creatures that use the white stone as camouflage.
* **Frozen Caverns:**
  * Description: Icy caverns where frost crystals cling to the walls, and frozen streams cut through the rock.
  * Found Here: Ice-based resources, frozen mobs, rare ice-infused minerals, and hidden ice caves containing valuable treasures.
* **Fungal Undergrowth:**
  * Description: Dark, damp caverns filled with bioluminescent fungi, creating a surreal, glowing environment.
  * Found Here: Unique fungal resources, rare glowing mushrooms, fungal-based mobs, and hidden fungal colonies with valuable spores.
* **Granite Mines:**
  * Description: Similar to the andesite and diorite mines, but made of granite.
  * Found here: large amounts of granite, rare ores, and creatures that have adapted to the hard stone.
* **Honey Grotto:**
  * Description: a cavern that contains large amounts of honey, and unique cave bees.
  * Found here: large honey deposits, cave bees that make unique honey, and honeycomb structures.
* **Marble Mines:**
  * Description: a cavern that contains large ammounts of marble.
  * Found here: Large deposits of marble, rare minerals that are found in marble, and creatures that use the white stone for camouflage.
* **Molten Passages:**
  * Description: Tunnels filled with flowing lava and volcanic rock, creating a dangerous and fiery environment.
  * Found Here: Fire-resistant mobs, rare volcanic resources, lava pools containing valuable ores, and ancient lava-forged structures.
* **Overgrown Dugout:**
  * Description: A cave that has been over taken by plant life.
  * Found here: Unique plant life, rare seeds, and creatures that live in the plants.
* **Sandy Chambers:**
  * Description: Caverns filled with fine, shifting sands, creating a desert-like environment within the depths.
  * Found Here: Unique desert-adapted mobs, rare sand-based resources, hidden chambers beneath the sands, and ancient sand-worn artifacts.
* **Subterranean Mesa:**
  * Description: A large, flat-topped rock formation within the caverns, creating a unique elevated environment.
  * Found Here: Rare resources found on the mesa's surface, unique mesa-dwelling mobs, and ancient mesa-top structures.
* **Terracotta Caves:**
  * Description: Caves made of many different colors of terracotta.
  * Found here: Large amounts of terracotta, rare clay based materials, and creatures that use the colorful walls as camouflage.

</details>

***

## Structures

<details>

<summary>A Hollow Puddle</summary>

Rarity: <mark style="color:purple;">Epic</mark>

</details>

<details>

<summary>Bee Nest</summary>

Often spawns in the Honey Grotto biome. Sometimes houses a Queen Bee boss!

Rarity: <mark style="color:purple;">Epic</mark>

</details>

<details>

<summary>Lava Pits</summary>

</details>

***

## Mob Spawns

<details>

<summary></summary>

</details>


# Nether: Incendium

The realm of fire and chaos (also referred to as The Nether) is home to the fire beasts and a land of constant warfare.

## Resources

<details>

<summary>Ancient Debris (Netherite)</summary>

Mine Requirement: Diamond Tier Pickaxe or higher

Drops: Ancient Debris

Main Crafts: Netherite Pickaxe

Rarity: <mark style="color:blue;">Rare</mark>

</details>

<details>

<summary>Block of Raw Ruby</summary>

Mine Requirement: Netherite Tier Pickaxe or higher

Drops: Ruby

Main Crafts: Ruby Bar

Rarity: <mark style="color:purple;">Epic</mark>

</details>

<details>

<summary>Ignetto Alloy</summary>

Obtained from: Combining Nether mobs' drops

Main Crafts: Ruby Bar

Rarity: <mark style="color:purple;">Epic</mark>

</details>

<details>

<summary>Vanilla Ores Info</summary>

ColdMC's Vanilla ore distribution in the Nether

Lower levels has higher chances of Ancient Debris

Lower levels also has more molten scoria and also a higher chance of Block of Raw Ruby

</details>

***

## Biomes (Incendium)

<details>

<summary>Ash Barrens</summary>

The Ash Barrens is a desolate, barren landscape characterized by its dark, ashy terrain. The ground is mostly composed of blackened ash blocks, with sparse vegetation that has been charred by the intense heat of the biome. The sky is often hazy with drifting ash particles, creating an eerie, apocalyptic atmosphere. Structures found in this biome may include remnants of ancient civilizations, now reduced to ruins by the unforgiving environment. Hostile mobs such as Blazes and Magma Cubes are common here, thriving in the hot, dry conditions.

![](https://3522175436-files.gitbook.io/~/files/v0/b/gitbook-x-prod.appspot.com/o/spaces%2FrcgtxEHRbgBRPbt4a4vb%2Fuploads%2Fz8sVysOkT96oYGHtyUpd%2Fimage.png?alt=media\&token=481a5dd4-7d17-45d4-8f47-2ea7f6f97c68)

</details>

<details>

<summary>Infernal Dunes</summary>

The Infernal Dunes biome is a vast, fiery desert dominated by rolling dunes of red-hot sand and scorched earth. The landscape is punctuated by large, smoking craters and pools of bubbling lava, making it a treacherous area to navigate. The intense heat causes the air to shimmer, distorting the landscape in the distance. Structures such as abandoned outposts and small fortresses can be found here, often partially buried in the sand. The biome is home to mobs like Ghasts and Piglins, who patrol the dunes, making it a dangerous place for unprepared adventurers.

![](https://3522175436-files.gitbook.io/~/files/v0/b/gitbook-x-prod.appspot.com/o/spaces%2FrcgtxEHRbgBRPbt4a4vb%2Fuploads%2F1Pm3XBVZnR8Bjod5g1qv%2Fimage.png?alt=media\&token=66b7d710-3954-48ab-a024-62698f68829b)

</details>

<details>

<summary>Inverted Forest</summary>

The Inverted Forest is a bizarre and twisted biome where gravity seems to play tricks on the landscape. Trees grow upside down, with their roots exposed to the sky, and the ground is covered in dense, shadowy foliage. The air is thick with an unnatural mist, and the light levels are lower than in other biomes, creating a sense of perpetual twilight. Structures within this biome may include upside-down temples and strange, floating islands. Hostile mobs such as Phantoms and Endermen are prevalent, adding to the unsettling atmosphere of the forest.

![](https://3522175436-files.gitbook.io/~/files/v0/b/gitbook-x-prod.appspot.com/o/spaces%2FrcgtxEHRbgBRPbt4a4vb%2Fuploads%2FlEuMGjpysKYx84Se8PLw%2Fimage.png?alt=media\&token=99ebd0b0-1a8d-46ea-b777-de900b03ea46)

</details>

<details>

<summary>Quartz Flats</summary>

Quartz Flats is a stark, gleaming biome composed primarily of quartz blocks, creating a blindingly bright landscape. The ground is smooth and reflective, with large crystals of quartz jutting out from the surface. The biome is largely devoid of vegetation, with only a few hardy, crystalline plants managing to survive in the harsh conditions. Structures in this biome might include ancient, quartz-built temples or monolithic pillars. Mobs are relatively rare, but you may encounter Striders and the occasional Blaze, drawn to the biome's heat.

![](https://3522175436-files.gitbook.io/~/files/v0/b/gitbook-x-prod.appspot.com/o/spaces%2FrcgtxEHRbgBRPbt4a4vb%2Fuploads%2FNRYep4n1pOpEBkkWMqeY%2Fimage.png?alt=media\&token=b8b90371-461a-42b3-9b03-fabf3bf71d73)

</details>

<details>

<summary>Toxic Heap</summary>

The Toxic Heap biome is a wasteland of poisonous sludge and decaying organic matter. The ground is covered in a thick layer of toxic waste, which bubbles and hisses when disturbed. The air is filled with noxious fumes, making it difficult to breathe without proper protection. Dead trees and mutated plants dot the landscape, their forms twisted by the toxic environment. Structures like ruined factories and abandoned labs can be found, hinting at the industrial disaster that created the biome. Hostile mobs include Slimes and Wither Skeletons, which thrive in the poisonous atmosphere.

![](https://3522175436-files.gitbook.io/~/files/v0/b/gitbook-x-prod.appspot.com/o/spaces%2FrcgtxEHRbgBRPbt4a4vb%2Fuploads%2F62wvEHCBuMe5WXwGhawD%2Fimage.png?alt=media\&token=0a4e433c-aad0-42b6-90bc-abcad199bebb)

</details>

<details>

<summary>Volcanic Deltas</summary>

Volcanic Deltas is a dynamic and dangerous biome filled with active volcanoes and rivers of flowing lava. The ground is composed of basalt and blackstone, with frequent eruptions sending plumes of ash and molten rock into the air. The landscape is rugged and treacherous, with steep cliffs and deep chasms that can easily catch unwary travelers off guard. Structures such as magma-covered fortresses and ancient ruins are scattered throughout the biome. Mobs like Magma Cubes and Blazes are common, taking advantage of the intense heat and volatile environment.

![](https://3522175436-files.gitbook.io/~/files/v0/b/gitbook-x-prod.appspot.com/o/spaces%2FrcgtxEHRbgBRPbt4a4vb%2Fuploads%2FpQj50ND72Mot5BYXMd2b%2Fimage.png?alt=media\&token=27a938e3-482e-47ef-80e9-7b9daa62c5c7)

</details>

<details>

<summary>Weeping Valley</summary>

The Weeping Valley is a somber and sorrowful biome, characterized by its perpetually overcast sky and constant rainfall. The ground is saturated with water, creating muddy terrain and shallow pools. Weeping Willows and other melancholic trees line the valley, their branches drooping towards the ground as if in mourning. Structures like abandoned villages and decaying mansions can be found, adding to the overall feeling of desolation. Hostile mobs such as Witches and Zombies are common, lurking in the shadows and preying on unsuspecting travelers.

![](https://3522175436-files.gitbook.io/~/files/v0/b/gitbook-x-prod.appspot.com/o/spaces%2FrcgtxEHRbgBRPbt4a4vb%2Fuploads%2FaiLFv9yDOZQ23AcPkmUH%2Fimage.png?alt=media\&token=86a50ed6-71bf-4748-a204-ef510e7784bc)

</details>

<details>

<summary>Withered Forest</summary>

The Withered Forest is a dead and decaying biome, where once-thriving trees have been reduced to withered husks. The ground is littered with dead leaves and the skeletal remains of trees, creating a bleak and lifeless environment. The air is dry and filled with the scent of decay, and the sky is often darkened by thick clouds. Structures such as crumbling towers and ruined castles can be found, remnants of a civilization long gone. Hostile mobs like Wither Skeletons and Phantoms are prevalent, making this biome especially dangerous for explorers.

![](https://3522175436-files.gitbook.io/~/files/v0/b/gitbook-x-prod.appspot.com/o/spaces%2FrcgtxEHRbgBRPbt4a4vb%2Fuploads%2FNgSESedJFz7yKhsf1681%2Fimage.png?alt=media\&token=0eeab463-313f-4e87-b489-4dd397f88f6c)

</details>

***

## Structures

<details>

<summary>Forbidden Castle</summary>

The Forbidden castle is an ominous, randomly generated structure, considered to be the most challenging of Muspelheim because of the well-trained Piglins inhabiting the place. Those Piglins are capable of everything to protect their territory and more importantly, their precious loot and weapons. The Forbidden castle is generated in a logical but random way, with fortified walls and towers protecting the fort you can enter through an entrance and court, but all possible pieces of the castle cannot spawn at the same time, meaning some rooms and the loot that comes with it might be missing from one Forbidden castle to another.

![](https://3522175436-files.gitbook.io/~/files/v0/b/gitbook-x-prod.appspot.com/o/spaces%2FrcgtxEHRbgBRPbt4a4vb%2Fuploads%2FNLtPOXJt5AuwhDN5UCXu%2Fimage.png?alt=media\&token=3bde5525-e3fa-4df8-b60f-214f7b4ae916)

![](https://3522175436-files.gitbook.io/~/files/v0/b/gitbook-x-prod.appspot.com/o/spaces%2FrcgtxEHRbgBRPbt4a4vb%2Fuploads%2FPvogqZYiwHAuPUW3ZUq3%2Fimage.png?alt=media\&token=1f17a91d-0ca8-4d97-bc87-a1849dff04d1)

</details>

<details>

<summary>Sanctum</summary>

The Sanctum is a structure that lies within the Quartz flats biome. Resembling a church made out of Quartz, inhabited by Illagers that found their way into the Nether, it is suspected that they built this church over a Bastion they destroyed, and that secrets lie within the basement of this massive building. When getting close to the structure, the curse of the place will prevent you from mining blocks, leaving you no option than to fight your way through

![](https://3522175436-files.gitbook.io/~/files/v0/b/gitbook-x-prod.appspot.com/o/spaces%2FrcgtxEHRbgBRPbt4a4vb%2Fuploads%2FMrm66PIyiK1K4YaZ5Evn%2Fimage.png?alt=media\&token=37d38aa2-8c57-4513-976d-d8e023d64cc4)

### Layout

The Sanctum is the biggest non-randomly generated structure in Muspelheim and can be hard to explore, but it can be divided into three parts.

![](https://3522175436-files.gitbook.io/~/files/v0/b/gitbook-x-prod.appspot.com/o/spaces%2FrcgtxEHRbgBRPbt4a4vb%2Fuploads%2FnaXEqKWovvsklBg5lEGb%2Fimage.png?alt=media\&token=5fc5d1e0-097b-400e-bb73-d1f6f2cdd569)

#### Main floor

Like a church, you enter the main floor through a narthex with two stairs leading to the first two towers. A path of redstone dust, or blood, near the entrance leads to the middle of the first right tower. A passage above the entrance connects the first floors of the first left and right towers. You can then enter the nave and aisle, leading straight to the sanctuary, where you will find a lectern and an altar with, on the sides, a way inside the two other towers. This main floor is filled with Illagers and even [Illusioners](https://minecraft.wiki/w/Illusioners), a mob still unused in Vanilla Minecraft.

[![Entrance of the Sanctum](https://static.miraheze.org/stardustlabswiki/thumb/3/3a/2022-03-04_23.18.50.png/120px-2022-03-04_23.18.50.png)](https://stardustlabs.miraheze.org/wiki/File:2022-03-04_23.18.50.png)\
Entrance of the Sanctum

[![Above of the entrance](https://static.miraheze.org/stardustlabswiki/thumb/1/17/Sanctum_round_window_room.jpg/120px-Sanctum_round_window_room.jpg)](https://stardustlabs.miraheze.org/wiki/File:Sanctum_round_window_room.jpg)\
Above of the entrance

[![Main Hall inside the Sanctum](https://static.miraheze.org/stardustlabswiki/thumb/8/80/Sanctum_MainHall.png/120px-Sanctum_MainHall.png)](https://stardustlabs.miraheze.org/wiki/File:Sanctum_MainHall.png)\
Main Hall inside the Sanctum

[![](https://static.miraheze.org/stardustlabswiki/thumb/f/fa/2022-03-04_23.17.56.png/120px-2022-03-04_23.17.56.png)](https://stardustlabs.miraheze.org/wiki/File:2022-03-04_23.17.56.png)

**First left tower**

The first left tower appears to be the common rooms for the Illagers inhabiting the Sanctum, with loots and furniture on the first two floors and a common bedroom on the 3rd one. The last one being kept for one of the four giant bells of Sanctum. The redstone dust, or blood, path also seem to start at the first floor of that tower.

[![](https://static.miraheze.org/stardustlabswiki/thumb/b/bb/Sanctum_First_left_tower_first_floor.png/120px-Sanctum_First_left_tower_first_floor.png)](https://stardustlabs.miraheze.org/wiki/File:Sanctum_First_left_tower_first_floor.png)[![](https://static.miraheze.org/stardustlabswiki/thumb/1/1b/2022-03-04_23.18.35.png/120px-2022-03-04_23.18.35.png)](https://stardustlabs.miraheze.org/wiki/File:2022-03-04_23.18.35.png)[![](https://static.miraheze.org/stardustlabswiki/thumb/2/2e/Sanctum_First_left_tower_second_floor.png/120px-Sanctum_First_left_tower_second_floor.png)](https://stardustlabs.miraheze.org/wiki/File:Sanctum_First_left_tower_second_floor.png)[![](https://static.miraheze.org/stardustlabswiki/thumb/6/65/Sanctum_First_left_tower_third_floor.png/120px-Sanctum_First_left_tower_third_floor.png)](https://stardustlabs.miraheze.org/wiki/File:Sanctum_First_left_tower_third_floor.png) [![](https://static.miraheze.org/stardustlabswiki/thumb/b/b5/Sanctum_First_left_tower_fourth_floor.png/120px-Sanctum_First_left_tower_fourth_floor.png)](https://stardustlabs.miraheze.org/wiki/File:Sanctum_First_left_tower_fourth_floor.png)[![](https://static.miraheze.org/stardustlabswiki/thumb/2/2f/2022-03-04_23.19.45.png/120px-2022-03-04_23.19.45.png)](https://stardustlabs.miraheze.org/wiki/File:2022-03-04_23.19.45.png)

**First right tower**

The first right tower first three floors are a decorated inside garden, in the middle of a staircase with a chandelier coming down from the 3rd floor ceiling. At the middle of that garden is a hidden stairway, noticeable by following the redstone dust, or blood, trail, leading down to the basement of the Sanctum. The topmost floor of that tower houses the second giant bell of the Sanctum.

[![](https://static.miraheze.org/stardustlabswiki/thumb/7/7c/Sanctum_first_right_tower_fourth_floor.png/120px-Sanctum_first_right_tower_fourth_floor.png)](https://stardustlabs.miraheze.org/wiki/File:Sanctum_first_right_tower_fourth_floor.png)

**Second left tower**

The second left tower floors appears to be working a working area, with cauldrons full of water to wash clothing on the first floor, then on the floors above, bookshelves with chairs and desks to read and write. The last two floors seems to be restricted since one of the four bells of the Sanctum has crashed through the fifth floor.

[![](https://static.miraheze.org/stardustlabswiki/thumb/5/5e/Sanctum_second_left_tower_ground_floor.png/120px-Sanctum_second_left_tower_ground_floor.png)](https://stardustlabs.miraheze.org/wiki/File:Sanctum_second_left_tower_ground_floor.png)[![](https://static.miraheze.org/stardustlabswiki/thumb/0/00/Sanctum_second_left_tower_fifth_floor.png/120px-Sanctum_second_left_tower_fifth_floor.png)](https://stardustlabs.miraheze.org/wiki/File:Sanctum_second_left_tower_fifth_floor.png)

**Second right tower**

The second right tower, like the second left tower, seems to be made for working purposes, with a kitchen at its base then, on the floors above storage, furniture, and workstations, before reaching the last of the four giant bells of the Sanctum.

[![](https://static.miraheze.org/stardustlabswiki/thumb/0/07/Sanctum_second_right_tower_ground_floor.png/120px-Sanctum_second_right_tower_ground_floor.png)](https://stardustlabs.miraheze.org/wiki/File:Sanctum_second_right_tower_ground_floor.png)[![](https://static.miraheze.org/stardustlabswiki/thumb/2/22/Sanctum_second_right_tower_fourth_floor.png/120px-Sanctum_second_right_tower_fourth_floor.png)](https://stardustlabs.miraheze.org/wiki/File:Sanctum_second_right_tower_fourth_floor.png)

#### Basement

The basement of the Sanctum is well-hidden, accessible through a hidden stairway in the first right tower, that leads through a set of galleries built withing the ruin of what is suspected to have been a Bastion.

**War table room**

The first room found upon descending the hidden staircase appears to be a meeting room with what seems to be a war table in the middle of it. This room also has multiple wooden coffins, workstations and other furniture lying around, which is logical considering the fact that it's a crossroads to other major parts of the Sanctum's basement.

[![](https://static.miraheze.org/stardustlabswiki/thumb/2/27/Sanctum_Basement_Wartable.png/120px-Sanctum_Basement_Wartable.png)](https://stardustlabs.miraheze.org/wiki/File:Sanctum_Basement_Wartable.png)

**Daybreaker maze**

The Daybreaker maze can be entered by turning right at the bottom of the hidden staircase. A secret entrance can be found inside of it, alongside loot, including the Daybreaker.

When breaking the item frame holding the Daybreaker, the floor of the whole maze will collapse and fall into lava.

[![](https://static.miraheze.org/stardustlabswiki/thumb/1/16/Sanctum_Basement_Daybreaker_Maze_Entrance.png/120px-Sanctum_Basement_Daybreaker_Maze_Entrance.png)](https://stardustlabs.miraheze.org/wiki/File:Sanctum_Basement_Daybreaker_Maze_Entrance.png)

**Coffins storage room**

Going left at the bottom of the hidden staircase through the war table room will lead you to a large corridor located right under the Sanctum's entrance. Apart from wooden coffins in the back, the room appears pretty empty.

When entering the room, a trap will activate, locking you in and starting a clock shooting fireballs through the whole corridor.

[![](https://static.miraheze.org/stardustlabswiki/thumb/6/6c/Sanctum_Basement_Coffin_Storage_Room.png/120px-Sanctum_Basement_Coffin_Storage_Room.png)](https://stardustlabs.miraheze.org/wiki/File:Sanctum_Basement_Coffin_Storage_Room.png)

**Storage maze**

Continuing through the coffins storage room will lead you to a maze with a storage room in the middle of it. The maze is booby trapped in multiple spots and multiple Sanctum ravagers roam inside of it, making it more difficult to fight your way through it than navigate it.

[![](https://static.miraheze.org/stardustlabswiki/thumb/1/12/Sanctum_Basement_Storage_Maze.png/120px-Sanctum_Basement_Storage_Maze.png)](https://stardustlabs.miraheze.org/wiki/File:Sanctum_Basement_Storage_Maze.png)

**Torture room**

A torture room can be found at the end of the storage maze, containing multiple torture devices and cells.

**Withered tree hub**

Going straight at the bottom of the hidden staircases through the war table room leads you into a hub connecting other majors rooms of that floor together. That hub is built around a lava pit with a withered tree in the middle of it. The bottom of the Withered Tree Hub is also the way to access the Crypt through piston doors, if you bring fire resistance potions and jump into the lava you will be able to swim over too the piston door that has buttons on the walls next to it apon pressing these you will be able to swim through the lava into the Crypt.

[![](https://static.miraheze.org/stardustlabswiki/thumb/3/37/Sanctum_Basement_Withered_Tree_Hub.png/120px-Sanctum_Basement_Withered_Tree_Hub.png)](https://stardustlabs.miraheze.org/wiki/File:Sanctum_Basement_Withered_Tree_Hub.png)

**Overworld resources storage**

Taking a left in the hub leads into a room filled with resources from the Overworld, wood, live chickens and ores.

[![](https://static.miraheze.org/stardustlabswiki/thumb/e/e9/Sanctum_Basement_Overworld_Resource_Storage.png/120px-Sanctum_Basement_Overworld_Resource_Storage.png)](https://stardustlabs.miraheze.org/wiki/File:Sanctum_Basement_Overworld_Resource_Storage.png)

**Portal room**

Connected to the storage room next to it, this room hosts a lit Nether portal leading back to the Overworld, where Illagers in the Sanctum go back to when they are out of provisions. It is unknown if that portal was the one they used to enter the Nether in the first place.

[![](https://static.miraheze.org/stardustlabswiki/thumb/7/7b/Sanctum_Basement_Portal_Room.png/120px-Sanctum_Basement_Portal_Room.png)](https://stardustlabs.miraheze.org/wiki/File:Sanctum_Basement_Portal_Room.png)

**Hidden altar room**

Going forward through the hub will lead you to a quartz-walled corridor, continuing forward through that corridor will lead to a room located right under the Sanctuary of the main floor. In the middle of that room is another altar shaped almost like a coffin.

[![](https://static.miraheze.org/stardustlabswiki/thumb/1/1b/Hidden_Altar_1.png/120px-Hidden_Altar_1.png)](https://stardustlabs.miraheze.org/wiki/File:Hidden_Altar_1.png)

#### Mausoleum

After going forward in the withered tree hub and taking a left down another flight of stairs, you will enter the mausoleum. Despite appearing as luxurious at first glance, this last floor hides many secrets, traps, and treasures.

**Exposition area**

At the bottom of the stairs is a large corridor turning left leading to multiple rooms with exhibited artworks and riches.

[![](https://static.miraheze.org/stardustlabswiki/thumb/b/b5/Sanctum_Crypt_unknown_1_PyroZero.png/120px-Sanctum_Crypt_unknown_1_PyroZero.png)](https://stardustlabs.miraheze.org/wiki/File:Sanctum_Crypt_unknown_1_PyroZero.png)

**Biome murals section**

The first right turn in that corridors leads to a section with two rooms with murals representing all the Helheim biomes, between those two rooms is a corridor filled with terracotta pots.

**Plants collection**

Going straight through that section leads to a room with multiple plants from the Nether and Overworld

**Wither statue**

At the other end of that section's corridor is a room with a broken down Wither sculpture

**Infinite corridor**

Back to the large corridor, taking a left then a right and another left will lead you into a room with a pressure plate connected to a dispenser. Activating it drops an item of low value, and appears to have made the corridor you entered infinite.

**Hidden poppies garden**

Hidden behind a painting at the back of the large corridor is an indoor garden full of poppies. There is no apparent reason for that many poppies to be there, much less hidden behind a painting

**Hidden crypt**

The hidden crypt is the secret part of the mausoleum, accessible through a piston door at the end of the exposition area main corridor then through the lava pit then another hidden piston door upfront. The lava pit can also be accessed through a tunnel built to fill the pit or by directly dropping from the withered tree hub

**Maze**

The hidden crypt of the mausoleum is mostly composed of a maze filled with cobwebs and random loot and materials scattered around, although some areas steps out.

**Storage room**

At the center of the maze is a storage room with two shelves on each side with a total of 7 barrels. Each barrel appears with one random potion with a random effect inside of it. There is a minuscule chance that instead of a random potion effect, the [Death potion](https://stardustlabs.miraheze.org/wiki/Death_potion) is found, which applies all the existing negative effects of Minecraft all at once.

[![](https://static.miraheze.org/stardustlabswiki/thumb/0/05/Storage_Room.png/120px-Storage_Room.png)](https://stardustlabs.miraheze.org/wiki/File:Storage_Room.png)

**Mage room**

A room with a lectern, an enchanting table and multiple bookshelves can be found further down the maze.

[![](https://static.miraheze.org/stardustlabswiki/thumb/4/4b/Mage_Room.png/120px-Mage_Room.png)](https://stardustlabs.miraheze.org/wiki/File:Mage_Room.png)

**Left turns corridors**

One part of the maze consists of 5 successive left turn dead ends, the last one having a barrel containing the Ragnarok bow.

[![](https://static.miraheze.org/stardustlabswiki/thumb/3/32/Ragnarok_location.png/120px-Ragnarok_location.png)](https://stardustlabs.miraheze.org/wiki/File:Ragnarok_location.png?filetimestamp=20220413232227&)

**Vault entrance**

The end of the maze leads to a locked vault. 3 item frames with spectral arrows can found on both sides of that room, hinting how to open the vault.

[![](https://static.miraheze.org/stardustlabswiki/thumb/2/28/Sanctum_Crypt_Vault_Entrance_12_PyroZero.png/120px-Sanctum_Crypt_Vault_Entrance_12_PyroZero.png)](https://stardustlabs.miraheze.org/wiki/File:Sanctum_Crypt_Vault_Entrance_12_PyroZero.png)

**Vault**

The vault is the last room at the Sanctum. Killing the 3 Sanctum guardians inside of it will give you a chance to obtain their Holy wrath crossbows and will get rid of the mining fatigue curse.

[![](https://static.miraheze.org/stardustlabswiki/thumb/6/62/Sanctum_Crypt_Vault_Room_13_PyroZero.png/120px-Sanctum_Crypt_Vault_Room_13_PyroZero.png)](https://stardustlabs.miraheze.org/wiki/File:Sanctum_Crypt_Vault_Room_13_PyroZero.png)<br>

</details>

<details>

<summary>Infernal Altar</summary>

The Infernal altar is a mysterious dome-shaped blazing structure with its interior representing all the existing biomes of Muspelheim that can be found in the Infernal dunes. At the center of the structure, you can find a book with a faded out text, indicating the process to summon the Hovering Inferno, the final boss of Muspelheim.

![](https://3522175436-files.gitbook.io/~/files/v0/b/gitbook-x-prod.appspot.com/o/spaces%2FrcgtxEHRbgBRPbt4a4vb%2Fuploads%2FGxFxFZnAqvwhyK3cNWRD%2Fimage.png?alt=media\&token=b21076fb-41e2-490e-b82a-d4d34ef64468)

</details>

<details>

<summary>Ruined Lab</summary>

The Ruined lab is a circle-shaped structure with a glass dome roof inhabited by buffed Wither skeletons, also called Withered scientists. Those Withered scientists seem to be holding some Piglins hostage to do experiments on them and try to develop new weapons against the Piglins. At the center of the structure, we can find the remains of what might be a Wither cage mixed and or a Basalt generator.

![](https://3522175436-files.gitbook.io/~/files/v0/b/gitbook-x-prod.appspot.com/o/spaces%2FrcgtxEHRbgBRPbt4a4vb%2Fuploads%2FQ0PiWiYpY6DSDd1vUsJZ%2Fimage.png?alt=media\&token=07e338c7-912e-49cb-a426-db944f8f16de)

![](https://3522175436-files.gitbook.io/~/files/v0/b/gitbook-x-prod.appspot.com/o/spaces%2FrcgtxEHRbgBRPbt4a4vb%2Fuploads%2FYI8PZmwqpPx3fQilXSFn%2Fimage.png?alt=media\&token=0b862051-b6e5-448f-ba9a-2e1a5ebb2869)

</details>

<details>

<summary>Nether Reactor</summary>

The Nether reactor is a structure before called Power plant shaped like a nuclear chimney, with some control rooms on its side, it is believed that this structure was used by Wither skeletons to create powerful weapons against the Piglins. Although it is now inactive, it is still inhabited by the Radiation director and the Reactor sentry, they might be guarding some powerful tools...

Biomes: Basalt deltas, Toxic heap, Volcanic deltas

![](https://3522175436-files.gitbook.io/~/files/v0/b/gitbook-x-prod.appspot.com/o/spaces%2FrcgtxEHRbgBRPbt4a4vb%2Fuploads%2FyCjkPgPcHWJcI6tvBhZK%2Fimage.png?alt=media\&token=5e990c6c-ec38-4866-a806-a6f97c09ca43)

![](https://3522175436-files.gitbook.io/~/files/v0/b/gitbook-x-prod.appspot.com/o/spaces%2FrcgtxEHRbgBRPbt4a4vb%2Fuploads%2FEZ1U7K9HhC8vYxwm4eMG%2Fimage.png?alt=media\&token=16cea5ae-ae0d-4956-8c3b-3d0ea70b8699)

</details>

<details>

<summary>Abandoned Tower</summary>

The Abandoned tower is a structure group looking like a village placed around a tower at its center filled with skeletons defending its loot. Atop the centermost tower awaits a caged Ghastling. However, watch out for the traps they planted for you.

Biomes: Quartz Flats

![](https://3522175436-files.gitbook.io/~/files/v0/b/gitbook-x-prod.appspot.com/o/spaces%2FrcgtxEHRbgBRPbt4a4vb%2Fuploads%2FRCpoePTnU9HbSP59PSHC%2Fimage.png?alt=media\&token=234a1eb8-9e39-467d-ad0a-170770496736)

</details>

<details>

<summary>Quartz Kitchen</summary>

The Quartz kitchen is a restaurant run by Torte and his crew of Skeleton brothers. It has a kitchen and dining area, a garden and some storage rooms. Surely a restaurant in such a place holds some secrets...

Biomes: Quartz Flats

![](https://3522175436-files.gitbook.io/~/files/v0/b/gitbook-x-prod.appspot.com/o/spaces%2FrcgtxEHRbgBRPbt4a4vb%2Fuploads%2FYhtoyXElWnAVVMBiB3Ds%2Fimage.png?alt=media\&token=c9da184e-f9de-4f2c-8136-fdf806b85352)

</details>

<details>

<summary>Piglin Village</summary>

The Piglin village is a randomly generated custom village full of passive Piglin villagers. It is a great place to rest and gather some resources while exploring Muspelheim.

Biomes: Crimson Forest

![](https://3522175436-files.gitbook.io/~/files/v0/b/gitbook-x-prod.appspot.com/o/spaces%2FrcgtxEHRbgBRPbt4a4vb%2Fuploads%2F5DqPSLwA7XGutNdWaYcP%2Fimage.png?alt=media\&token=6ae34e9d-a08e-4458-9abb-afe4ba2b7d7f)

</details>

<details>

<summary>Pipelines</summary>

The Pipelines are abandoned, randomly generated structures, filled with Sentries, still defending the place. The purpose and makers of those structures is still unknown.

Biomes: Basalt deltas, Infernal dunes, Toxic heap

![](https://3522175436-files.gitbook.io/~/files/v0/b/gitbook-x-prod.appspot.com/o/spaces%2FrcgtxEHRbgBRPbt4a4vb%2Fuploads%2FRJy5Btk9osHCqjQAnn0d%2Fimage.png?alt=media\&token=c9715d1c-1d75-4435-bc34-c2bf2ed5da74)

</details>

***

## Mob Spawns

#### Mythril Ore

Rarity: Rare

Hovering Inferno


# Hell

Sub-dimension of Nether

## How to get here

A fiery, infernal dimension located below the Nether, accessed by finding a structure made of Eldsten and using a "Eldsten Destroyer" to get to a "Dark Hole" found below the Eldsten.

***

## Resources

<details>

<summary>Hellfire</summary>

Mine Requirement: Eldsten Pickaxe or higher

Drops: Hellfire

Main Crafts: Hellfire Bar and Infernal materials

Rarity: <mark style="color:yellow;">Legendary</mark>

</details>

***

## Hell Biomes

#### Hell Plains

Rarity: Rare

***

## Structures

#### Structures reflecting the circles of Hell

Rarity: Rare

***

## Mob Spawns

#### Demonic mobs with powerful abilities

Rarity: Rare

***

## Bosses

#### Satan

Twelve new bosses, each representing a circle of Hell.


# Nether Mechanics


# Lava Fishing


# Page


# The End

The realm of the dead (also referred to as The End) is a gloomy and eerie dimension filled with old evolved undead creatures and ancient secrets.

## Resources

<details>

<summary>Iridium Ore</summary>

Mine Requirement: Netherite Pickaxe or higher

Drops: Iridium Shard

Main Crafts: Iridium Crystal

Rarity: <mark style="color:purple;">Epic</mark>

</details>

<details>

<summary>Uranium Ore</summary>

Mine Requirement: Netherite Tier Pickaxe/Drill or higher

Drops: Uranium Debris

Main Crafts: Uranium

Rarity: <mark style="color:purple;">Epic</mark>

</details>

***

## Biomes

#### The Hallow

This biome is a magical, colorful area where the water has transmutative properties, allowing you to change items into different forms, sometimes even reversing the process. It’s a vibrant, mystical place with a significant gameplay impact.

Rarity: <mark style="color:blue;">Rare</mark>

#### Ender Wastes

These biomes maintain the barren, desolate feel of the vanilla End, providing a stark contrast to some of the more vibrant areas introduced by the mod. They offer a more challenging and harsh environment.

Rarity: Common

#### Dragon's Den

This is a complete overhaul of the main island where the Ender Dragon fight takes place. The Dragon's Den is more visually interesting and complex than the vanilla End island, though its primary purpose remains as an arena for the Ender Dragon battle.

Rarity: <mark style="color:green;">Uncommon</mark>

#### Frosted Hills

?

Rarity: <mark style="color:green;">Uncommon</mark>

#### Amethyst Forest

A magical biome filled with vivid colors and a wide block palette, all using blocks found in the base game. The Amethyst Forest is a bright, enchanting area, offering a mystical experience within the End.

Rarity: <mark style="color:green;">Uncommon</mark>

#### Prismarine Forest

This biome is unique in its design and material palette, including Prismarine blocks, which are normally associated with ocean monuments. It adds a fresh and aquatic-like aesthetic to the End.

Rarity: <mark style="color:green;">Uncommon</mark>

#### Ashfall Deltas

A barren, volcanic-like biome that stands in stark contrast to the more lively and colorful areas in the mod. It represents the harsher, more unforgiving side of the End.

Rarity: <mark style="color:green;">Uncommon</mark>

***

## Structures

#### **Stronghold**

These are large fortresses built by Illagers around the End Portals. They are heavily guarded and designed to fend off anyone attempting to access Helheim. This biome significantly enhances the challenge of reaching Helheim, turning the journey into a more formidable task.

Rarity: <mark style="color:green;">Uncommon</mark>

#### **Altar of the Accursed**

The Altar of the Accursed is a dark, foreboding structure used for performing rituals involving dark magic. These rituals can include unbinding enchantments, transferring them to unenchanted books, or crafting cursed items with unique properties. The altar is a focal point for players looking to delve into the darker aspects of magic within the Helheim dimension, offering powerful but risky benefits. The rituals performed here often come at a cost, whether in materials or in-game consequences, making the altar a tool for those willing to pay the price for power.

Rarity: Common

[Read more about the recipes and how it is used here](/items/stations/lategame-altars/altar-of-the-accursed).

#### **End Cities**

Found within the Ender Wastes, End Cities have been entirely reworked, adding new challenges and valuable loot. Players are unable to place or break blocks within the End City until all Protective Crystals atop the towers are destroyed. Additionally, Shulkers have been upgraded with different colored variants, each offering unique challenges. There is an elytra located in the ship here.

Rarity: <mark style="color:green;">Uncommon</mark>

#### **End Dungeons**

End Dungeons are treacherous underground structures filled with traps, powerful mobs, and rare loot. These dungeons add an extra layer of challenge to the Helheim dimension, requiring players to navigate through dangerous corridors and rooms while facing off against enhanced enemies. The loot found in these dungeons is often valuable.

Rarity: <mark style="color:green;">Uncommon</mark>

#### **End Village**

These villages are peaceful settlements found within the End dimension, inhabited by a mysterious race of beings who have adapted to the harsh environment of the End. The villages are well-defended and offer various services and trades to players, similar to Villagers in Midgard. They provide a rare oasis of safety within the otherwise dangerous and desolate End.

Rarity: <mark style="color:blue;">Rare</mark>

<figure><img src="https://3522175436-files.gitbook.io/~/files/v0/b/gitbook-x-prod.appspot.com/o/spaces%2FrcgtxEHRbgBRPbt4a4vb%2Fuploads%2FpBq5OAe45pbA97iwAPw1%2Fimage.png?alt=media&amp;token=3fe494fa-fcd4-42ff-a81e-3460df406ae7" alt=""><figcaption></figcaption></figure>

#### **The Chapel of Light**

Found within The Hallow, this area allows players to summon the Empress of Light, a new boss that offers a challenging, bullet-hell style fight. This encounter becomes even more difficult if fought in daylight in [Midgard (Overworld)](/dim/overworld/hub-dimension-old) or [Vanaheim (The Grove)](/dim/the-garden).

Rarity: <mark style="color:blue;">Rare</mark>

#### **Altar of the Sacred**

The Altar of the Sacred generates directly in the middle of the Chapel of Light. It can be mined with a diamond pickaxe or stronger. Altar of the Sacred is an altar that can be moved anywhere, is used to summon Empress of Light, and to trade in materials for effects.

Rarity: <mark style="color:blue;">Rare</mark>

[Read more about the recipes and how it is used here](/items/stations/lategame-altars/altar-of-the-sacred).

***

## Monster Spawns

#### Enderman

Rarity: Common

#### Harbringer

Spawns throughout the whole dimension of Helheim and is an evolved variant of the Enderman.

Rarity: <mark style="color:green;">Uncommon</mark>

#### Daedalus

Spawns throughout the whole dimension of Helheim and is an ancient knight creature.

Rarity: <mark style="color:green;">Uncommon</mark>

#### Light Bender

Spawns throughout the whole dimension of Helheim and is a formidable magical ancient creature.

Rarity: <mark style="color:blue;">Rare</mark>

#### **Pixies**

Pixies are small, magical creatures that can be found in certain enchanted biomes, like The Hallow. They are typically non-hostile but can have various interactions with the player, such as providing buffs or guiding them to hidden treasures.

Rarity: <mark style="color:blue;">Rare</mark>

#### **Gloops**

Gloops are slime-like creatures that exist in Helheim. They can be challenging to fight due to their tendency to split into smaller versions when damaged, similar to Slimes in Midgard. However, Gloops have unique properties and drops.

Rarity: <mark style="color:blue;">Rare</mark>

#### **Buffed Shulkers**

Shulkers in Stellarity have received significant upgrades. There are different variants of Shulkers, each with distinct abilities and appearances, making the challenge of exploring End Cities and other structures even greater.

Rarity: <mark style="color:blue;">Rare</mark>

#### **Wraiths**

These spectral beings are found in dark, ominous biomes like the Shadowgrove. Wraiths are hostile mobs that can pass through walls and deal substantial damage, making them formidable opponents. They often guard valuable treasures or rare resources.

Rarity: <mark style="color:blue;">Rare</mark>

***

## Boss Spawns

#### Ender Dragon (Boss)

Can be summoned in the [Dragon's Den](#dragons-den).

#### Empress of Light (Boss)

The Empress of Light is a powerful boss that can be summoned in [The Hallow](#the-hallow) biome. This boss fight is reminiscent of a bullet-hell game, with the Empress using a variety of light-based attacks. The battle is significantly harder during daylight in [Midgard (Overworld)](/dim/overworld/hub-dimension-old), making it a challenging encounter for even seasoned players.

Can be summoned in the [Altar of the Sacred](#altar-of-the-sacred).

***

## Introduced Mechanics

<details>

<summary><img src="https://3522175436-files.gitbook.io/~/files/v0/b/gitbook-x-prod.appspot.com/o/spaces%2FrcgtxEHRbgBRPbt4a4vb%2Fuploads%2Fn0DJvwqOw4fB7MpocToF%2Fimage.png?alt=media&amp;token=ec8953f7-5753-473a-8cde-44b8de556665" alt="" data-size="line"> Void Fishing</summary>

<img src="https://3522175436-files.gitbook.io/~/files/v0/b/gitbook-x-prod.appspot.com/o/spaces%2FrcgtxEHRbgBRPbt4a4vb%2Fuploads%2FM5bPYbpq5ERFZb5ZcBL2%2Fimage.png?alt=media&amp;token=77537a22-bf2b-4939-8257-7780a59b29a7" alt="" data-size="original">

</details>

<details>

<summary><img src="https://3522175436-files.gitbook.io/~/files/v0/b/gitbook-x-prod.appspot.com/o/spaces%2FrcgtxEHRbgBRPbt4a4vb%2Fuploads%2F64Pd7zN3B3m6DkKNf4s9%2Fimage.png?alt=media&amp;token=f151a699-d176-46e5-a617-4c81e254f9fc" alt="" data-size="line"> Consecration</summary>

**Consecration** is a mechanic that allows you to change items into different ones, by dropping them into **Shimmer**, or the water in The Hallowed.

### [Permanent buffs](/items/consumables/permanent-buffs) <a href="#permanent-buffs" id="permanent-buffs"></a>

* Golden Carrot -> [Lucky Carrot](/items/consumables/permanent-buffs#lucky-carrot)
* Poisonous Potato -> Cleansing Potato
* Rabbit Stew -> Endurance Stew
* Beetroot -> Rageroot
* Sweet Berries -> Fury Berries
* Chorus Fruit -> Energizing Fruit
* Enchanted Golden Apple -> Miracle Fruit
  * Learn more about these Here

### Conversions <a href="#conversions" id="conversions"></a>

Transumations usually work both ways, or loop at some point

* Any Leaves -> Cherry Leaves
* Any Log/Stripped Log/Wood/Stripped Wood -> Cherry equivalent
* Wither Rose -> Poppy
* Dead Bush -> Pink Petals
* Turtle Egg -> Scute
* Apple -> Chorus Fruit (needs to be thrown in again to turn it into Chaos Fruit)
* Ink Sac <-> Glow Ink Sac
* Brick <-> Nether Brick
* Lapis Lazuli -> Quartz
* Quartz -> Redstone
* Redstone -> Lapis Lazuli
* Slime Block <-> Honey Block
* Torch <-> Soul Torch
* Lantern <-> Soul Lantern
* Campfire <-> Soul Campfire
* Glowstone <-> Shroomlight
* Iron Block -> Hallowed Ingot (1 : 2 conversion ratio)
* Iron Armor -> Chainmal Armor
* Music Disc 5 -> Music Disc Relic
* Coal <-> Charcoal
* Calibrated Sculk Sensor -> Sculk Sensor
* Azalea <-> Flowering Azalea
* Sand <-> Red Sand (also applies to Sandstone and its variants)
* Obsidian <-> Crying Obsidian
* Music Disc 13 <-> Music Disc Cat
* Clock <-> Compass
* Magma Cream <-> Blaze Powder
* Nether Gold Ore <-> Gilded Blackstone
* Chorus Flower -> Spore Blossom
* Pumpkin <-> Melon

Note that all conversions (unless stated) follow a 1 : 1 conversion ratio, meaning the number of outcome items is the same as number of input items.

### Tips <a href="#tips" id="tips"></a>

* Remember that this exists.

</details>


# Clans of Tear

The inter-dimensional travelers that is a clan having multiple sources of operation traveling to try to find and map all the dimensions nearby the Earth realm

magical portals, hidden passages (like closets, mirrors, rabbit holes), powerful spells, or special artifacts, but it can also be achieved through altered states like dreams/lucid dreaming, exploring natural 'thin spots' in reality, or even manipulating the very fabric of space through 'tessering'.

Loading zones. Think of in a videogame where you enter an area that isn't loaded yet, but as the new area loads, the place you came from disappears. It could be hidden with fog, smoke, darkness, or something else, but there is the idea that the world just forms around you.

Blink. You are just suddenly there. Like one frame of animation you are at one place, then the next frame you are somewhere completely different.

Dreams. You don't retreat into your mind when you dream, but into another world. Could your dream self find their way to your "real body" and interact with it?

They get a swing set (maybe it's a magical pendulum device or something if you want to go fancy with it) and they rock themselves higher and higher. Once they get enough momentum to swing all the way over the top of the frame, they do a dimension flip, where the ascending part of the arc they're in dimension 1, at the pinnacle they swap over and the descending part of the arc then takes place on a linked swing in dimension 2.

The poor people of my universe travel through dimensions by going through the metaphorical garbage dump dimension

i.e. the universe's version of hell. Since the garbage dump is the only link that connects all worlds to each other, it is the only method known to anyone capable of planar hopping, even the gods.

Not a pleasant experience. Can also easily drive anyone insane, since the 'dump' has no concrete concept of space, time, or tangibility in general.


# End Mechanics


# Void Fishing


# Page


# Mythical Lands

The secret realm of the elves, a legendary realm of eternal twilight and ethereal beauty. It’s a place of powerful boosted magic, where players can find magical items.

## Trivia

Also referred to as, Alfheim, Heartland of Mythos, Wilderlands of Mythos, Dawnlands, Luminary Expanse, Elysium Veridian, Aethelgard, Celestia Terra.

## Resources

<details>

<summary>Leaf</summary>

Mine Requirement: Netherite Tier Pickaxe or higher

Drops: Mythril Ingot

Main Crafts: Mythril Pickaxe

Rarity: Common

</details>

<details>

<summary>Wood Basis</summary>

Main Crafts: Advanced crafts

Rarity: Common

</details>

<details>

<summary>Stone Basis</summary>

Mine Requirement: Pickaxe

Main Crafts: Advanced crafts

Rarity: Common

</details>

<details>

<summary>Crystal</summary>

Mine Requirement: Pickaxe

Main Crafts: Advanced crafts

Rarity: <mark style="color:blue;">Rare</mark>

</details>

***

## Biomes

#### Mythril Ore

Rarity: Rare

***

## Structures

#### Mythril Ore

Rarity: Rare

***

## Mob Spawns

#### Mythril Ore

Rarity: Rare


# The Void

An independent sub-dimension of The End

## How to get here

*Where does all void fish come from? From the Void obviously.* You can get here by Void Fishing up "The Null" and defeating it will give you a Null Cell which you can craft a Void Token to teleport into the void.

By going too close to the bottom bedrock layer during a bloodmoon, the bedrock becomes unstable and noclips you into the Void Dimension (Not the empty void)

You can alternatively craft a void token early-game by crafting Dark Essence from True Black.

You can also get here by a small chance when sleeping in the overworld and experiencing a "Nightmare Event".

## Resources

<details>

<summary>Nightmare Ore</summary>

Mine Requirement: Netherite Pickaxe or higher

Drops: Nightmare Fuel

Main Crafts: Nightmare Bar

Rarity: <mark style="color:yellow;">Legendary</mark>

</details>

***

## Void Biomes

#### Void

Rarity: Rare

***

## Structures

#### A T0w3r

Rarity: Rare

***

## Mob Spawns

#### Void Creature

Rarity: Rare


# The Abyss

Sub-dimension of The Garden

## How to get here

*Do not sleep in the garden, you will regret it.* By sleeping in the garden during the abyss event, you will be sent to the Abyss.&#x20;

You can also get here by opening up an Ancient Portal in the Deep Dark.

***

## Resources

<details>

<summary>Exo Stone</summary>

Mine Requirement: Netherite Pickaxe or higher

Drops: Exo Stone

Main Crafts: Exo Gear

Rarity: <mark style="color:yellow;">Legendary</mark>

</details>

<details>

<summary>Chlorophyte Ore</summary>

Mine Requirement: Netherite Pickaxe or higher

Drops: Chlorophyte

Main Crafts: Chlorophyte Ingot

Rarity: <mark style="color:yellow;">Legendary</mark>

</details>

***

## Biomes

#### Mythril Ore

Rarity: Rare

***

## Structures

#### Mythril Ore

Rarity: Rare

***

## Mob Spawns

#### Mythril Ore

Rarity: Rare


# The Garden

A lush and verdant realm, The Garden is the hidden lands of nature spirits and ancient wisdom. Here, players can harvest powerful herbs and encounter mystical creatures.

## How to get here

The Azure Bluet ritual is made with 4 candles surrounded by azure bluets. If activated a magic pig will apear. When interacted with, it will transform into a runic travel stone which will send you to The Garden.

{% hint style="info" %}
BETA FEATURE, WILL NOT REQUIRE EMPRESS' PRISMATIC PEARL!
{% endhint %}

***

## Introduced Resources

<details>

<summary>Ruby Ore</summary>

Mine Requirement: Netherite Pickaxe or higher

Drops: Ruby

Main Crafts: Ruby Bar

Rarity: <mark style="color:purple;">Epic</mark>

</details>

<details>

<summary>Chlorophyte Ore</summary>

Mine Requirement: Netherite Pickaxe or higher

Drops: Chlorophyte

Main Crafts: Chlorophyte Ingot

Rarity: <mark style="color:yellow;">Legendary</mark>

</details>

## Known Resources

<details>

<summary>Mythril Ore</summary>

Mine Requirement: Netherite Tier Pickaxe or higher

Drops: Mythril Ingot

Main Crafts: Mythril Pickaxe

Rarity: Common

</details>

<details>

<summary>Orichalcum Ore</summary>

Mine Requirement: Netherite Tier Pickaxe or higher

Drops: Orichalcum Ingot

Main Crafts: Orichalcum Pickaxe

Rarity: Common

</details>

<details>

<summary>Titanium Ore</summary>

Mine Requirement: Netherite Tier Pickaxe or higher

Drops: Titanium Ingot

Main Crafts: Titanium Pickaxe

Rarity: <mark style="color:blue;">Rare</mark>

</details>

<details>

<summary><img src="https://3522175436-files.gitbook.io/~/files/v0/b/gitbook-x-prod.appspot.com/o/spaces%2FrcgtxEHRbgBRPbt4a4vb%2Fuploads%2FEnsS1k5IMQXfXdIFyrvD%2Fdiamond.png?alt=media&amp;token=a5bd81c7-e718-4a75-bb8b-bc591fc18256" alt="" data-size="line"> Vanilla Ores Info</summary>

ColdMC's Vanilla ore distribution

<img src="https://3522175436-files.gitbook.io/~/files/v0/b/gitbook-x-prod.appspot.com/o/spaces%2FrcgtxEHRbgBRPbt4a4vb%2Fuploads%2FnVojViRHmIxSiFWZFApp%2F1-18-ore-distribution.jpeg?alt=media&amp;token=23955e66-b300-41bf-8b50-e18e551f1c4e" alt="" data-size="original">

</details>

***

## Biomes

<details>

<summary>Evergreen Forest</summary>

</details>

***

## Structures

<details>

<summary>The Maze</summary>

KUR\_ROT boss

Mimics

</details>

***

## Mob Spawns

#### Mythril Ore

Rarity: Rare


# The Aether Highlands

A realm of divine light and power, The Aether is home to the gods and the seat of immense magical energy. Expect to find divine materials, world items and face celestial beings.

## Resources

<details>

<summary>Aetherium</summary>

Mine Requirement: Netherite Pickaxe or higher

Drops: Aetherium Essence

Main Crafts: Aeralyte (alloy)

Rarity: <mark style="color:yellow;">Legendary</mark>

</details>

<details>

<summary>Platinum Ore</summary>

Mine Requirement: Netherite Pickaxe or higher

Drops: Platinum

Main Crafts: Platinum Ingot

Rarity: <mark style="color:yellow;">Legendary</mark>

</details>

***

## Biomes

#### Mythril Ore

Rarity: Rare

***

## Structures

#### Mythril Ore

Rarity: Rare

***

## Mob Spawns

#### Mythril Ore

Rarity: Rare


# Wastelands

A dark and fiery dimension that is ruled by volcanic activity and molten lava. Players who brave its dangers can discover legendary treasures and materials for mixing electricity with magic. SETH

## Introduced Resources

<details>

<summary>Dragonite Ore</summary>

Mine Requirement: Netherite Pickaxe or higher

Drops: Dragonite

Main Crafts: Dragonite Bar

Rarity: <mark style="color:purple;">Epic</mark>

</details>

<details>

<summary>Amber Ore</summary>

Mine Requirement: Netherite Pickaxe or higher

Drops: Amber

Main Crafts: Amber Ingot

Rarity: <mark style="color:yellow;">Legendary</mark>

</details>

<details>

<summary>Solarite Nugget</summary>

Obtained from: Solar mobs

Main Crafts: Solarite Ingot

Rarity: <mark style="color:purple;">Epic</mark>

</details>

<details>

<summary>Rusted Iron</summary>

Obtained from: Iron exposed to the air of the waste.

Rarity: <mark style="color:purple;">Epic</mark>

</details>

## Known Resources

<details>

<summary>Titanium Ore</summary>

Mine Requirement: Netherite Tier Pickaxe or higher

Drops: Titanium Ingot

Main Crafts: Titanium Pickaxe

Rarity: Common

</details>

<details>

<summary><img src="https://3522175436-files.gitbook.io/~/files/v0/b/gitbook-x-prod.appspot.com/o/spaces%2FrcgtxEHRbgBRPbt4a4vb%2Fuploads%2FEnsS1k5IMQXfXdIFyrvD%2Fdiamond.png?alt=media&amp;token=a5bd81c7-e718-4a75-bb8b-bc591fc18256" alt="" data-size="line"> Vanilla Ores Info</summary>

ColdMC's Vanilla ore distribution

<img src="https://3522175436-files.gitbook.io/~/files/v0/b/gitbook-x-prod.appspot.com/o/spaces%2FrcgtxEHRbgBRPbt4a4vb%2Fuploads%2FnVojViRHmIxSiFWZFApp%2F1-18-ore-distribution.jpeg?alt=media&amp;token=23955e66-b300-41bf-8b50-e18e551f1c4e" alt="" data-size="original">

</details>

***

## Biomes

#### Mythril Ore

Rarity: Rare

***

## Structures

#### Mythril Ore

Rarity: Rare

***

## Mob Spawns

#### Mythril Ore

Rarity: Rare


# Land of Quaoar

A cold land, filled with valuable resources for money. The first prismatic ore can be found here. Eternal Frost

## Introduced Resources

<details>

<summary>Platinum Ore</summary>

Mine Requirement: Netherite Pickaxe or higher

Drops: Platinum

Main Crafts: Platinum Ingot

Rarity: <mark style="color:yellow;">Legendary</mark>

</details>

<details>

<summary>Apoithakarah Ore</summary>

Mine Requirement: Netherite Pickaxe or higher

Drops: Apoithakarah

Main Crafts: Not known by public

Rarity: <mark style="color:red;">Fabled</mark>

</details>

## Known Resources

<details>

<summary>Mythril Ore</summary>

Mine Requirement: Netherite Tier Pickaxe or higher

Drops: Mythril Ingot

Main Crafts: Aeralyte (alloy)

Rarity: Common

</details>

<details>

<summary><img src="https://3522175436-files.gitbook.io/~/files/v0/b/gitbook-x-prod.appspot.com/o/spaces%2FrcgtxEHRbgBRPbt4a4vb%2Fuploads%2FEnsS1k5IMQXfXdIFyrvD%2Fdiamond.png?alt=media&amp;token=a5bd81c7-e718-4a75-bb8b-bc591fc18256" alt="" data-size="line"> Vanilla Ores Info</summary>

ColdMC's Vanilla ore distribution

<img src="https://3522175436-files.gitbook.io/~/files/v0/b/gitbook-x-prod.appspot.com/o/spaces%2FrcgtxEHRbgBRPbt4a4vb%2Fuploads%2FnVojViRHmIxSiFWZFApp%2F1-18-ore-distribution.jpeg?alt=media&amp;token=23955e66-b300-41bf-8b50-e18e551f1c4e" alt="" data-size="original">

</details>

***

## Biomes

#### Mythril Ore

Rarity: Rare

***

## Structures

#### Mythril Ore

Rarity: Rare

***

## Mob Spawns

#### Mythril Ore

Rarity: Rare


# Lands of Collosi

A big and mountainous land, the domain of giants. It’s a dangerous dimension filled with powerful monsters, but also rich in the most valuable resources.

## Introduced Resources

<details>

<summary>Adamantite Ore</summary>

Mine Requirement: Netherite Pickaxe or higher

Drops: Adamantite Rocks

Main Crafts: Legendary Alloys

Rarity: <mark style="color:yellow;">Legendary</mark>

</details>

<details>

<summary>Atlarus Ore</summary>

Mine Requirement: Netherite Pickaxe or higher

Drops: Platinum

Main Crafts: Platinum Ingot

Rarity: <mark style="color:yellow;">Legendary</mark>

</details>

<details>

<summary>Palladium Ore</summary>

Mine Requirement: Netherite Pickaxe or higher

Drops: Palladium

Main Crafts: Magic Circuits

Rarity: <mark style="color:yellow;">Legendary</mark>

</details>

## Known Resources

<details>

<summary>Orichalcum Ore</summary>

Mine Requirement: Netherite Tier Pickaxe or higher

Drops: Orichalcum Ingot

Main Crafts: Drakeshine (alloy)

Rarity: Common

</details>

<details>

<summary><img src="https://3522175436-files.gitbook.io/~/files/v0/b/gitbook-x-prod.appspot.com/o/spaces%2FrcgtxEHRbgBRPbt4a4vb%2Fuploads%2FEnsS1k5IMQXfXdIFyrvD%2Fdiamond.png?alt=media&amp;token=a5bd81c7-e718-4a75-bb8b-bc591fc18256" alt="" data-size="line"> Vanilla Ores Info</summary>

ColdMC's Vanilla ore distribution

<img src="https://3522175436-files.gitbook.io/~/files/v0/b/gitbook-x-prod.appspot.com/o/spaces%2FrcgtxEHRbgBRPbt4a4vb%2Fuploads%2FnVojViRHmIxSiFWZFApp%2F1-18-ore-distribution.jpeg?alt=media&amp;token=23955e66-b300-41bf-8b50-e18e551f1c4e" alt="" data-size="original">

</details>

***

## Biomes

#### Hydraxi Mountains

Rarity: Common

***

## Structures

#### Dark Hole Structure

Rarity: Rare

***

## Mob Spawns

#### Tall Moving Tree Entity

Rarity: Rare


# Depths of Collosi

The underground realm of the dwarves filled with magic, Svartalfheim is a labyrinth of mines and forges. Here, players can find mythical or fabled metals and craft the most powerful weapons and armor.

## Introduced Resources

<details>

<summary>Unknown</summary>

Mine Requirement: Netherite Pickaxe or higher

Drops: Unknown Nugget

Main Crafts: Unknown Ingot

Rarity: <mark style="color:red;">Mythical</mark>

</details>

<details>

<summary>Celestial Uranium Ore</summary>

Mine Requirement: Netherite Pickaxe or higher

Drops: Celestial Uranium

Main Crafts: Not known by public

Rarity: <mark style="color:red;">Fabled</mark>

</details>

<details>

<summary>Scarletite Ore</summary>

Mine Requirement: Netherite Pickaxe or higher

Drops: Scarletite

Main Crafts: Not known by public

Rarity: <mark style="color:red;">Fabled</mark>

</details>

## Known Resources

<details>

<summary>Mythril Ore</summary>

Mine Requirement: Netherite Tier Pickaxe or higher

Drops: Mythril Ingot

Main Crafts: Mythril Pickaxe

Rarity: <mark style="color:purple;">Epic</mark>

</details>

<details>

<summary>Orichalcum Ore</summary>

Mine Requirement: Netherite Tier Pickaxe or higher

Drops: Orichalcum Ingot

Main Crafts: Orichalcum Pickaxe

Rarity: <mark style="color:purple;">Epic</mark>

</details>

<details>

<summary>Titanium Ore</summary>

Mine Requirement: Netherite Tier Pickaxe or higher

Drops: Titanium Ingot

Main Crafts: Titanium Pickaxe

Rarity: <mark style="color:purple;">Epic</mark>

</details>

<details>

<summary>Ancient Debris (Netherite)</summary>

Mine Requirement: Diamond Tier Pickaxe or higher

Drops: Ancient Debris

Main Crafts: Netherite Pickaxe

Rarity: <mark style="color:purple;">Epic</mark>

</details>

<details>

<summary>Ruby Ore</summary>

Mine Requirement: Netherite Pickaxe or higher

Drops: Ruby

Main Crafts: Ruby Bar

Rarity: <mark style="color:purple;">Epic</mark>

</details>

<details>

<summary>Chlorophyte Ore</summary>

Mine Requirement: Netherite Pickaxe or higher

Drops: Chlorophyte

Main Crafts: Chlorophyte Ingot

Rarity: <mark style="color:purple;">Epic</mark>

</details>

<details>

<summary>Dragonite Ore</summary>

Mine Requirement: Netherite Pickaxe or higher

Drops: Dragonite

Main Crafts: Dragonite Bar

Rarity: <mark style="color:purple;">Epic</mark>

</details>

<details>

<summary>Amber Ore</summary>

Mine Requirement: Netherite Pickaxe or higher

Drops: Amber

Main Crafts: Amber Ingot

Rarity: <mark style="color:purple;">Epic</mark>

</details>

<details>

<summary>Platinum Ore</summary>

Mine Requirement: Netherite Pickaxe or higher

Drops: Platinum

Main Crafts: Platinum Ingot

Rarity: <mark style="color:purple;">Epic</mark>

</details>

<details>

<summary>Apoithakarah Ore</summary>

Mine Requirement: Netherite Pickaxe or higher

Drops: Apoithakarah

Main Crafts: Not known by public

Rarity: <mark style="color:red;">Fabled</mark>

</details>

<details>

<summary><img src="https://3522175436-files.gitbook.io/~/files/v0/b/gitbook-x-prod.appspot.com/o/spaces%2FrcgtxEHRbgBRPbt4a4vb%2Fuploads%2FEnsS1k5IMQXfXdIFyrvD%2Fdiamond.png?alt=media&amp;token=a5bd81c7-e718-4a75-bb8b-bc591fc18256" alt="" data-size="line"> Vanilla Ores Info</summary>

ColdMC's Vanilla ore distribution

<img src="https://3522175436-files.gitbook.io/~/files/v0/b/gitbook-x-prod.appspot.com/o/spaces%2FrcgtxEHRbgBRPbt4a4vb%2Fuploads%2FnVojViRHmIxSiFWZFApp%2F1-18-ore-distribution.jpeg?alt=media&amp;token=23955e66-b300-41bf-8b50-e18e551f1c4e" alt="" data-size="original">

</details>

***

## Biomes

#### Substratum

Rarity: Rare

***

## Structures

#### Not a normal structure

Rarity: Rare

***

## Mob Spawns

#### Spittle

Rarity: Rare


# Stations

What is Crafting Stations and how to use them?

## Information

The Stations in ColdMC is specialized crafting tables, smelters, forges, or something else entirely, that allows players to create more powerful and complex items beyond the vanilla crafting table.&#x20;

* **Advanced Items:** Players can craft advanced items like more powerful weapons, armor, and tools that offer an enhanced ability or stats.
* **Special Materials:** The station supports the use of materials that are not available in regular Minecraft, making it essential for creating the most potent gear in the game.
* **Enhanced Crafting:** The crafting grid in the Advanced Crafting Station have no slots which allow for more complex recipes compared to the standard crafting table.

**How to use:**

1. Access the Station through the crafted block (see the [Advanced Crafting Table recipe](/items/stations/crafting-table#advanced-crafting-station))
2. Gather the required materials for the item you want to craft
3. Click to craft the item to start the crafting process, then after the product is finished, you can claim the item by clicking it in the queue.

***

## Pre-Advanced Stations

{% content-ref url="/pages/B8du6THhfGQ9i8QbTOoN" %}
[Crafting Table](/items/stations/crafting-table)
{% endcontent-ref %}

{% content-ref url="/pages/SbBm9TWbZr5ZJik8OzKM" %}
[Advanced Crafting Station](/items/stations/early-stations/advanced-crafting-station)
{% endcontent-ref %}

{% content-ref url="/pages/3TGKjHI598GS9eneBaYz" %}
[Infinite Smelting Station](/items/stations/early-stations/infinite-smelting-station)
{% endcontent-ref %}

{% content-ref url="/pages/fzACNquUEEM58QsjUzVA" %}
[Enchanter](/items/stations/midgame-stations/enchanter)
{% endcontent-ref %}

***

## Nether Stations

{% content-ref url="/pages/2VWohKAoXCA5LTfn5FWd" %}
[Infinite Forging Station](/items/stations/early-stations/infinite-forging-station)
{% endcontent-ref %}

***

## Pre-Dragon Stations

{% content-ref url="/pages/4pLG7kNKTNx2gvUObErT" %}
[Alchemy Bench](/items/stations/midgame-stations/alchemy-bench)
{% endcontent-ref %}

***

## Post-Dragon Stations

{% content-ref url="/pages/wRZ9W5NaGJen8kC3oaqM" %}
[Altar of the Accursed](/items/stations/lategame-altars/altar-of-the-accursed)
{% endcontent-ref %}

{% content-ref url="/pages/DK7W7HfSooGnXVbWMaKp" %}
[Altar of the Sacred](/items/stations/lategame-altars/altar-of-the-sacred)
{% endcontent-ref %}

***

## Post-Hydra

Mythical Forge


# Crafting Table

All custom recipes in the vanilla crafting table

## Information

The Stations in ColdMC is specialized crafting tables, smelters, forges, or something else entirely, that allows players to create more powerful and complex items beyond the vanilla crafting table.&#x20;

* **Advanced Items:** Players can craft advanced items like more powerful weapons, armor, and tools that offer an enhanced ability or stats.
* **Special Materials:** The station supports the use of materials that are not available in regular Minecraft, making it essential for creating the most potent gear in the game.
* **Enhanced Crafting:** The crafting grid in the Advanced Crafting Station have no slots which allow for more complex recipes compared to the standard crafting table.

#### **How to craft:**

* 4 planks in a 2x2 square.

***

## Progression Recipes

<details>

<summary><img src="https://3522175436-files.gitbook.io/~/files/v0/b/gitbook-x-prod.appspot.com/o/spaces%2FrcgtxEHRbgBRPbt4a4vb%2Fuploads%2F55hHtv8mhhpkEPIZDgh4%2Fwarden_blessing.png?alt=media&amp;token=1256bd2d-5c23-401f-9780-9a870b22e12d" alt=""> Advanced Crafting Station</summary>

This station is used to craft more advanced items. \
Check it out [here](/items/stations/early-stations/advanced-crafting-station).

#### Ingredients:&#x20;

* [Crafting Table](https://minecraft.wiki/w/Crafting_Table) + 4 Diamond = ![](https://3522175436-files.gitbook.io/~/files/v0/b/gitbook-x-prod.appspot.com/o/spaces%2FrcgtxEHRbgBRPbt4a4vb%2Fuploads%2F55hHtv8mhhpkEPIZDgh4%2Fwarden_blessing.png?alt=media\&token=1256bd2d-5c23-401f-9780-9a870b22e12d) Advanced Crafting Station

</details>

<details>

<summary><img src="https://3522175436-files.gitbook.io/~/files/v0/b/gitbook-x-prod.appspot.com/o/spaces%2FrcgtxEHRbgBRPbt4a4vb%2Fuploads%2F55hHtv8mhhpkEPIZDgh4%2Fwarden_blessing.png?alt=media&amp;token=1256bd2d-5c23-401f-9780-9a870b22e12d" alt=""> Infinite Smelting Station</summary>

This station is used to smelt more items and advanced items without the need of fuel. \
Check it out [here](/items/stations/early-stations/infinite-smelting-station).

#### Ingredients:&#x20;

* ![](https://3522175436-files.gitbook.io/~/files/v0/b/gitbook-x-prod.appspot.com/o/spaces%2FrcgtxEHRbgBRPbt4a4vb%2Fuploads%2F55hHtv8mhhpkEPIZDgh4%2Fwarden_blessing.png?alt=media\&token=1256bd2d-5c23-401f-9780-9a870b22e12d) [Advanced Crafting Table](#advanced-crafting-station) + 8 Magma Block = ![](https://3522175436-files.gitbook.io/~/files/v0/b/gitbook-x-prod.appspot.com/o/spaces%2FrcgtxEHRbgBRPbt4a4vb%2Fuploads%2F55hHtv8mhhpkEPIZDgh4%2Fwarden_blessing.png?alt=media\&token=1256bd2d-5c23-401f-9780-9a870b22e12d) Infinite Smelting Station

<img src="https://3522175436-files.gitbook.io/~/files/v0/b/gitbook-x-prod.appspot.com/o/spaces%2FrcgtxEHRbgBRPbt4a4vb%2Fuploads%2FSeEdiVlAUTdbheMu42wW%2Fimage.png?alt=media&amp;token=9c11fe35-34b8-4755-b368-1c93f2995859" alt="Recipe for Infinite Smelting Station" data-size="original">

</details>

<details>

<summary><img src="https://3522175436-files.gitbook.io/~/files/v0/b/gitbook-x-prod.appspot.com/o/spaces%2FrcgtxEHRbgBRPbt4a4vb%2Fuploads%2F55hHtv8mhhpkEPIZDgh4%2Fwarden_blessing.png?alt=media&amp;token=1256bd2d-5c23-401f-9780-9a870b22e12d" alt=""> Infinite Forging Station</summary>

This station is used to forge advanced equipment and gear without any risk of damaging the station. \
Check it out [here](/items/stations/early-stations/infinite-forging-station).

#### Ingredients:&#x20;

* ![](https://3522175436-files.gitbook.io/~/files/v0/b/gitbook-x-prod.appspot.com/o/spaces%2FrcgtxEHRbgBRPbt4a4vb%2Fuploads%2F55hHtv8mhhpkEPIZDgh4%2Fwarden_blessing.png?alt=media\&token=1256bd2d-5c23-401f-9780-9a870b22e12d) [Advanced Crafting Table](#advanced-crafting-station) + 8 Blaze Powder = ![](https://3522175436-files.gitbook.io/~/files/v0/b/gitbook-x-prod.appspot.com/o/spaces%2FrcgtxEHRbgBRPbt4a4vb%2Fuploads%2F55hHtv8mhhpkEPIZDgh4%2Fwarden_blessing.png?alt=media\&token=1256bd2d-5c23-401f-9780-9a870b22e12d) Infinite Forging Station

<img src="https://3522175436-files.gitbook.io/~/files/v0/b/gitbook-x-prod.appspot.com/o/spaces%2FrcgtxEHRbgBRPbt4a4vb%2Fuploads%2Fvmj8zCjlAJdC6n9NEMUe%2Fimage.png?alt=media&amp;token=f886b537-5999-4c43-b73d-4618dbe51cec" alt="Recipe for Infinite Forging Station" data-size="original">

</details>

***

<details>

<summary><img src="https://3522175436-files.gitbook.io/~/files/v0/b/gitbook-x-prod.appspot.com/o/spaces%2FrcgtxEHRbgBRPbt4a4vb%2Fuploads%2F55hHtv8mhhpkEPIZDgh4%2Fwarden_blessing.png?alt=media&amp;token=1256bd2d-5c23-401f-9780-9a870b22e12d" alt=""> Enchanter</summary>

This station is used to craft advanced enchantments. Check it out [here](/items/stations/midgame-stations/enchanter).

#### Ingredients:&#x20;

* ![](https://3522175436-files.gitbook.io/~/files/v0/b/gitbook-x-prod.appspot.com/o/spaces%2FrcgtxEHRbgBRPbt4a4vb%2Fuploads%2F55hHtv8mhhpkEPIZDgh4%2Fwarden_blessing.png?alt=media\&token=1256bd2d-5c23-401f-9780-9a870b22e12d) [Advanced Crafting Table](#advanced-crafting-station) + 8 Ender Pearl = ![](https://3522175436-files.gitbook.io/~/files/v0/b/gitbook-x-prod.appspot.com/o/spaces%2FrcgtxEHRbgBRPbt4a4vb%2Fuploads%2F55hHtv8mhhpkEPIZDgh4%2Fwarden_blessing.png?alt=media\&token=1256bd2d-5c23-401f-9780-9a870b22e12d) Enchanter

<img src="https://3522175436-files.gitbook.io/~/files/v0/b/gitbook-x-prod.appspot.com/o/spaces%2FrcgtxEHRbgBRPbt4a4vb%2Fuploads%2FnRBrZThn7UkTCoM76OOr%2FSk%C3%A4rmbild%202024-11-12%20213020.png?alt=media&amp;token=dff87866-3e4c-4512-9bff-8ed3509e05e0" alt="Recipe for Enchanter" data-size="original">

</details>

<details>

<summary><img src="https://3522175436-files.gitbook.io/~/files/v0/b/gitbook-x-prod.appspot.com/o/spaces%2FrcgtxEHRbgBRPbt4a4vb%2Fuploads%2F55hHtv8mhhpkEPIZDgh4%2Fwarden_blessing.png?alt=media&amp;token=1256bd2d-5c23-401f-9780-9a870b22e12d" alt=""> Alchemy Bench</summary>

This station is used to craft advanced alchemy and gem stones. Check it out [here](/items/stations/midgame-stations/alchemy-bench).

#### Ingredients:&#x20;

* ![](https://3522175436-files.gitbook.io/~/files/v0/b/gitbook-x-prod.appspot.com/o/spaces%2FrcgtxEHRbgBRPbt4a4vb%2Fuploads%2F55hHtv8mhhpkEPIZDgh4%2Fwarden_blessing.png?alt=media\&token=1256bd2d-5c23-401f-9780-9a870b22e12d) [Advanced Crafting Table](#advanced-crafting-station) + 8 End Stone = ![](https://3522175436-files.gitbook.io/~/files/v0/b/gitbook-x-prod.appspot.com/o/spaces%2FrcgtxEHRbgBRPbt4a4vb%2Fuploads%2F55hHtv8mhhpkEPIZDgh4%2Fwarden_blessing.png?alt=media\&token=1256bd2d-5c23-401f-9780-9a870b22e12d) Alchemy Bench

<img src="https://3522175436-files.gitbook.io/~/files/v0/b/gitbook-x-prod.appspot.com/o/spaces%2FrcgtxEHRbgBRPbt4a4vb%2Fuploads%2FUdCTqVZcQSou0fKPivap%2FSk%C3%A4rmbild%202024-11-13%20110829.png?alt=media&amp;token=2bb2049b-0d3c-461d-9950-617945441dba" alt="Recipe for Alchemy Bench" data-size="original">

</details>

***

## Useful Recipes

<details>

<summary>Cross (for Villagers)</summary>

This is for making a villager revivable. Check out how to revive villagers [here](/dim/overworld/hub-dimension-old#villager-reviving).

**Ingredients:**

* &#x20;5 Iron Ingot + 4 String = Cross

<img src="https://3522175436-files.gitbook.io/~/files/v0/b/gitbook-x-prod.appspot.com/o/spaces%2FrcgtxEHRbgBRPbt4a4vb%2Fuploads%2F4Y2dxlVFEp1CIbdSMc2N%2Fimage.png?alt=media&amp;token=2cf58134-8c52-41c6-9b9d-e1c5b098a68c" alt="Recipe for Cross" data-size="original">

</details>

***


# Early Stations

## Information

The Stations in ColdMC is specialized crafting tables, smelters, forges, or something else entirely, that allows players to create more powerful and complex items beyond the vanilla crafting table.&#x20;

* **Advanced Items:** Players can craft advanced items like more powerful weapons, armor, and tools that offer an enhanced ability or stats.
* **Special Materials:** The station supports the use of materials that are not available in regular Minecraft, making it essential for creating the most potent gear in the game.
* **Enhanced Crafting:** The crafting grid in the Advanced Crafting Station have no slots which allow for more complex recipes compared to the standard crafting table.

**How to use:**

1. Access the Station through the crafted block (see the [Advanced Crafting Table recipe](/items/stations/crafting-table#advanced-crafting-station))
2. Gather the required materials for the item you want to craft
3. Click to craft the item to start the crafting process, then after the product is finished, you can claim the item by clicking it in the queue.

***

## Pre-Advanced Stations

{% content-ref url="/pages/SbBm9TWbZr5ZJik8OzKM" %}
[Advanced Crafting Station](/items/stations/early-stations/advanced-crafting-station)
{% endcontent-ref %}

{% content-ref url="/pages/3TGKjHI598GS9eneBaYz" %}
[Infinite Smelting Station](/items/stations/early-stations/infinite-smelting-station)
{% endcontent-ref %}

***

## Nether Stations

{% content-ref url="/pages/2VWohKAoXCA5LTfn5FWd" %}
[Infinite Forging Station](/items/stations/early-stations/infinite-forging-station)
{% endcontent-ref %}

***


# Advanced Crafting Station

Recipes from the Advanced Crafting Station

## Information

This station is used to craft more advanced items.&#x20;

#### **How to craft:**

* Crafting Table + 4 Diamond = Advanced Crafting Station

***

## Wood & Leaf Recipes (Star Level 12)

<details>

<summary><img src="https://3522175436-files.gitbook.io/~/files/v0/b/gitbook-x-prod.appspot.com/o/spaces%2FrcgtxEHRbgBRPbt4a4vb%2Fuploads%2FSjB7xDdmqNDCNI6a4RA4%2F1959.png?alt=media&amp;token=0c1093d8-3600-4307-947a-91c70471a62e" alt="" data-size="line"> <a href="/items/ingredients#leaf">Leaf </a>Recipe</summary>

**About:** A widely used ingredient in many different recipes in the Advanced Crafting Station.

**Station:** [Advanced Crafting Station](/items/stations/early-stations/advanced-crafting-station)

#### **Ingredients:**

* Any type of leaves

{% hint style="success" %}
Any type of leaves include Shamrock and Four-leaf Clovers, and they even give extra leaf
{% endhint %}

**Lore:** Leaf

</details>

## Undead Recipes (Star Level 14)

<details>

<summary><img src="https://3522175436-files.gitbook.io/~/files/v0/b/gitbook-x-prod.appspot.com/o/spaces%2FrcgtxEHRbgBRPbt4a4vb%2Fuploads%2FXNJhURrrIK5yiWhAGESN%2Frotten_flesh.png?alt=media&amp;token=dcf14513-afe4-4eac-ab66-41a665f8b1a5" alt="" data-size="line"> <a href="https://minecraft.wiki/w/Rotten_Flesh">Rotten Flesh</a> Recipe</summary>

**Station:** [Advanced Crafting Station](/items/stations/early-stations/advanced-crafting-station)

#### **Ingredients:**&#x20;

* [Monster Materials](/items/ingredients/monster-materials#ghoul-tissue) x 16

</details>

<details>

<summary></summary>

</details>

<details>

<summary></summary>

</details>

## Dark Table

#### Leaf

***

#### Wood Basis

A widely used ingredient in many different recipes in the Advanced Crafting Station.

#### Ingredients:&#x20;

* Any type of wooden log = Wood Basis
* Twig = 3 Wood Basis

***

#### Stone Basis

A widely used ingredient in many different recipes in the Advanced Crafting Station.

#### Ingredients:&#x20;

* Any type of Stone = Stone Basis

{% hint style="info" %}
Stone types (f. e. Cobblestone, Andesite, Diorite, Granite, Rock, Boulder)
{% endhint %}

***

#### Crystal

A widely used ingredient in many different recipes in the Advanced Crafting Station.

#### Ingredients:&#x20;

* 3 Amethyst + Prismarine = Crystal
* Diamond + 3 Quartz = Crystal


# Infinite Smelting Station

Recipes from the Infinite Smelting Station

## Information

This station is used to smelt more items and advanced items without the need of fuel.&#x20;

#### **How to craft:**&#x20;

* ![](https://3522175436-files.gitbook.io/~/files/v0/b/gitbook-x-prod.appspot.com/o/spaces%2FrcgtxEHRbgBRPbt4a4vb%2Fuploads%2F55hHtv8mhhpkEPIZDgh4%2Fwarden_blessing.png?alt=media\&token=1256bd2d-5c23-401f-9780-9a870b22e12d) Advanced Crafting Table + 8 Magma Block = Infinite Smelting Station

<div align="center" data-full-width="false"><figure><img src="https://3522175436-files.gitbook.io/~/files/v0/b/gitbook-x-prod.appspot.com/o/spaces%2FrcgtxEHRbgBRPbt4a4vb%2Fuploads%2FSeEdiVlAUTdbheMu42wW%2Fimage.png?alt=media&amp;token=9c11fe35-34b8-4755-b368-1c93f2995859" alt=""><figcaption><p>Recipe for Infinite Smelting Station</p></figcaption></figure></div>

***

#### Ignetto Alloy


# Infinite Forging Station

## Information

This station is used to forge advanced equipment and gear without any risk of damaging the station.&#x20;

#### **How to craft:**

* ![](https://3522175436-files.gitbook.io/~/files/v0/b/gitbook-x-prod.appspot.com/o/spaces%2FrcgtxEHRbgBRPbt4a4vb%2Fuploads%2F55hHtv8mhhpkEPIZDgh4%2Fwarden_blessing.png?alt=media\&token=1256bd2d-5c23-401f-9780-9a870b22e12d) Advanced Crafting Table + 8 Blaze Powder = Infinite Forging Station

<div align="center" data-full-width="false"><figure><img src="https://3522175436-files.gitbook.io/~/files/v0/b/gitbook-x-prod.appspot.com/o/spaces%2FrcgtxEHRbgBRPbt4a4vb%2Fuploads%2Fvmj8zCjlAJdC6n9NEMUe%2Fimage.png?alt=media&amp;token=f886b537-5999-4c43-b73d-4618dbe51cec" alt=""><figcaption><p>Recipe for Infinite Forging Station</p></figcaption></figure></div>

***

#### Ignetto Alloy


# Midgame Stations

## Information

The Stations in ColdMC is specialized crafting tables, smelters, forges, or something else entirely, that allows players to create more powerful and complex items beyond the vanilla crafting table.&#x20;

* **Advanced Items:** Players can craft advanced items like more powerful weapons, armor, and tools that offer an enhanced ability or stats.
* **Special Materials:** The station supports the use of materials that are not available in regular Minecraft, making it essential for creating the most potent gear in the game.
* **Enhanced Crafting:** The crafting grid in the Advanced Crafting Station have no slots which allow for more complex recipes compared to the standard crafting table.

**How to use:**

1. Access the Station through the crafted block (see the [Advanced Crafting Table recipe](/items/stations/crafting-table#advanced-crafting-station))
2. Gather the required materials for the item you want to craft
3. Click to craft the item to start the crafting process, then after the product is finished, you can claim the item by clicking it in the queue.

***

## Pre-Advanced Stations

{% content-ref url="/pages/fzACNquUEEM58QsjUzVA" %}
[Enchanter](/items/stations/midgame-stations/enchanter)
{% endcontent-ref %}

***

## Pre-Dragon Stations

{% content-ref url="/pages/4pLG7kNKTNx2gvUObErT" %}
[Alchemy Bench](/items/stations/midgame-stations/alchemy-bench)
{% endcontent-ref %}

***


# Enchanter

## Information

This station is used to craft advanced enchantments. It is a special station where players can use experience points (EXP) or coins to summon powerful enchanted books and items. These items offer various boosts, unique effects, and enhancements to help you succeed in battles and other adventures.

#### How to craft:&#x20;

* ![](https://3522175436-files.gitbook.io/~/files/v0/b/gitbook-x-prod.appspot.com/o/spaces%2FrcgtxEHRbgBRPbt4a4vb%2Fuploads%2F55hHtv8mhhpkEPIZDgh4%2Fwarden_blessing.png?alt=media\&token=1256bd2d-5c23-401f-9780-9a870b22e12d) Advanced Crafting Table + 8 Ender Pearl = Enchanter

<div align="center" data-full-width="false"><figure><img src="https://3522175436-files.gitbook.io/~/files/v0/b/gitbook-x-prod.appspot.com/o/spaces%2FrcgtxEHRbgBRPbt4a4vb%2Fuploads%2FnRBrZThn7UkTCoM76OOr%2FSk%C3%A4rmbild%202024-11-12%20213020.png?alt=media&amp;token=dff87866-3e4c-4512-9bff-8ed3509e05e0" alt=""><figcaption><p>Recipe for Enchanter</p></figcaption></figure></div>

***

## **Enchantment Book Tiers**

Each tier of enchanted book provides different levels of power and rarity. Here’s a breakdown:

1. **Simple Enchantment Books**
   * **Cost**: 400 EXP
   * **Description**: Basic enchantments for minor boosts.
   * **Rarity**: Basic
2. **Unique Enchantment Books**
   * **Cost**: 800 EXP
   * **Description**: Adds unique abilities that can enhance your playstyle.
   * **Rarity**: Enhanced over Simple tier
3. **Elite Enchantment Books**
   * **Cost**: 2500 EXP
   * **Description**: Potent enchantments offering significant advantages in combat and exploration.
   * **Rarity**: Elite
4. **Ultimate Enchantment Books**
   * **Cost**: 5000 EXP
   * **Description**: High-powered enchantments for advanced gameplay.
   * **Rarity**: Ultimate
5. **Legendary Enchantment Books**
   * **Cost**: 25000 EXP
   * **Description**: The rarest and most powerful enchantments with unmatched boosts and bonuses.
   * **Rarity**: Legendary

***

## **Additional Enchanter Options**

The Enchanter also features several unique options that allow players to enhance or repurpose their items in creative ways:

* **Tinkerer**:
  * Trade unwanted enchanted books for Secret Gems and Experience Bottles, making it a valuable way to recycle lower-tier items into useful resources.
* **Alchemist**:
  * Combine two enchanted books or Lucky Stones into a stronger version. Perfect for boosting your gear beyond standard levels.
* **Enchant Items Shop**:
  * Purchase items like Lucky Stones, Protection Scrolls, Slot Scrolls, and Orbs. These items can protect or add slots to your gear, increase enchantment potential, and offer other valuable upgrades.


# Alchemy Bench

## Information

This station is used to craft advanced alchemy and gem stones.

#### How to craft:

* ![](https://3522175436-files.gitbook.io/~/files/v0/b/gitbook-x-prod.appspot.com/o/spaces%2FrcgtxEHRbgBRPbt4a4vb%2Fuploads%2F55hHtv8mhhpkEPIZDgh4%2Fwarden_blessing.png?alt=media\&token=1256bd2d-5c23-401f-9780-9a870b22e12d) Advanced Crafting Table + 8 End Stone = Alchemy Bench

<div align="center" data-full-width="false"><figure><img src="https://3522175436-files.gitbook.io/~/files/v0/b/gitbook-x-prod.appspot.com/o/spaces%2FrcgtxEHRbgBRPbt4a4vb%2Fuploads%2FUdCTqVZcQSou0fKPivap%2FSk%C3%A4rmbild%202024-11-13%20110829.png?alt=media&amp;token=2bb2049b-0d3c-461d-9950-617945441dba" alt=""><figcaption><p>Recipe for Alchemy Bench</p></figcaption></figure></div>

***


# Lategame Altars


# Altar of the Accursed

## Information

This station is used to smelt more items and advanced items without the need of fuel.&#x20;

#### **How to craft in advanced crafting station**:&#x20;

{% hint style="info" %}
Recipe in the ![](https://3522175436-files.gitbook.io/~/files/v0/b/gitbook-x-prod.appspot.com/o/spaces%2FrcgtxEHRbgBRPbt4a4vb%2Fuploads%2F55hHtv8mhhpkEPIZDgh4%2Fwarden_blessing.png?alt=media\&token=1256bd2d-5c23-401f-9780-9a870b22e12d) [Advanced Crafting Station](/items/stations/early-stations/advanced-crafting-station)
{% endhint %}

* 10 Obsidian + 8 Witch Blood = Altar of the Accursed

***

#### Ignetto Alloy

**Altar of the Accursed** is an altar with the [Dragonblade](/items/melee-weapons#dragonblade) stuck inside of it. It is used to craft many different Post-Dragon and Post-Empress items.

### Obtaining <a href="#obtaining" id="obtaining"></a>

The Altar of the Accursed will generate in an oddly shaped pillar on the main island. It cannot be mined or picked up in any ways

### Usage <a href="#usage" id="usage"></a>

Throwing items on top of the Altar of the Accursed will cause them to combine together into new items&#x20;

* Hallowed Armor:&#x20;
  * Any piece of netherite armor&#x20;
  * 4 Hallowed Ingots&#x20;
  * 1 Enderite Smithing Template
* Chorus Champion Armor:
  * Any piece of netherite armor
  * 4 Chorus Plating
  * 1 Enderite Smithing Template
* Shulker Armor/Shulker Tools:
  * Any netherite armor/tool
  * 4 Shulker Shells
  * 1 Enderite Smithing Template
* Hematic Pickaxe:
  * Netherite Pickaxe
  * Living Flesh
  * 1 Enderite Smithing Template
* Call of the Void:
  * Bow
  * 8 Dragon's Breath
  * 16 Enderite Shards
  * 1 Enderite Smithing Template
* Spectral Fury (UNOBTAINABLE):
  * Sharanga
  * 3 Diamonds
  * 8 Phantom Membrane
  * 1 Enderite Smithing Template

The Altar of the Accursed can also be used to disenchant items.


# Altar of the Sacred

Altar of the Sacred is an altar that can be moved anywhere, is used to summon Empress of Light, and to trade in materials for effects.

## Information

This station is used to smelt more items and advanced items without the need of fuel.&#x20;

#### **How to craft in advanced crafting station**:&#x20;

{% hint style="info" %}
Recipe in the ![](https://3522175436-files.gitbook.io/~/files/v0/b/gitbook-x-prod.appspot.com/o/spaces%2FrcgtxEHRbgBRPbt4a4vb%2Fuploads%2F55hHtv8mhhpkEPIZDgh4%2Fwarden_blessing.png?alt=media\&token=1256bd2d-5c23-401f-9780-9a870b22e12d) [Advanced Crafting Station](/items/stations/early-stations/advanced-crafting-station)
{% endhint %}

* 10 Obsidian + 8 Hallowed Ingot = Altar of the Sacred

***

#### Ignetto Alloy

Throwing Iron, Gold, Diamond, Emerald or Netherite on top of the Altar will give specific buffs, and by throwing multiple of the same ingot at once increases the duration of the effect.&#x20;

* Iron = 3 minutes of resistance per iron ingot
* Gold = 3.5 minutes of haste per gold ingot
* Diamond = 5.5 minutes of speed per diamond
* Emerald = 4.25 minutes of hero of the village per emerald
* Netherite = 20 minutes of fire resistance per netherite ingot
* Any Treasure heads = Any new Treasure head
* Pixie Dust = Summons the Empress of Light

{% hint style="info" %}
Remember to sacrifice materials before starting the empress fight, its right there and will give you a nice boost for the fight
{% endhint %}


# Endgame Stations


# Empress's Iridium Forge

## Information

A mystical forge used to bind rare, enchanted metals with magical properties.

**Ingredients**:&#x20;

* ![](https://3522175436-files.gitbook.io/~/files/v0/b/gitbook-x-prod.appspot.com/o/spaces%2FrcgtxEHRbgBRPbt4a4vb%2Fuploads%2F55hHtv8mhhpkEPIZDgh4%2Fwarden_blessing.png?alt=media\&token=1256bd2d-5c23-401f-9780-9a870b22e12d) Advanced Crafting Table + 8 Magma Block = Infinite Smelting Station

<div align="center" data-full-width="false"><figure><img src="https://3522175436-files.gitbook.io/~/files/v0/b/gitbook-x-prod.appspot.com/o/spaces%2FrcgtxEHRbgBRPbt4a4vb%2Fuploads%2FSeEdiVlAUTdbheMu42wW%2Fimage.png?alt=media&amp;token=9c11fe35-34b8-4755-b368-1c93f2995859" alt=""><figcaption><p>Recipe for Infinite Smelting Station</p></figcaption></figure></div>

***

#### Ignetto Alloy


# Regal Infusion Station

## Information

Imbues items with powerful status effects inspired by the Empress’s magic.

**Ingredients**:&#x20;

* ![](https://3522175436-files.gitbook.io/~/files/v0/b/gitbook-x-prod.appspot.com/o/spaces%2FrcgtxEHRbgBRPbt4a4vb%2Fuploads%2F55hHtv8mhhpkEPIZDgh4%2Fwarden_blessing.png?alt=media\&token=1256bd2d-5c23-401f-9780-9a870b22e12d) Advanced Crafting Table + 8 Magma Block = Infinite Smelting Station

<div align="center" data-full-width="false"><figure><img src="https://3522175436-files.gitbook.io/~/files/v0/b/gitbook-x-prod.appspot.com/o/spaces%2FrcgtxEHRbgBRPbt4a4vb%2Fuploads%2FSeEdiVlAUTdbheMu42wW%2Fimage.png?alt=media&amp;token=9c11fe35-34b8-4755-b368-1c93f2995859" alt=""><figcaption><p>Recipe for Infinite Smelting Station</p></figcaption></figure></div>

***

#### Ignetto Alloy


# Melee Weapons

## Pre-Advanced

<details>

<summary><img src="https://3522175436-files.gitbook.io/~/files/v0/b/gitbook-x-prod.appspot.com/o/spaces%2FrcgtxEHRbgBRPbt4a4vb%2Fuploads%2Fj1gxDkWd44C6oICEnRON%2Fwooden_sword.png?alt=media&amp;token=d545d5f3-b0c7-47b8-84bf-fe9de9ada083" alt="" data-size="line"> Wooden Sword</summary>

Rarity: Common

Attack Damage: 4.2\
Attack Speed: 1.4

</details>

<details>

<summary><img src="https://3522175436-files.gitbook.io/~/files/v0/b/gitbook-x-prod.appspot.com/o/spaces%2FrcgtxEHRbgBRPbt4a4vb%2Fuploads%2FSU7SJsgXr1uPtRVB95Pn%2Fstone_sword.png?alt=media&amp;token=53e5294e-63a8-4413-b678-218d8442db58" alt="" data-size="line"> Stone Sword</summary>

Rarity: Common

</details>

<details>

<summary><img src="https://3522175436-files.gitbook.io/~/files/v0/b/gitbook-x-prod.appspot.com/o/spaces%2FrcgtxEHRbgBRPbt4a4vb%2Fuploads%2FmmkZsSgF4fEWka4ZP07q%2Fgolden_sword.png?alt=media&amp;token=ffc8d8f6-b73f-4fca-b475-3040272049e4" alt="" data-size="line"> Golden Sword</summary>

Rarity: Common

</details>

<details>

<summary><img src="https://3522175436-files.gitbook.io/~/files/v0/b/gitbook-x-prod.appspot.com/o/spaces%2FrcgtxEHRbgBRPbt4a4vb%2Fuploads%2FEuX2rjCiqImlJdPie3HX%2Firon_sword.png?alt=media&amp;token=e1bc407d-f3a3-4ae0-ae31-139792da71c0" alt="" data-size="line"> Iron Sword</summary>

Rarity: Common

</details>

<details>

<summary><img src="https://3522175436-files.gitbook.io/~/files/v0/b/gitbook-x-prod.appspot.com/o/spaces%2FrcgtxEHRbgBRPbt4a4vb%2Fuploads%2FAOcHAGn7ODpDVaEEOlOM%2Fdiamond_sword.png?alt=media&amp;token=7293c2f1-ead2-4fb3-85f6-88a06f4bea9d" alt="" data-size="line"> Diamond Sword</summary>

Rarity: Uncommon

</details>

<details>

<summary>Trident</summary>

Rarity: Common

</details>

***

## Advanced

<details>

<summary><img src="https://3522175436-files.gitbook.io/~/files/v0/b/gitbook-x-prod.appspot.com/o/spaces%2FrcgtxEHRbgBRPbt4a4vb%2Fuploads%2FzCbYuRM5PcTt9oF78LaI%2Fstick.png?alt=media&amp;token=35cc1fae-59c6-466d-9818-4d88be8d7cb3" alt="" data-size="line"> Random Stick</summary>

</details>

<details>

<summary>Training Stick</summary>

</details>

<details>

<summary><img src="https://3522175436-files.gitbook.io/~/files/v0/b/gitbook-x-prod.appspot.com/o/spaces%2FrcgtxEHRbgBRPbt4a4vb%2Fuploads%2FkDHSJAaqoEzX9ndGiqvr%2F3017.png?alt=media&amp;token=fafa02cd-9049-40dd-a993-4d35fb3612bd" alt="" data-size="line"> Worked Sword</summary>

</details>

<details>

<summary>Fallen Leaf Blade</summary>

</details>

<details>

<summary>Training Sword</summary>

</details>

<details>

<summary>Fighting Stick</summary>

</details>

<details>

<summary>Rotten Sword</summary>

</details>

<details>

<summary>Ninja Sword</summary>

</details>

<details>

<summary>Wooden Katana</summary>

</details>

<details>

<summary>Broad Wood Sword</summary>

</details>

<details>

<summary>Oni Sword</summary>

</details>

***

## Muspelheim

<details>

<summary><img src="https://3522175436-files.gitbook.io/~/files/v0/b/gitbook-x-prod.appspot.com/o/spaces%2FrcgtxEHRbgBRPbt4a4vb%2Fuploads%2FTY5x6R6q0ixbW0HuZZ6Q%2Fnetherite_sword.png?alt=media&amp;token=d7bf7346-9f0d-41ee-9145-78619ac3f1d1" alt="" data-size="line"> Netherite Sword</summary>

Rarity: Rare

</details>

<details>

<summary><img src="https://3522175436-files.gitbook.io/~/files/v0/b/gitbook-x-prod.appspot.com/o/spaces%2FrcgtxEHRbgBRPbt4a4vb%2Fuploads%2FYQ8k2bfw5Lam56icdvp2%2Fimage.png?alt=media&amp;token=cfcd26b0-6e60-4aeb-82cb-22a8e47faa1a" alt="" data-size="line"> Blazing Hatchet</summary>

Attack Damage: 9\
Attack Speed: 1\
Durability: 1561

The Blazing hatchet is a diamond axe with the ability to launch entities into the air with a burst of flame and to transform any type of burnable wood log into charcoal when mined.

### Obtaining

The Blazing hatchet can be found in an item frame placed on the throne of the Pyromaniac room which has a chance to be found in the Forbidden castle.

* [![](https://static.miraheze.org/stardustlabswiki/thumb/d/d5/Blazing_hatchet_location_%284%29.png/120px-Blazing_hatchet_location_%284%29.png)](https://stardustlabs.miraheze.org/wiki/File:Blazing_hatchet_location_\(4\).png?filetimestamp=20220413232027&)
* [![](https://static.miraheze.org/stardustlabswiki/thumb/9/95/Blazing_hatchet_location_%285%29.png/120px-Blazing_hatchet_location_%285%29.png)](https://stardustlabs.miraheze.org/wiki/File:Blazing_hatchet_location_\(5\).png?filetimestamp=20220413232040&)
* [![](https://static.miraheze.org/stardustlabswiki/thumb/5/5e/Blazing_hatchet_location_%286%29.png/120px-Blazing_hatchet_location_%286%29.png)](https://stardustlabs.miraheze.org/wiki/File:Blazing_hatchet_location_\(6\).png?filetimestamp=20220413232249&)

### Modifications

This item can be renamed without loosing its effect, but it will lose its font color.

#### Possible upgrades

The Blazing hatchet can be upgraded with Netherite on a Smithing table and retain its properties. Every axe enchantments can be applied.

#### Downsides

The Looting enchantment will not change the number of charcoal obtained by mining logs with the Blazing hatchet.

#### Description

*Packs a fiery, yet powerful punch*

</details>

<details>

<summary><img src="https://3522175436-files.gitbook.io/~/files/v0/b/gitbook-x-prod.appspot.com/o/spaces%2FrcgtxEHRbgBRPbt4a4vb%2Fuploads%2FSjZSaKtxm25pEUG5ea1i%2Fimage.png?alt=media&amp;token=f4ae407d-dc2f-4e7a-bbfb-4e34383b4279" alt="" data-size="line"> Chilling Blade</summary>

Attack Damage: 7\
Attack Speed: 1.6\
Durability: 1561

The Chilling blade is a diamond sword with the ability to give entities the Slowness II effect.

**Location**

The Chilling blade has an 80% chance to be found inside a barrel in the Icy room which as a chance to be found in the Forbidden castle.

* [![](https://static.miraheze.org/stardustlabswiki/thumb/e/e0/Chilling_blade_location_%283%29.png/120px-Chilling_blade_location_%283%29.png)](https://stardustlabs.miraheze.org/wiki/File:Chilling_blade_location_\(3\).png?filetimestamp=20220413232311&)
* [![](https://static.miraheze.org/stardustlabswiki/thumb/2/2d/Chilling_blade_location_%282%29.png/120px-Chilling_blade_location_%282%29.png)](https://stardustlabs.miraheze.org/wiki/File:Chilling_blade_location_\(2\).png?filetimestamp=20220413232107&)
* [![](https://static.miraheze.org/stardustlabswiki/thumb/6/60/Chilling_blade_location_%281%29.png/120px-Chilling_blade_location_%281%29.png)](https://stardustlabs.miraheze.org/wiki/File:Chilling_blade_location_\(1\).png?filetimestamp=20220413232055&)

### Modifications

This item can be renamed without loosing its effect, but it will lose its font color.

#### Possible upgrades

The Chilling blade can be upgraded with Netherite on a Smithing table and enchanted with all the sword enchantments without loosing its ability.

#### Description

*Freezes souls to the core*

</details>

<details>

<summary><img src="https://3522175436-files.gitbook.io/~/files/v0/b/gitbook-x-prod.appspot.com/o/spaces%2FrcgtxEHRbgBRPbt4a4vb%2Fuploads%2FrmCSd78kWLaQ8O74o46z%2Fimage.png?alt=media&amp;token=9d1b96f0-1885-42db-a4f4-ba6bd6e0b8b9" alt="" data-size="line"> Daybreaker</summary>

Attack Damage: 6 - 8\
Attack Speed: 2 - 2.23\
Durability: 2031

The Daybreaker is like a Netherite sword with the ability to make mobs killed with it have a chance to drop gold nuggets.

### Obtaining

The Daybreaker can be found in an item frame at the end of a labyrinth in the first level under the Sanctum.

* [![](https://static.miraheze.org/stardustlabswiki/thumb/1/14/Daybreaker_location.png/120px-Daybreaker_location.png)](https://stardustlabs.miraheze.org/wiki/File:Daybreaker_location.png?filetimestamp=20220413232321&)

### Modifications

This item can be renamed without loosing its effect, but it will lose its font color.

#### Possible upgrades

The Daybreaker can be enchanted with any sword enchantments.

#### Downsides

The Looting enchantment has no effects on the amount of gold nuggets dropped by mobs killed using the Daybreaker.

#### Description

*Has a chance to drop gold when killing any mob*

</details>

<details>

<summary><img src="https://3522175436-files.gitbook.io/~/files/v0/b/gitbook-x-prod.appspot.com/o/spaces%2FrcgtxEHRbgBRPbt4a4vb%2Fuploads%2Fq4ajYujeMilP5ukx1Jnn%2Fimage.png?alt=media&amp;token=13b5eb89-31a9-4532-82d1-655112e849ba" alt="" data-size="line"> Warping Witherblade</summary>

Attack Damage: 14\
Attack Speed: 1.6\
Durability: 2031

The Warping witherblade is a slow but powerful sword that has a 75% chance to afflict mobs with the Wither effect when struck.

### Obtaining

The Warping witherblade has a 33% chance of being dropped by the Wither boss when killed in a Warped forest or Inverted forest.

### Modifications

This item can be renamed without loosing its effect, but it will lose its font color.

#### Possible upgrades

The Warping witherblade can be enchanted with any sword enchantments.

#### Description

*For in life all things return to death, and in death all things return to the shadow of ----------.*

</details>

<details>

<summary><img src="https://3522175436-files.gitbook.io/~/files/v0/b/gitbook-x-prod.appspot.com/o/spaces%2FrcgtxEHRbgBRPbt4a4vb%2Fuploads%2Fi9c02xmavShGQyJMrP9d%2Fimage.png?alt=media&amp;token=ca718af6-9f45-4c35-9cb0-5532e71c69e8" alt="" data-size="line"> Withersbane</summary>

Attack Damage: 4\
Attack Speed: 1.6\
Durability: 32

Always spawn with Mending and Unbreaking VIII.

The Withersbane is a Gold sword with the ability to spread its damage from undead entities to other undead entities. Entities considered undead include Skeletons, Wither Skeletons and Zombie Piglins.

### Obtaining

The Withersbane can be found in a small room at the center of a round table which as a chance to be found in the Forbidden castle.

* [![](https://static.miraheze.org/stardustlabswiki/thumb/5/5b/Roundtable_wartable_room_2.png/120px-Roundtable_wartable_room_2.png)](https://stardustlabs.miraheze.org/wiki/File:Roundtable_wartable_room_2.png?filetimestamp=20220607232514&)

### Modifications

This item can be renamed without loosing its effect, but it will lose its font color.

#### Possible upgrades

The Withersbane can be upgraded with any sword enchantments.

### History

#### Description

*An ancient blade to smite the impurity from the Nether*

</details>

<details>

<summary><img src="https://3522175436-files.gitbook.io/~/files/v0/b/gitbook-x-prod.appspot.com/o/spaces%2FrcgtxEHRbgBRPbt4a4vb%2Fuploads%2FkT310jmPQyfl5sl8WonA%2Fimage.png?alt=media&amp;token=68ffee4e-63ab-4c5c-8944-18100295b05c" alt="" data-size="line"> Greatsword of Sacrifice</summary>

Attack Damage: 14 - 21\
Attack Speed: 0.88\
Durability: 2031

The Greatsword of sacrifice is a slow sword that drains your health on all hits but deals massive damage in return.

### Obtaining

The Greatsword of sacrifice has a 50% chance of spawning on the tip of the main tower in the Forbidden castle.

* [![](https://static.miraheze.org/stardustlabswiki/thumb/2/20/Forbidden_castle_tera_%286%29.png/120px-Forbidden_castle_tera_%286%29.png)](https://stardustlabs.miraheze.org/wiki/File:Forbidden_castle_tera_\(6\).png?filetimestamp=20220302101239&)
* [![](https://static.miraheze.org/stardustlabswiki/thumb/4/41/Forbidden_castle_tera_%285%29.png/120px-Forbidden_castle_tera_%285%29.png)](https://stardustlabs.miraheze.org/wiki/File:Forbidden_castle_tera_\(5\).png?filetimestamp=20220302101156&)
* [![](https://static.miraheze.org/stardustlabswiki/thumb/8/86/Forbidden_castle_tera_%281%29.png/120px-Forbidden_castle_tera_%281%29.png)](https://stardustlabs.miraheze.org/wiki/File:Forbidden_castle_tera_\(1\).png?filetimestamp=20220302100954&)

### Modifications

This item can be renamed without loosing its effect, but it will lose its font color.

#### Possible upgrades

The Greatsword of sacrifice can be enchanted with any sword enchantment.

### History

#### Description

*Drains the life of its wielder to inflict massive damage*

</details>

<details>

<summary><img src="https://3522175436-files.gitbook.io/~/files/v0/b/gitbook-x-prod.appspot.com/o/spaces%2FrcgtxEHRbgBRPbt4a4vb%2Fuploads%2FoPggxXzB4TJ48PKlcLx0%2Fimage.png?alt=media&amp;token=012fe72a-c40d-488f-8ff9-418f1c364a11" alt="" data-size="line"> Scarlet Dagger</summary>

Attack Damage: 7.25 - 9\
Attack Speed: 1.68\
Durability: 2031

The Scarlet dagger is a light weapon with a lightly buffed attack speed but reduced damage, but it also has a 5% to slightly heal you when damaging mobs, 100% when killing them.

### Obtaining

The Scarlet dagger has a 50% chance of spawning on the tip of the main tower in the Forbidden castle.

* [![](https://static.miraheze.org/stardustlabswiki/thumb/2/20/Forbidden_castle_tera_%286%29.png/120px-Forbidden_castle_tera_%286%29.png)](https://stardustlabs.miraheze.org/wiki/File:Forbidden_castle_tera_\(6\).png?filetimestamp=20220302101239&)
* [![](https://static.miraheze.org/stardustlabswiki/thumb/4/41/Forbidden_castle_tera_%285%29.png/120px-Forbidden_castle_tera_%285%29.png)](https://stardustlabs.miraheze.org/wiki/File:Forbidden_castle_tera_\(5\).png?filetimestamp=20220302101156&)
* [![](https://static.miraheze.org/stardustlabswiki/thumb/8/86/Forbidden_castle_tera_%281%29.png/120px-Forbidden_castle_tera_%281%29.png)](https://stardustlabs.miraheze.org/wiki/File:Forbidden_castle_tera_\(1\).png?filetimestamp=20220302100954&)

### Modifications

This item can be renamed without loosing its effect, but it will lose its font color.

#### Possible upgrades

The Scarlet dagger can be enchanted with any sword enchantments.

### History

#### Description

*Drains the life of its slain victims*

</details>

<details>

<summary><img src="https://3522175436-files.gitbook.io/~/files/v0/b/gitbook-x-prod.appspot.com/o/spaces%2FrcgtxEHRbgBRPbt4a4vb%2Fuploads%2FVvrphdEN3Q1YvR9czMXi%2Fimage.png?alt=media&amp;token=fc8c9715-d3cd-474d-bc2c-46143e4991a4" alt="" data-size="line"> Piglin Slayer</summary>

Attack Damage: 5\
Attack Speed: 1.6\
Durability: 131

Enchants: Sharpness V, Smite V, Unbreaking III, Knockback II, Looting III, Fire Aspect II

The Piglin slayer is a cosmetic Stone sword with no special ability. The name is actually in Zalgo in game, but behind that animated text is in reality written "Piglin slayer".

#### Obtaining

The Piglin slayer can be found in one of the barrels in the Ruined lab.

* [![](https://static.miraheze.org/stardustlabswiki/thumb/c/cb/PiglinSlayerLoot.png/120px-PiglinSlayerLoot.png)](https://stardustlabs.miraheze.org/wiki/File:PiglinSlayerLoot.png)

### Modifications

This item can be renamed but it will lose its font color and effect.

### Possible upgrades

The Piglin slayer can be enchanted with any additional sword enchantments.

</details>

<details>

<summary><img src="https://3522175436-files.gitbook.io/~/files/v0/b/gitbook-x-prod.appspot.com/o/spaces%2FrcgtxEHRbgBRPbt4a4vb%2Fuploads%2FXnazHl9OtUAkLYmidBN2%2Fimage.png?alt=media&amp;token=b25854fe-9cee-4251-87cb-556666ca7cfa" alt="" data-size="line"> Voltaic Trident</summary>

Attack Damage: 8 (+8 electric damage)\
Attack Speed: 1.1\
Durability: 250

Enchants: Loyalty I

The Voltaic trident is a custom Trident with the power to make a sphere of electricity appear where it has stricken, damaging any entity around.

### Obtaining

The Voltaic trident can be found at the top of Clock towers in the Forbidden castle.

* [![](https://static.miraheze.org/stardustlabswiki/thumb/f/f1/Forbidden_castle_tera_%2815%29.png/120px-Forbidden_castle_tera_%2815%29.png)](https://stardustlabs.miraheze.org/wiki/File:Forbidden_castle_tera_\(15\).png?filetimestamp=20220302101608&)
* [![](https://static.miraheze.org/stardustlabswiki/thumb/4/48/Forbidden_castle_tera_%2813%29.png/120px-Forbidden_castle_tera_%2813%29.png)](https://stardustlabs.miraheze.org/wiki/File:Forbidden_castle_tera_\(13\).png?filetimestamp=20220302101711&)
* [![](https://static.miraheze.org/stardustlabswiki/thumb/b/b8/Forbidden_castle_tera_%2814%29.png/120px-Forbidden_castle_tera_%2814%29.png)](https://stardustlabs.miraheze.org/wiki/File:Forbidden_castle_tera_\(14\).png?filetimestamp=20220302101748&)

### Modifications

This item can be renamed without loosing its effect, but it will lose its font color.

#### Possible upgrades

The Voltaic trident can be enchanted with Loyalty, Unbreaking and Mending. It can also be used as a melee weapon, but with no real effect.

#### Downsides

Grindstoning it and adding Channeling will strike self with lightning upon use. The Voltaic trident will also lose its ability if enchanted with Riptide, while Impaling will have no effects.

#### Description

*Feel its electrical power*

<mark style="color:red;">NOTES: The texture shown is not implemented because Tridents are not able to have different custom textures once thrown</mark>

</details>

***

## Pre-Dragon

<details>

<summary>Steelfeather Sword</summary>

</details>

<details>

<summary>Bloodthirsty Wooden Katana</summary>

</details>

<details>

<summary>Ancient Wood Sword</summary>

</details>

<details>

<summary>Wooden Dreadblade</summary>

</details>

<details>

<summary>Wooden Steel Saber</summary>

</details>

<details>

<summary>Spider Sword</summary>

</details>

<details>

<summary>Wraithblade</summary>

</details>

<details>

<summary>Wooden Stormslayer</summary>

</details>

<details>

<summary>Venomous Stinger</summary>

</details>

<details>

<summary>Mythril Greatsword</summary>

</details>

<details>

<summary>Everburn</summary>

</details>

***

## Post-Dragon

<details>

<summary><img src="https://3522175436-files.gitbook.io/~/files/v0/b/gitbook-x-prod.appspot.com/o/spaces%2FrcgtxEHRbgBRPbt4a4vb%2Fuploads%2FojX2RKCm0xwQF2vNelfd%2Fimage.png?alt=media&amp;token=30705bae-4435-4ac3-a714-0ce90d41ec2b" alt="" data-size="line"> Dragonblade</summary>

**Damage:** 6.5\
**Attack Speed:** Slow (1.3)\
**Tooltip:** A fearsome sword with an otherworldly punch!\
*'It came from the edge of The End'*\
*ᴛɪᴘ: ᴘᴜɴᴄʜ ᴛʜᴇᴍ ɪɴᴛᴏ ᴡᴀʟʟs*\
**Durability:** Unbreakable

The Dragonblade is a post-Dragon greatsword with the ability to trigger a powerful punch after hitting a mob 3 times. Punches deal heavy damage with high armor penetration, knock enemies back a great distance and temporarily stun them.

&#x20;The Dragonblade can be enchanted with any Sword enchantment. Knockback enchantment further empowers its punch ability.

&#x20;The Dragonblade is unbreakable and cannot be repaired with an Anvil. However, Enchanted Books can be fused with the Dragonblade to transfer enchantments.

**Obtaining**:\
After defeating the Ender Dragon for the first time, the Dragonblade spawns stuck in the [Altar of The Accursed](/dim/the-end#altar-of-the-accursed). Right clicking it will cause it to drop, making it collectable.

Only one Dragonblade generates on each world.

**Usage**:\
Attacking enemies inflicts Dragon Stacks. After 3 Stacks are inflicted, player can sneak while holding the Dragonblade to use all Stacks to perform a powerful punch. Stacks time out on their own after 16 seconds.

Punching warps affected entity 8.2 blocks away from the player, but stopping on any solid block. Punches deals 7 HP х ₃.₅ base damage with 70% armor penetration.

Punched enemies will have Weakness I applied to them for 7 seconds, on top of being stunned for 1 second. Stunned mobs are unable to walk, but can still jump and attack. Additionaly, punched mob will be afflicted with Voided I for 10 seconds.

If an enemy is punched into any solid block, the damage is boosted to 24HP x ₁₂. The duration of Weakness is also increased to 11 seconds and stun duration to 2 seconds. Enemies nearby take 4 HP splash damage, while also being being inflicted with Weakness I for 3 seconds.

Each level of Knockback enchantment enchances punch distance by 1.1 blocks and punch damage, inceasing it by is +1.5HPₓ ₀․₇₅, +4 HP and +1.5 HP ₓ ₀․₇₅ per level for normal punch, wall punch and splash damage respectively.

Punched mobs cannot have stacks applied to them for the next 8 seconds, indicated by a cloud of dust above their head.

Punches receive only 40% of melee damage bonuses. Strength Potions do not increase punch damage, only boosting base weapon damage instead.

The Dragonblade is unbreakable on top of being immune to lava, fire, explosions and cacti. Additionaly, it automatically returns to the Altar of The Accursed if dropped away from it, meaning that it is truly indestructible.

**Tips**:\
Dragonblade is slightly slower compared to other swords, so take that into consideration when timing your hits.

Sweeping Edge allows the Dragonblade to apply Stacks to multiple enemies at once with the sweep attack.

Knockback II Dragonblade deals 32 HP х ₁₆ damage on block punches. Keep in mind that 70% of that damage ignores armor completely, meaning that mobs and players with unenchanted Netherite Armor and 20 health or less can die in a single punch.

Because the Dragonblade is unbreakable, enchanting it with Unbreaking or Mending is redundant. Don't waste your Enchanted Books.

Voided is inflicted **before** punch damages a mob. You can treat it as a separate damage instance worth 20% of your tartet's max health and 100% armor penetration.

</details>

<details>

<summary><img src="https://3522175436-files.gitbook.io/~/files/v0/b/gitbook-x-prod.appspot.com/o/spaces%2FrcgtxEHRbgBRPbt4a4vb%2Fuploads%2FMyDVJY47ywnT1bX4KyNz%2Fimage.png?alt=media&amp;token=2697dbd0-efe9-4471-8ecf-1b8bb8379a6b" alt="" data-size="line"> Tamaris</summary>

**Damage:** 7\
**Attack Speed:** Normal (1.6)\
**Tooltip:** Press \[SHIFT] to activate your Execute ability, instantly killing nearby enemies with low health!\
*Property of Captain Charo*\
**Durability:** 1562

**Tamaris** is a post-Dragon sword which allows players to trigger a powerful Execute ability, warping to nearby enemies with low health and killing them instantly.

&#x20;Tamaris can be enchanted with any Sword enchantment.

&#x20;Tamaris can be repaired with Netherite Ingots.

### Obtaining <a href="#obtaining" id="obtaining"></a>

Tamaris has a 66% chance to be dropped by the Ender Dragon. It always drops with either an Ender Insignia or Crest of The End.

### Usage <a href="#usage" id="usage"></a>

When damaged below 25% of health, mobs will have a gray mark above their head. This marks them as weak with a puff of dust above them.

After sneaking for a moment, you will warp to the nearest weak mob, instantly killing them. This warp has a range of 10 blocks. If an enemy walks out of that radius mid-execute, the warp is going to follow the mob to its new location.

Executing a mob holding a Totem of Undying or a player with the Holy Protection buff applies an 11 second execute cooldown. It is indicated by a DISABLED text in player's action bar, which goes away as the cooldown ends.

### Tips <a href="#tips" id="tips"></a>

* Tamaris is intended to be used as a support weapon. Switching to it to execute a weak enemy is the best way to use it.
* Tamaris prioritizes nearest weak mob while choosing a target to execute next. Keep in mind while trying to chain execute a group of weak mobs.
* The execute treshold is lower for certain mobs.
  * On bosses *(Wither, Empress of Light)* and Wardens, this treshold is **10%**.
  * Non-living entities *(Item Frames, Armor Stands, etc.)* and the Ender Dragon are immune to Tamaris' execute.
* Use this weapon carefully in Multiplayer while teaming up with other players, as it could potentialy lead to one of your allies being accidentaly executed.
  * Execute move targets the closest weak mob, so use this information to avoid mistakes.
* The execute strike cannot be dodged or avoided without any form of invulnerability. Even if an entity teleports away mid-fight, the warp is going to take you to their new location.

<br>

</details>

<details>

<summary><img src="https://3522175436-files.gitbook.io/~/files/v0/b/gitbook-x-prod.appspot.com/o/spaces%2FrcgtxEHRbgBRPbt4a4vb%2Fuploads%2FstnYO65gQAYF6bcck6bd%2Fimage.png?alt=media&amp;token=d35c239a-3777-4a19-accd-ee2822525c2a" alt="" data-size="line"> Chorus Dagger</summary>

**Damage:** 5\
**Attack Speed:** Fast (2)\
**Tooltip:** Sneak to warp to a nearby enemy, dealing damage and speeding you up\
**Durability:** 764

**Chorus Dagger** is a post-Dragon dagger with a special ability which allows players to instantly warp to mobs in order to deal damage and gain a speed boost.

&#x20;Chorus Dagger can be enchanted with any sword enchantment.

&#x20;Chorus Dagger can be repaired with  Iron Ingots.

### Obtaining <a href="#obtaining" id="obtaining"></a>

Chorus Dagger can be found in [End Cities](/dim/the-end#end-cities). There is a: - 20% chance for one to generate in chests left by Protective Crystals in large towers. - 10% chance for one to generate in chests left by Protective Crystals in small towers. - 3.75% chance for one to generate in any chest.

### Usage <a href="#usage" id="usage"></a>

While holding the dagger, sneaking will instantly teleport the player to a nearby mob in a radius of 8 blocks. Said mob will be dealt critical damage worth 150% of weapon's damage. After teleporting, player will be given a 4 seconds of Speed II, followed by 1 second of Speed I, making up for a total of 5 seconds of bonus' duration.

After a successful teleport, players cannot do it again for the next 8 seconds.

### Tips <a href="#tips" id="tips"></a>

* Dash always deals critical damage worth 1.5x the weapon's damage.
* Due to Dagger's low base damage, it is advised to use it as a support weapon.
* This item is brilliant for support in PvP, as the dash can be used for a quick burst of damage and the speed bonus can be used to easily combo your enemy.

</details>

<details>

<summary><img src="https://3522175436-files.gitbook.io/~/files/v0/b/gitbook-x-prod.appspot.com/o/spaces%2FrcgtxEHRbgBRPbt4a4vb%2Fuploads%2F6hIkRyYokRq1J68lgc1D%2Fimage.png?alt=media&amp;token=1885799a-bf04-4650-afbb-96acb0839468" alt="" data-size="line"> The Beginning</summary>

**Damage:** 5 (6 with both equipped)\
**Attack Speed:** Very Fast (2.6)\
**Tooltip:** Attracts spirits on attacks\
Hold *The Beginning/The End* in the other hand and look at them to teleport to their location, damaging all mobs and gaining a short buff.\
*'RIP Spirit Daggers'* \
&#x20;\- Developer Item -\
**Durability:** 496\
**Other:** +1 Damage (while in offhand)

**The Beginning and The End** is a pair of special daggers which have the ability to attract Spirits on attacks, and if both are used in a tandem - a second ability which allows players to telepot to aforementioned Spirits, gainin a short attack buff.

&#x20;Both daggers can be enchanted with any Sword enchantment. Certain enchantments will have new effects.

&#x20;The Beginning and The End can be repaired with Netherite Ingots.

### Obtaining <a href="#obtaining" id="obtaining"></a>

The Beginning and The End can be found in End City and End Dungeon chests. Additionally, you can get them from Void fishing through an ender crate.

### Usage <a href="#usage" id="usage"></a>

<img src="https://stellarity.kohara.xyz/assets/items/spirit_dagger/spirit.png" alt="An attracted Spirit" data-size="original">

Damaging enemies while holding a Beginning or End in any hand has a 50% chance to attract a Spirit. If the other sword is equipped in the other hand, players can teleport to the summoned Spirit by looking at it for 10 ticks (0.5 second). Only one Spirit can exist in a 4 block radius.

Teleporting to the Spirit creates a large area of effect slash which damages all enemies around it for 5 HP x ₂.₅ damage with 100% armor penetration. Afterwards player receives a small combat buff - 4 HP points of Absorption, +3 HP x ₁.₅ damage and +35% movement speed. Assasination buff lasts for 4 seconds. The slash attack has a radius of 3.8 blocks. Slashes receive 60% of melee damage bonuses (excluding Potions of Strength).

Hit mobs which **have attracted a Spirit** won't be able to do it again for the next 22 seconds, indicated by a spray of particles above their head.

While in the offhand, The Beginning provides a +1 damage to any weapon, while The End gives + 5% speed.

#### Enchantments <a href="#enchantments" id="enchantments"></a>

Certain enchantments empower Spirit Dagger's slash attack. Enchantment power scales from both Daggers, meaning that having Sweeping Edge III on one of them and Sweeping Edge II on the other one acts as Sweeping Edge V.

### Tips <a href="#tips" id="tips"></a>

* Both the damage and speed bonuses stack with Potions of Strength and Swiftness respectively.
* Spirits can be attracted by ANY damage, including *(but not limited to)* other Swords, Crossbows, Bows, etc., for as long as you are holding a Beginning or End in any hand.
  * However, the damage dealt has to be higher than 3 HP х ₁.₅. Anything lower will not attract any Spirits no matter what.
* Teleporting has a distance limit of 70 blocks.
  * This makes this item great for quick long distance travels while exploring or crossing large gaps.
  * Spyglass comes in handy while trying to position your cursor over a Spirit, as you can switch to The Beginning and The End right away once you align perfectly.
* This item pairs extremely well with [Sharanga](/items/ranged-weapons#sharanga), since Spectral Bolts are completely unaffected by gravity, meaning that it is easier to snipe targets from far away in order to potentially attract Spirits.

</details>

<details>

<summary><img src="https://3522175436-files.gitbook.io/~/files/v0/b/gitbook-x-prod.appspot.com/o/spaces%2FrcgtxEHRbgBRPbt4a4vb%2Fuploads%2Fm6sp4Mjpf7o3ZKsjOEwS%2Fimage.png?alt=media&amp;token=25327411-161d-45de-a657-af5efbe0b710" alt="" data-size="line"> The End</summary>

**Damage:** 5 (6 with both equipped)\
**Attack Speed:** Very Fast (2.6)\
**Tooltip:** Attracts spirits on attacks\
Hold *The Beginning/The End* in the other hand and look at them to teleport to their location, damaging all mobs and gaining a short buff.\
*'RIP Spirit Daggers'* \
&#x20;\- Developer Item -\
**Durability:** 496\
**Other:** +1 Damage (while in offhand)

**The Beginning and The End** is a pair of special daggers which have the ability to attract Spirits on attacks, and if both are used in a tandem - a second ability which allows players to telepot to aforementioned Spirits, gainin a short attack buff.

&#x20;Both daggers can be enchanted with any Sword enchantment. Certain enchantments will have new effects.

&#x20;The Beginning and The End can be repaired with Netherite Ingots.

### Obtaining <a href="#obtaining" id="obtaining"></a>

The Beginning and The End can be found in End City and End Dungeon chests. Additionally, you can get them from Void fishing through an ender crate.

### Usage <a href="#usage" id="usage"></a>

<img src="https://stellarity.kohara.xyz/assets/items/spirit_dagger/spirit.png" alt="An attracted Spirit" data-size="original">

Damaging enemies while holding a Beginning or End in any hand has a 50% chance to attract a Spirit. If the other sword is equipped in the other hand, players can teleport to the summoned Spirit by looking at it for 10 ticks (0.5 second). Only one Spirit can exist in a 4 block radius.

Teleporting to the Spirit creates a large area of effect slash which damages all enemies around it for 5 HP x ₂.₅ damage with 100% armor penetration. Afterwards player receives a small combat buff - 4 HP points of Absorption, +3 HP x ₁.₅ damage and +35% movement speed. Assasination buff lasts for 4 seconds. The slash attack has a radius of 3.8 blocks. Slashes receive 60% of melee damage bonuses (excluding Potions of Strength).

Hit mobs which **have attracted a Spirit** won't be able to do it again for the next 22 seconds, indicated by a spray of particles above their head.

While in the offhand, The Beginning provides a +1 damage to any weapon, while The End gives + 5% speed.

#### Enchantments <a href="#enchantments" id="enchantments"></a>

Certain enchantments empower Spirit Dagger's slash attack. Enchantment power scales from both Daggers, meaning that having Sweeping Edge III on one of them and Sweeping Edge II on the other one acts as Sweeping Edge V.

### Tips <a href="#tips" id="tips"></a>

* Both the damage and speed bonuses stack with Potions of Strength and Swiftness respectively.
* Spirits can be attracted by ANY damage, including *(but not limited to)* other Swords, Crossbows, Bows, etc., for as long as you are holding a Beginning or End in any hand.
  * However, the damage dealt has to be higher than 3 HP х ₁.₅. Anything lower will not attract any Spirits no matter what.
* Teleporting has a distance limit of 70 blocks.
  * This makes this item great for quick long distance travels while exploring or crossing large gaps.
  * Spyglass comes in handy while trying to position your cursor over a Spirit, as you can switch to The Beginning and The End right away once you align perfectly.
* This item pairs extremely well with [Sharanga](/items/ranged-weapons#sharanga), since Spectral Bolts are completely unaffected by gravity, meaning that it is easier to snipe targets from far away in order to potentially attract Spirits.

</details>

<details>

<summary><img src="https://3522175436-files.gitbook.io/~/files/v0/b/gitbook-x-prod.appspot.com/o/spaces%2FrcgtxEHRbgBRPbt4a4vb%2Fuploads%2F1Yewkfw7relgsHVqHErw%2Fimage.png?alt=media&amp;token=4b617b01-25ef-49c6-b705-71aa2cd06d30" alt="" data-size="line"> Stellar Striker</summary>

**Damage:** 10\
**Attack Speed:** 0.9\
**Tooltip:** Hold it in any hand to periodically collect stars.\
Sneak and attack to send the stars flying in the direction you are facing to deal high armor-piercing damage.\
*Works from the offhand, with reduced damage.*\
**Durability:** Unbreakable

**Stellar Striker** is an unobtainable item

&#x20;Stellar Striker can be enchanted with any sword enchantment.

&#x20;Stellar Striker can be repaired with Netherite Ingots.

### Obtaining <a href="#obtaining" id="obtaining"></a>

Unknown (unobtainable)

### Usage <a href="#usage" id="usage"></a>

When you hold the Stellar Striker out, stars build up. One appears every 6 seconds, with a max of 5 stars. When you crouch and attack, a star is released, dealing 12 HP x 6 damage with 8 HP of the damage being splash. Both direct hit and splash damage have 40% armor penetration.\
\
the Casket of stars exists but who cares about that thing its not only unobtainable but its also gonna get removed

### Tips <a href="#tips" id="tips"></a>

* This weapon would be best to use at range, to make full use of the range advantage from the stars
* Using this against high defense enemies will be recommended, due to the good damage you can build up mixed with armor penetration.

</details>

<details>

<summary><img src="https://3522175436-files.gitbook.io/~/files/v0/b/gitbook-x-prod.appspot.com/o/spaces%2FrcgtxEHRbgBRPbt4a4vb%2Fuploads%2Fv9EPyuk83vAOTWzcIf7X%2Fimage.png?alt=media&amp;token=2deba35c-781e-4b3d-8319-1e7e2174aa7e" alt="" data-size="line"> Starless Scythe</summary>

**Damage:** 10\
**Attack Speed:** Very Slow (0.9)\
**Tooltip:** Steals life from attacked mobs\
*Can damage multiple mobs at once*\
**Durability:** 1232

**Starless Scythe** is a post-Dragon scythe which performs sweep attacks that heal yourself on hit.

&#x20;Starless Scythe can be enchanted with any Hoe enchantment, getting special combat effects from them.

&#x20;Starless Scythe can be repaired with Netherite ingots, or a Netherite Hoe.

### Obtaining <a href="#obtaining" id="obtaining"></a>

The Starless Scythe can be obtained from End City Treasure chests and End Dungeon chests.

### Usage <a href="#usage" id="usage"></a>

When used, the Starless Scythe performs a sweeping attack like a sword. The sweep deals 60% of the base damage. When an enemy is hit, you are healed 5% of the damage dealt to the mob.\
The Starless Scythe has various enchantment interactions. Efficiency makes enemies you hit get crippled, scaling with the level. Fortune increases healing amount by 2% per level. Silk touch makes it so that you get regeneration for 3 seconds upon killing a mob, with an additional second if a mob is killed in those 3 seconds.

### Tips <a href="#tips" id="tips"></a>

* This weapon is best to be used as a support item to get your health back up, as its damage is outclassed by other stellarity items.
* This weapon is a great synergy to use with any modded weapon that uses up your health.

</details>

<details>

<summary><img src="https://3522175436-files.gitbook.io/~/files/v0/b/gitbook-x-prod.appspot.com/o/spaces%2FrcgtxEHRbgBRPbt4a4vb%2Fuploads%2FCgGvIHUi8Y9sYUk0qV04%2Fimage.png?alt=media&amp;token=583efe66-965d-4f1d-ae52-4437609f15fb" alt="" data-size="line"><img src="https://3522175436-files.gitbook.io/~/files/v0/b/gitbook-x-prod.appspot.com/o/spaces%2FrcgtxEHRbgBRPbt4a4vb%2Fuploads%2FRtbIsWPNy3M05as8GMdl%2Fimage.png?alt=media&amp;token=dfb287b5-f9d6-495a-875c-342fc6f7b60c" alt="" data-size="line"> Frigid Harvester</summary>

**Damage:** 5 (base)\
**Attack Speed:** Very Slow (0.85)\
**Tooltip:** Imbues itself with souls of slain mobs, permanently increasing its damage and unlocking passive abilities.\
*Gets less damage the more souls it absorbs.*\
&#x20;*-* Developer Item -\
**Durability:** 1562 (unbreakable after upgraded enough)\
**Other:** -15% Movement Speed (while held)

### Obtaining <a href="#obtaining" id="obtaining"></a>

Frigid Harvester has a 10% chance to be found inside Frozen Crates fished up during Void Fishing.

Strays found in [Frosted Hills](/dim/the-end#frosted-hills) have a 3% chance to spawn holding a Frigid Harvester, which they always drop on death. Strays equipped with Harvesters have increased stats and wear a Diamond Helmet and Chestplate.

### Usage <a href="#usage" id="usage"></a>

Killing any living mob permanently increases Frigid Harvester's damage. Stronger mobs give more extra damage, while passive mobs barely grant any increase. Displayed damage is rounded up to the lower tenth, meaning that e.g. damage value of `8.62` is going to be displayed as `8.6` instead.

Total damage Frigid Harvester can aquire is 19, however damage gains roll off quickly at higher amounts, meaning that getting past certain tresholds requires farming.

While holding Frigid Harvester in main hand movement speed is reduced by 15%. Players also give off ambient particles which change in appearance as the damage increases.

#### Passive Abilities <a href="#passive-abilities" id="passive-abilities"></a>

The frigid harvester can gain passive abilities by killing specific mobs.\
&#x20;Blaze: Frostburn. Extreme cold burns enemies for extra damage.\
&#x20;Stray: Arctic Wind. Super cold aura slows down all nearby mobs.\
&#x20;Witch: Piercing Cold. Chance to weaken enemy armor on hit.\
&#x20;Iron Golem: Frost Barrier. Gain temporary damage reduction after killing a mob.\
&#x20;Wither: Amina Conduit. Souls are crushed down and converted into a healing force.\
&#x20;Ender Dragon: Cryonics. Using a Totem of Undying encases you in protective ice, making you invulnerable and providing extreme healing.

**Stat scaling from mobs**

* **All passive mobs, Bee, Polar Bear, Snow Golem, Iron Golem, Slime, Magma Cube, Cave Spider**
  * Extra Damage: +0.07
  * Anima Conduit Healing: 2HP
  * FP: 1 🍗 (2 saturation)
* **Zombie, Skeleton, Spider, Enderman, Husk, Stray, Pillager, Drowned, Zombie Villager, Zombified Piglin, Piglin, Vex, Guardian**
  * Extra Damage: +0.14
  * Anima Conduit Healing: 4HP
  * FP: 2 🍗 (4 saturation)
* **Wither Skeleton, Blaze, Vindicator, Witch, Phantom, Shulker, Hoglin, Creeper, Other players (PvP)**
  * Extra Damage: +0.24
  * Anima Conduit Healing: 6HP
  * FP: 3 🍗 (6 saturation)
* **Evoker, Illusioner, Piglin Brute, Ghast, Zoglin, Ravager**
  * Extra Damage: +0.35
  * Anima Conduit Healing: 8HP
  * FP: 5 🍗 (10 saturation)
* **Wither, Giant, Elder Guardian, Warden, Some modded bosses**
  * Extra Damage: +0.67
  * Anima Conduit Healing: 16HP
  * FP: 12 🍗 (24 saturation)

### Tips <a href="#tips" id="tips"></a>

* It is relatively easy to get Frigid Harvester to 8 or 11 damage. It can be achieved in one night by just running around and killing Zombies or Skeletons. Getting it to 14 is not much harder.
  * Getting Frigid Harvester to 19 damage will be difficult, as weaker mobs quickly stop giving as much extra damage.
* Even though Frigid Harvester starts extremely weak compared to other weapons of the same tier, it can quickly outdamage them with enough grinding and right setup.
* You get slowed down while holding a Frigid Harvester. This can be cancelled out by using a Swiftness Potion.
* Warden farming is the easiest (and probably the only) way of getting a Frigid Harvester to the maximum damage.
  * However, it isn't quick, as it at higher damage numbers it can take up to 100 Wardens to get 1 extra damage. Building an efficient farm is crucial.
* Anima Conduit is by far the best item ability in Stellarity in terms of survivability. It could even potentially remove the need to eat completely given the player regularly goes after some mobs to kill.
  * This however comes with a price of long mob grinding to get the Harvester to its maximum potential.
* Frigid Harvester is one of the 2 upgradable items in Stellarity, the other one being Nature's Wrath

</details>

<details>

<summary>Orichalcum Sword</summary>

</details>

***

## Post-Empress

<details>

<summary><img src="https://3522175436-files.gitbook.io/~/files/v0/b/gitbook-x-prod.appspot.com/o/spaces%2FrcgtxEHRbgBRPbt4a4vb%2Fuploads%2FFiLL2iWsgaeFg2VLCBhw%2Fimage.png?alt=media&amp;token=d99313e7-7c56-421f-872c-b5f268f64248" alt="" data-size="line"> Prismember</summary>

**Damage:** 8\
**Attack Speed:** Normal (1.6)\
**Tooltip:** Sneak to charge up a fiery spin, igniting all nearby mobs and setting them on Prismatic Inferno\
**Durability:** 2031

**Prismember** is a post-Empress sword which can do a spin attack that applies Prismatic Inferno to all enemies around you.

&#x20;Prismember can be enchanted with any Sword enchantment.

&#x20;Prismember can be repaired with Netherite Ingots.

### Obtaining <a href="#obtaining" id="obtaining"></a>

Prismember has a 33% chance to be dropped by the Empress of Light, but only if killed in The End or in the Overworld during nighttime.

### Usage <a href="#usage" id="usage"></a>

When you crouch, a red and orange timer appears above your hotbar. After 8 ticks, it is filled up and tells you to attack. When you do, a fiery spin is released, dealing 8HP damage with 30% armor penetration, and applying Prismatic Inferno for 3 seconds, with an extra second for each level of fire aspect you have. This spin has a 20 tick cooldown.

### Tips <a href="#tips" id="tips"></a>

* This weapon is great for hitting and running. Just make sure to reapply Prismatic Inferno every few seconds for it to not timeout.

</details>

<details>

<summary><img src="https://3522175436-files.gitbook.io/~/files/v0/b/gitbook-x-prod.appspot.com/o/spaces%2FrcgtxEHRbgBRPbt4a4vb%2Fuploads%2FdPHUS66Ujk3VG9sj506E%2Fimage.png?alt=media&amp;token=9b536ddb-3289-4f50-91c5-3f1ac3704d44" alt="" data-size="line"> Kaleidoscope</summary>

**Damage:**

* **10 (base)**
* **3.3 - 30 (discharge)**

**Attack Speed:** Very Slow (0.8)\
**Tooltip:** Channels power from the core of the sun. Strike enemies to release stored energy all at once in a powerful discharge.\
**Durability:** Unbreakable

**Kaleidoscope** is a post-Empress greataxe which charges itself while held. Attacking releases stored energy in a powerful discharge which deals heavy splashing damage and sets mobs on fire.

&#x20;Kaleidoscope can be enchanted with any Axe enchantment.

&#x20;Kaleidoscope is unbreakable and cannot be repaired with an Anvil. However, Enchanted Books can be fused with a Kaleidoscope to transfer enchantments.

**Obtaining**

Kaleidoscope is a guaranteed drop from the Empress of Light, but only if she is killed in the Overworld during the day. This makes obtaining it extremely challenging.

### Usage <a href="#usage" id="usage"></a>

While held in the main hand, Kaleidoscope will rapidly charge itself, with charge scaling from 0 to 100 over the course of 7.5 seconds. Being hurt will reduce current charge by 50%.

Attacking a mob resets the charge back to 0. If the charge value is under 33, nothing happens. However, if player's charge value is anything above 33, Kaleidoscope will release all of its stored energy in an explosive discharge which deals heavy damage which splashes to multiple enemies and sets them on fire. Splash damage is equal to 70% of discharge's damage and drops off with distance, scaling down to 30%. Fire duration on splash damage also scales down with distance, going from 80% of full duration to 50%.

The discharge damage stacks with weapons's base damage. Discharges only inherit 50% of melee damage bonuses (excluding Strength potions, which only increase weapon's base damage).

Discharge damage is reduced further by Blast Protection enchantment. This does not affect base sword damage. Keep in mind that armor piercing damage ignores specialized enchantments.

Kaleidoscope is unbreakable and immune to lava, fire, explosions and cacti. The only way to destroy the item is through either tossing it into the void or through natural despawn.

**Discharge levels:**

* **33 - 65:**
  * **Damage:** charge/10 (3.3 - 9.5)
  * **Fire Duration:** 20 + charge/2 (37 - 53) ticks
  * **Splash Radius:** 0
  * **Armor Penetration:** 15%
* **66 - 99:**
  * **Damage:** 8 + charge/10 (14.6 - 17.9)
  * **Fire Duration:** 40 + charge/2 (73 - 89) ticks
  * **Splash Radius:** 2.7
  * **Armor Penetration:** 25%
* **100:**
  * **Damage:** 30
  * **Fire Duration:** 20 + charge/2 (20 + 50) ticks
  * **Splash Radius:** 120
  * **Armor Penetration:** 4.2

### Tips <a href="#tips" id="tips"></a>

* Enchantments which increase weapon's damage (like Sharpness, Smite or Bane of Arthropods) only increase Kaleidoscope's base damage. Discharge damage can only be increased by bonuses from other items.
* Since it is unbreakable, enchanting it with Mending and/or Unbreaking is pointless.
* 3rd level discharges are extremely deadly, as not only do higher damage amounts get mitigated less by armor, combining it with the extra armor penetration makes up for a deadly strike.
  * Kaleidoscope is the most efficient if 3rd level discharges are timed well.

</details>

<details>

<summary>Ravensoul</summary>

</details>

<details>

<summary>Crystal Stick</summary>

</details>

<details>

<summary>Soul Stealer</summary>

</details>

<details>

<summary>Warped Leaf Blade</summary>

</details>

<details>

<summary>Cursed Wooden Warglaive</summary>

</details>

<details>

<summary>Wind Blade</summary>

</details>

***

## Pre-Solar

<details>

<summary>Wooden Thundershocker</summary>

</details>

<details>

<summary>Blade of the Samurai</summary>

</details>

<details>

<summary>Thornblade</summary>

</details>

<details>

<summary>Fast Flamescar</summary>

</details>

<details>

<summary>Lazarus</summary>

</details>

***

## Pre-Giants

<details>

<summary>Wooden Frost Sword</summary>

</details>

<details>

<summary>Wooden Frostbite</summary>

</details>

<details>

<summary>Hardened Steel Claymore</summary>

</details>

<details>

<summary>Cane Sword</summary>

</details>

<details>

<summary>Crystal Saber</summary>

</details>

<details>

<summary>Flesh Flayer</summary>

</details>

***

## Pre-Punky

<details>

<summary>Steel Dagger</summary>

</details>

<details>

<summary>Dracula's Dagger</summary>

</details>

<details>

<summary>Molten Blade</summary>

</details>

<details>

<summary>Two Handed Steel Sword</summary>

</details>

<details>

<summary>Double or Nothing</summary>

</details>

<details>

<summary>Santammer</summary>

</details>

<details>

<summary>Claw of Oxoc</summary>

Collectable right before Punky boss fight by travelling back to Alfheim and talking to Oxoc's Apprentice to start the secret quest of Oxoc.

</details>

***

## Pre- Space Event Horizon

<details>

<summary>Fire Greatlance</summary>

</details>

<details>

<summary>Fury Katana</summary>

</details>

<details>

<summary>Barbarian's Greataxe</summary>

</details>

<details>

<summary>Unreliable Greathammer</summary>

</details>

<details>

<summary>Earthly Cacti Greatsword</summary>

</details>

<details>

<summary>Flowing Katana</summary>

</details>

<details>

<summary>Titanium Blade</summary>

</details>

***

## Pre-Asgard

<details>

<summary>Master Katana</summary>

</details>

<details>

<summary>Dual Longsword</summary>

</details>

<details>

<summary>Skilled Sword</summary>

</details>

<details>

<summary>Securus</summary>

</details>

<details>

<summary>Hemoslayer</summary>

</details>

<details>

<summary>Paladin Hammer</summary>

</details>

<details>

<summary>Justice</summary>

</details>

***

## Pre-Thunderlord

<details>

<summary>Ark of the Cosmos</summary>

</details>

<details>

<summary>Absolute Zero</summary>

</details>

<details>

<summary>The Trickster</summary>

</details>

<details>

<summary>Fearmonger</summary>

</details>

<details>

<summary>Deathbringer</summary>

</details>

<details>

<summary>Executioner's Blade</summary>

</details>

***

## True End

<details>

<summary>The Calamity</summary>

</details>

<details>

<summary>Hemophobia</summary>

</details>

<details>

<summary>Shadow</summary>

</details>

<details>

<summary>Withered</summary>

</details>

<details>

<summary>The Daedalus</summary>

</details>

<details>

<summary>Rememberence</summary>

</details>

<details>

<summary>Silverlight</summary>

</details>

<details>

<summary>Sub-Zero</summary>

</details>

<details>

<summary>Cobra</summary>

</details>

<details>

<summary>Duskshadow</summary>

</details>

<details>

<summary>Earthbound</summary>

</details>

***


# Magic Weapons

## Pre-Advanced

<details>

<summary></summary>

</details>

<details>

<summary></summary>

</details>

<details>

<summary></summary>

</details>

***

## Advanced

<details>

<summary></summary>

</details>

<details>

<summary></summary>

</details>

<details>

<summary></summary>

</details>

***

## Muspelheim

<details>

<summary></summary>

</details>

<details>

<summary></summary>

</details>

<details>

<summary></summary>

</details>

***

## Pre-Dragon

<details>

<summary></summary>

</details>

<details>

<summary></summary>

</details>

<details>

<summary></summary>

</details>

***

## Post-Dragon

<details>

<summary></summary>

</details>

<details>

<summary></summary>

</details>

<details>

<summary></summary>

</details>

***

## Post-Empress

<details>

<summary></summary>

</details>

<details>

<summary></summary>

</details>

<details>

<summary></summary>

</details>

***

## Pre-Solar

<details>

<summary></summary>

</details>

<details>

<summary></summary>

</details>

<details>

<summary></summary>

</details>

***

## Pre-Giants

<details>

<summary></summary>

</details>

<details>

<summary></summary>

</details>

<details>

<summary></summary>

</details>

***

## Pre-Punky

<details>

<summary></summary>

</details>

<details>

<summary></summary>

</details>

<details>

<summary></summary>

</details>

***

## Pre- Space Event Horizon

<details>

<summary></summary>

</details>

<details>

<summary></summary>

</details>

<details>

<summary></summary>

</details>

***

## Pre-Asgard

<details>

<summary></summary>

</details>

<details>

<summary></summary>

</details>

<details>

<summary></summary>

</details>

***

## Pre-Thunderlord

<details>

<summary></summary>

</details>

<details>

<summary></summary>

</details>

<details>

<summary></summary>

</details>

***

## True End

<details>

<summary></summary>

</details>

<details>

<summary></summary>

</details>

<details>

<summary></summary>

</details>

s


# Ranged Weapons

## Pre-Advanced

<details>

<summary>Bow</summary>

</details>

<details>

<summary>Crossbow</summary>

</details>

<details>

<summary><img src="https://3522175436-files.gitbook.io/~/files/v0/b/gitbook-x-prod.appspot.com/o/spaces%2FrcgtxEHRbgBRPbt4a4vb%2Fuploads%2FerW8RCs2lDaJCuU9KVoy%2Fimage.png?alt=media&amp;token=386156e0-e416-4abb-995d-dfb6c05bb020" alt="" data-size="line"> Bandit Bow</summary>

More info [here](https://stardustlabs.miraheze.org/wiki/Bandit_bow)

**Obtaining:**\
It can be found in [themed structures](/dim/overworld/hub-dimension-old#themed-structures-15).

</details>

<details>

<summary></summary>

</details>

***

## Advanced

<details>

<summary></summary>

</details>

<details>

<summary></summary>

</details>

<details>

<summary></summary>

</details>

***

## Muspelheim

<details>

<summary><img src="https://3522175436-files.gitbook.io/~/files/v0/b/gitbook-x-prod.appspot.com/o/spaces%2FrcgtxEHRbgBRPbt4a4vb%2Fuploads%2FgIjY2hVgzLeenfieHzyc%2Fimage.png?alt=media&amp;token=85db22d5-f84a-4e40-8c8e-7b47e8b681b7" alt="" data-size="line"> Multiplex Crossbow</summary>

Attack Damage: 16 - 17\
Attack Speed: 0.8\
Durability: 465

The Multiplex crossbow is a crossbow with the ability to launch a short-range, high spread blast of fiery arrows.

### Obtaining

The Multiplex crossbow can be found at the top of open tower tops which as a chance to be found in the Forbidden castle.

* [![](https://static.miraheze.org/stardustlabswiki/thumb/4/46/Multiplex_location_%283%29.png/120px-Multiplex_location_%283%29.png)](https://stardustlabs.miraheze.org/wiki/File:Multiplex_location_\(3\).png?filetimestamp=20220413232152&)
* [![](https://static.miraheze.org/stardustlabswiki/thumb/9/90/Multiplex_location_%282%29.png/120px-Multiplex_location_%282%29.png)](https://stardustlabs.miraheze.org/wiki/File:Multiplex_location_\(2\).png?filetimestamp=20220413231919&)

### Modifications

This item can be renamed without loosing its effect, but it will lose its font color.

#### Possible upgrades

The Multiplex crossbow can be enchanted with Mending, Quick charge and Unbreaking and can use most tipped arrows, although only one of the arrows will apply the effect.

#### Downsides

Multishot and Piercing have no effects with the Multiplex apart from taking its durability faster, and harming tipped arrows and spectral arrows have no effects.

#### Description

*Shoots a blast of fiery arrows at a short-range*

</details>

<details>

<summary><img src="https://3522175436-files.gitbook.io/~/files/v0/b/gitbook-x-prod.appspot.com/o/spaces%2FrcgtxEHRbgBRPbt4a4vb%2Fuploads%2FBeSd2Pr3OKDt5kcCMbNJ%2Fimage.png?alt=media&amp;token=6ffaf2b6-5100-4b13-8bf7-0ce6d1303aee" alt="" data-size="line"> Holy Wrath</summary>

Attack Damage: 4 - 7 (+15 explosion damage)\
Attack Speed: 0.8\
Durability: 465

The Holy wrath is a powerful crossbow with the ability to set the target on fire and to summon 24 arrows that fly outwards in a circular pattern, creating fire when they land. The crossbow can only be loaded with Spectral arrows and won't work with normal arrows.

### Obtaining

The Holy wrath is dropped by the Sanctum guardians in the Sanctum's vault.

### Modifications

This item can be renamed without loosing its effect, but it will lose its font color.

#### Possible upgrades

The Holy Wrath can be enchanted with Mending, Quick charge and Unbreaking, and can also use tipped arrows that will only work on a direct hit.

#### Downsides

No benefits can be gained with Multishot and Piercing.

#### Description

*Spawn a spiral of fireball*

</details>

<details>

<summary><img src="https://3522175436-files.gitbook.io/~/files/v0/b/gitbook-x-prod.appspot.com/o/spaces%2FrcgtxEHRbgBRPbt4a4vb%2Fuploads%2FrUXeGb8ZOSo9RR0gUvhs%2Fimage.png?alt=media&amp;token=eebfb706-bef4-432f-a324-2c4d62d95fac" alt="" data-size="line"> Sentry's Wrath</summary>

Attack Damage: 16\
Attack Speed: 0.8\
Durability: 465

Enchants: Mending, Piercing VI

The Sentry's wrath is a special crossbow that shoots out a slow moving bolt of lightning which shoots out arcing particle streams in random directions until it strikes something. Once it does, that bolt of lightning explodes.

It comes enchanted with Piercing VI and Mending, but also with a cooldown, indicated by an auditory clue. If you shoot before that sound, you will be electrocuted and badly hurt.

### Obtaining

The Sentry's wrath can be found in a special room with a copper mechanism and captured Sentries which as a chance to be found in the Forbidden castle.

* [![](https://static.miraheze.org/stardustlabswiki/thumb/b/bd/Forbidden_castle_tera_%284%29.png/120px-Forbidden_castle_tera_%284%29.png)](https://stardustlabs.miraheze.org/wiki/File:Forbidden_castle_tera_\(4\).png?filetimestamp=20220302101122&)

### Modifications

This item can be renamed without loosing its effect, but it will lose its font color.

#### Possible upgrades

The Sentry's wrath enchanted with Quick charge and Unbreaking with books or other crossbows.

#### Downsides

The Sentry's wrath has no benefits if enchanted with Multishot and will lose 25 of durability upon attempting to use it without spectral arrows. Trying to grindstone it will create an explosion, damaging you and deleting the item.

### History

#### Description

*Turns spectral arrows into a slow, powerful attack. Beware the cooldown.*

</details>

<details>

<summary><img src="https://3522175436-files.gitbook.io/~/files/v0/b/gitbook-x-prod.appspot.com/o/spaces%2FrcgtxEHRbgBRPbt4a4vb%2Fuploads%2FGpxas4fSf6xanK0iUA5F%2Fimage.png?alt=media&amp;token=9aa83928-6c13-4831-be53-9bf794544d7e" alt="" data-size="line"> Firestorm</summary>

Attack Damage: 16 - 17\
Attack Speed: 0.8\
Durability: 465

The Firestorm is a Crossbow with the ability to shoot a magical fireball, exploding on impact.

### Obtaining

The Firestorm has a 20% chance to be dropped by the Hovering Inferno.

### Modifications

This item can be renamed without loosing its effect, but it will lose its font color.

#### Possible upgrades

Can only be upgraded in Creative.

#### Downsides

If used without spectral arrows, the Firestorm will lose 25 of durability and explode, damaging the player. The weapon will be destroyed if grindstoned.

#### Description

*Turns spectral arrows into a powerful lightning attack*

</details>

<details>

<summary><img src="https://3522175436-files.gitbook.io/~/files/v0/b/gitbook-x-prod.appspot.com/o/spaces%2FrcgtxEHRbgBRPbt4a4vb%2Fuploads%2Fvrst4FXA5maPLRuJlYHO%2Fimage.png?alt=media&amp;token=910fc0c2-a474-4235-8096-ba1d404e53b4" alt="" data-size="line"> Ragnarok</summary>

Durability: 384

The Ragnarok is a Bow with the ability to summon an electrical bolt that makes lightning strikes any entity that comes in contact with that electrical trail. If charged for too long, the user gets struck by lightning.

### Obtaining

The Ragnarok can be found in the last dead end of a corridor composed of five dead ends in the Labyrinthine hidden crypt of the Sanctum.

* [![](https://static.miraheze.org/stardustlabswiki/thumb/3/32/Ragnarok_location.png/120px-Ragnarok_location.png)](https://stardustlabs.miraheze.org/wiki/File:Ragnarok_location.png?filetimestamp=20220413232227&)

### Modifications

This item can be renamed without loosing its effect, but it will lose its font color.

#### Possible upgrades

The Ragnarok can be enchanted with Infinity, Mending and Unbreaking.

#### Downsides

Power, Punch, and tipped arrows have no effects.

### History

#### Description

*The longer you hold back the bow, the more powerful the lightning you create*

</details>

<details>

<summary><img src="https://3522175436-files.gitbook.io/~/files/v0/b/gitbook-x-prod.appspot.com/o/spaces%2FrcgtxEHRbgBRPbt4a4vb%2Fuploads%2FmXxyX3vMO3Se02B9bEsU%2Fimage.png?alt=media&amp;token=fc0b1fad-c374-4342-bffb-f901e0bbb41a" alt="" data-size="line"> Trailblazer</summary>

Charge Damage: 4, 6, 10, 15 (+10 explosion damage)\
Charge Speed: 1, 0.5, 0.33, 0.25\
Durability: 384

The Trailblazer is a bow that pierces through mobs, exploded on impact with blocks, and leaves a trail of fire behind if used with spectral arrows. If used too quickly, it can set the user on fire. Its damages and effects scale up the longer the bow is held back. With great power comes a downside: the bow cannot be used for some time both during, and after it rained, or if brought with a player underwater.

### Obtaining

The Traiblazer has a 20% chance to be dropped by the Hovering Inferno.

### Modifications

This item can be renamed without loosing its effect, but it will lose its font color.

#### Possible upgrades

The Trailblazer can use any arrow types, but only a direct hit will apply the effects. It can also be enchanted with any bow enchantments, Infinity or Mending, Power, Punch, and Unbreaking.

#### Description

*Fires more powerful arrows the longer you pull the bow. Spectral arrows leave a trail of blaze.*

</details>

***

## Pre-Dragon

<details>

<summary><img src="https://3522175436-files.gitbook.io/~/files/v0/b/gitbook-x-prod.appspot.com/o/spaces%2FrcgtxEHRbgBRPbt4a4vb%2Fuploads%2F9UNPMDxIKtRxCiKELvxy%2Fimage.png?alt=media&amp;token=cbf6fba9-ed49-4005-8809-fdb6c34aa178" alt="" data-size="line"> Sharanga</summary>

**Damage:** Varies\
**Tooltip:** Spectral Arrows travel in a straight line and deal increased damage\
*25% chance to save Spectral Arrows*\
**Durability:** 424

Sharanga is a pre-Dragon bow which converts Spectral Arrows into Spectral Bolts. They travel faster, deal more damage and are unaffected by gravity.

&#x20;Sharanga can be enchanted with any Bow enchantment.

&#x20;Sharanga can be repaired by fusing it with a different Bow.

**Obtaining:**\
Sharanga has a 9% chance to be dropped by Illusioners in [Strongholds](/dim/the-end#stronghold). Each level of Looting increases the odds by 3%, up to a total of 18% with Looting III.

It drops paired with 7 - 22 Spectral Arrows.

**Usage:**\
When using Spectral Arrows as ammunition, they are converted into high velocity Spectral Bolts. Bolts deal 30% more damage and fly 30% faster and in a straight line. They can also pierce up to 4 mobs, dissipating upon hitting the 5th.

Sharanga has a 25% chance to not use up fired Spectral Arrows. This chance is doubled by the Infinity enchantment for a total of 50%.

**Tips:**\
Bolts always disappear after either hitting a block or after 3 seconds have passed, not after travelling a set distance.

Sharanga enchanted with Infinity is superior to one enchanted with Mending due to increased chance of conserving Spectral Arrows.

Skeletons in The End drop Spectral Arrows on death while being inflicted with Glowing, meaning that setting up a mob farm there could be a really good way to get the special ammunition for Sharanga.

</details>

<details>

<summary><img src="https://3522175436-files.gitbook.io/~/files/v0/b/gitbook-x-prod.appspot.com/o/spaces%2FrcgtxEHRbgBRPbt4a4vb%2Fuploads%2FJ2hLPjC98d5Y8EXR3tuz%2Fimage.png?alt=media&amp;token=c4929f55-9eaa-4ccd-a28e-66696f552990" alt="" data-size="line"> Clockwork Crossbow</summary>

**Damage:** 4 - 8\
**Attack Speed:** Insanely Fast\
**Tooltip:** Shoots incredibly fast but with reduced damage\
*Chance to save ammunition, increases with Quick Charge enchantment*\
*'i'm not using auto!'*\
**Durability:** 365

Clockwork Crossbow is a modified Crossbow with the ability to shoot incredibly fast, but dealing a bit less damage when compared to its non-mechanized counterpart. It has a small chance to save Arrows, not consuming the after being shot.

&#x20;Clockwork Crossbow can be enchanted with any Crossbow enchantment. Due to it charging almost instantly, Quick Charge increases the odds of not using Arrows when shooting.

&#x20;Clockwork Crossbow can be repaired by fusing it with a different Crossbow.

**Obtaining**:\
Clockwork Crossbow has a 7% chance to be dropped by Pillagers in [Strongholds](/dim/the-end#stronghold). Each level of Looting increases the odds by 2%, up to a total of 13% with Looting III.

**Usage**:\
Holding Clockwork Crossbow will automatically load it every 7 ticks (0.35s), provided there is at least 1 Arrow in player's inventory. ALL Arrow types will be converted into normal Arrows. By default, Arrows shot by a Clockwork Crossbow cannot critical hit.

While shooting, player suffers a 30% speed penalty, which lasts for an extra 1.1s after player stops shooting.

After being loaded, there is a 25% Clockwork Crossbow won't use any Arrows. If an arrow is conserved, the next fired shot will ALWAYS be critical. Quick Charge enchantment increases the odds to save Arrows (and what comes with it - shooting critical Arrows) by 6% per level, giving a maximum of 43% chance to save Arrows with Quick Charge III. Only non-conserved arrows can be picked up after firing.

Shot Arrows deal reduced damage - about 4 HP per shot.

**Tips**:\
Because projectiles in Stellarity ignore invulnerability ticks, Arrows will never 'bounce off' the target without dealing any damage.

This makes a Clockwork Crossbow enchanted with Multishot incredibly deadly up close, as all Arrows can hit the target.

Since all Arrows are stripped of any special properties, pair a Clockwork Crossbow with only normal Arrows and save your stronger ammunition for use with other weapons.

</details>

<details>

<summary></summary>

</details>

***

## Post-Dragon

<details>

<summary><img src="https://3522175436-files.gitbook.io/~/files/v0/b/gitbook-x-prod.appspot.com/o/spaces%2FrcgtxEHRbgBRPbt4a4vb%2Fuploads%2FPUdw7rC64kshjyHkqTv6%2Fimage.png?alt=media&amp;token=85041892-d19c-420c-8fea-0a9aac824b94" alt="" data-size="line"> Call of the Void</summary>

**Damage:** Varies\
**Tooltip:** Shoots Void Arrows, which reduce enemy HP and shatter on impact.\
**Durability:** 424

**Call of the Void** is a Post-Dragon bow that when shot, shatters, dealing small damage around the arrow, and the arrow applies the Voided effect on anything hit.

&#x20;Call of the Void can be enchanted with any Bow enchantment.

&#x20;Call of the Void can be repaired by fusing it with a different Bow.

### Obtaining <a href="#obtaining" id="obtaining"></a>

Call of the Void can be crafted at the [Altar of The Accursed](/dim/the-end#altar-of-the-accursed) using any bow, 8 Dragon's Breath, 16 Enderite Shards, and 1 Enderite Smithing Template.

### Usage <a href="#usage" id="usage"></a>

When used, Shoots arrows that travel faster and deal 15% more damage than a normal bow. The arrow shot from the bow shatters upon impact, dealing 4.5 HP x ¼ damage. Enemies that are directly hit by the bow are applied Voided 1, which reduces the effected entity's hp by 20%

### Tips <a href="#tips" id="tips"></a>

* This bow is the easiest way to apply the Voided effect to an entity. The only other way is through the [Dragonblade's](/items/melee-weapons#dragonblade) punch attack.
* The Voided effect make's this a great weapon to use against high hp or highly armored enemies, like a ravager or another player, because of voided being percentage based

</details>

<details>

<summary><img src="https://3522175436-files.gitbook.io/~/files/v0/b/gitbook-x-prod.appspot.com/o/spaces%2FrcgtxEHRbgBRPbt4a4vb%2Fuploads%2FFiO1jOmsXtLGhna3OHZ0%2Fimage.png?alt=media&amp;token=3f4e669c-4c13-460b-bc62-577580833e0d" alt="" data-size="line"> Slayer Crossbow (Unobtainable)</summary>

**Damage:** 9\
**Tooltip:** Shoots highly damaging energy bolts with infinite pierce, but limited range\
**Durability:** 365

**Slayer Crossbow** is a crossbow that shoots an energy bolt that branches out into other bolts. These bolts infinitely pierce but with limited range.

&#x20;Slayer Crossbow can be enchanted with any Crossbow enchantment, though multishot does not do anything. Piercing increases Slayer Crossbow's damage instead of pierce.

&#x20;Slayer Crossbow can be repaired by fusing it with a different Crossbow.

### Obtaining <a href="#obtaining" id="obtaining"></a>

Unknown (unobtainable)

### Usage <a href="#usage" id="usage"></a>

When shot, an energy bolt that branches out into multiple bolts is shot, dealing 9 HP x ½ damage, and instantly travels. This bolt has a limited range, but the bolt can infinitely pierce.

Quick charge works normally with Slayer Crossow, but multishot does not work. Piercing is altered to, instead of increasing pierce, increase damage by 2. HP This makes a Slayer Crossbow with piercing 4's total damage 17. HP x 8.5

### Tips <a href="#tips" id="tips"></a>

* This weapon should be used like a shotgun, due to its low range, but high damage
* This can be a very strong weapon against dense and strong crowds, due to its high damage per second combined with infinite piercing.

</details>

<details>

<summary><img src="https://3522175436-files.gitbook.io/~/files/v0/b/gitbook-x-prod.appspot.com/o/spaces%2FrcgtxEHRbgBRPbt4a4vb%2Fuploads%2FSy7DYF2LvbKEv0pmKPfk%2Fimage.png?alt=media&amp;token=2a4d9e3a-f6a0-43bc-b35c-3cc1d4e937fc" alt="" data-size="line"> Spectral Fury</summary>

**Damage:** Varies (Arrows)\
**7 - 11.5 (Wisp)**\
**Tooltip:** Overcharged shots convert Spectral Arrows into wisps which seek out and attack mobs\
*25% chance to save Spectral Arrows*\
**Durability:** 636

**Spectral Fury** is a post-Dragon bow with the ability to convert Spectral Arrows into homing Wisps on overcharged shots. Wisps slowly fly and seek out nearest mobs.

&#x20;Spectral Fury can be enchanted with any Bow enchantment.

&#x20;Spectral Fury can be repaired by fusing it with a different Bow.

### Obtaining <a href="#obtaining" id="obtaining"></a>

Spectral fury can be obtained by combining a Sharanga, 3 Diamonds, 8 Phantom Membranes and an Enderite Upgrade Smithing Template on the [Altar of The Accursed](/dim/the-end#altar-of-the-accursed).

### Usage <a href="#usage" id="usage"></a>

When using Spectral Arrows as ammunition, shots charged for a total of 1.5 seconds or longer will instead shoot a Wisp. Wisps last for 7 seconds and slowly move forwards, homing in on any mob in a 16 block radius.

Wisps can pierce 2 enemies, dissipating upon hitting the 3rd. Wisps try to home in a 'smart' way:

* If there are 3 mobs near each other, Wisps will try to hit all 3 of them, one after another.
* If there are 2 mobs next to each other, Wisps will first hit mob #1, then fly and attack mob #2 and then back to mob #1.
* If there is only 1 mob and no other mobs in a 16 block radius, it will instead hit the same mob 3 times.

Wisps deal `4 + (1.5 * arrowdmg)` damage, where `arrowdmg` is Arrow's base damage value[1](https://stellarity.kohara.xyz/items/spectral_fury/#fn:1). After piercing an enemy, Wisps damage for the next hit will be reduced by 40% (rounded to the nearest tenth), stacking multiplicatively.

#### Wisp damage <a href="#wisp-damage" id="wisp-damage"></a>

![](https://3522175436-files.gitbook.io/~/files/v0/b/gitbook-x-prod.appspot.com/o/spaces%2FrcgtxEHRbgBRPbt4a4vb%2Fuploads%2FhgVw8MQBcHUrph71jxKG%2FSka%CC%88rmavbild%202024-09-04%20kl.%2000.28.30.png?alt=media\&token=3ba256dc-e462-4aad-bd01-d761afdbd137)

\* Due to rounding, the damage gains might be inconsistent across levels.

### Tips <a href="#tips" id="tips"></a>

* Bolts always disappear after either hitting a block or after 3 seconds have passed, not after traveling a set distance.
* Spectral Fury inherits Sharanga's arrow conservation chance, meaning that enchanting it with Infinity is superior to enchanting it with Mending due to increased chance of conserving Spectral Arrows.
  * Mending is made redundant even further with Spectral Fury's increased durability.
* Skeletons in The End drop Spectral Arrows on death while being inflicted with Glowing, meaning that setting up a mob farm there could be a really good way to get the special ammunition for Spectral Fury.<br>

</details>

***

## Post-Empress

<details>

<summary><img src="https://3522175436-files.gitbook.io/~/files/v0/b/gitbook-x-prod.appspot.com/o/spaces%2FrcgtxEHRbgBRPbt4a4vb%2Fuploads%2FzDEq63FM2voBDaXN7t0c%2Fimage.png?alt=media&amp;token=07e797c6-85a1-4bb0-8235-34336edcc49e" alt="" data-size="line"> Prismatic Punch</summary>

**Damage:** 7 - 11\
**Tooltip:** Shoots exploding Prismatic Blasts which explode multiple times and set mobs on Prismatic Inferno\
**Durability:** 365

Obtaining

Prismatic Punch has a 50% chance to be dropped by the Empress of Light if killed in The End or during nighttime.

### Usage <a href="#usage" id="usage"></a>

Prismatic Punch conevrts any loaded projectile into a powerful Prismatic Blast. Blasts are shot with initial velocity of 16 blocks per second, but accelerate by 4.8 b/s^2 until reaching top speed of 120 b/s. Blasts are unaffected by gravity and travel in a straight line.

When a Prismatic Blast collides with an entity or a block, it instantly explodes, dealing variable damage in a small area. All damaged mobs will be set on Prismatic Inferno for 3 seconds. Explosions don't destroy blocks. Blasts can explode multiple times with odds presented in the table below, with the average damage being 8.2 HP ₓ ₄․₁.**Prismatic Punch** is a post-Empress crossbow that converts arrows into quick Prismatic Blasts which gain speed over time and explode upon coming into contact with anything.

&#x20;Prismatic Punch can be enchanted with any Crossbow enchantment.

&#x20;Prismatic Punch can be repaired by fusing it with a different Crossbow.

**Explosion Count & Total Explosion Damage:**

* **1:** 7 HP ₓ 3.5 (50% chance)
* **2:** 9 HP ₓ 4.5 (40% chance)
* **3:** 11 HP ₓ 5.5 (10% chance)

Multishot enchantment causes 2 smaller blasts to appear circling around the Blast is it travels, which create smaller explosions. Explosion count from the main blast is always 1, however it has a much larger radius and inflicts Prismatic Inferno for 5 seconds total.

Piercing enchantment causes the blast to be able to pierce through enemies and trigger explosions multiple times. If mobs are close to each other, then different explosions can hurt the same entity, stacking the damage.

### Tips <a href="#tips" id="tips"></a>

* Prismatic Blasts are uncomparably quicker than Arrows and more reliable on large distances. Combining this with the fact that Blasts deal AoE damage, meaning that shots don't need to be perfectly accurate, makes the Prismatic Punch an excellent weapon for sniping targets from afar.
* Use regular Arrows with this weapon, since it converts ALL ammo into Blasts. Using Spectral/Tipped Arrows is a waste of ammo.
* Explosions can hurt you if you stand too close to your target. Keep your distance.
* Explosions from Prismatic Punch ignore invulnerability frames.
* With Multishot, remember that only the main blast has increased radius. Enemies further away from the center of the explosion won't take full explosion damage. However, they will still be burned for the same duration.

</details>

<details>

<summary></summary>

</details>

<details>

<summary></summary>

</details>

***

## Pre-Solar

<details>

<summary></summary>

</details>

<details>

<summary></summary>

</details>

<details>

<summary></summary>

</details>

***

## Pre-Giants

<details>

<summary></summary>

</details>

<details>

<summary></summary>

</details>

<details>

<summary></summary>

</details>

***

## Pre-Punky

<details>

<summary></summary>

</details>

<details>

<summary></summary>

</details>

<details>

<summary></summary>

</details>

***

## Pre- Space Event Horizon

<details>

<summary></summary>

</details>

<details>

<summary></summary>

</details>

<details>

<summary></summary>

</details>

***

## Pre-Asgard

<details>

<summary></summary>

</details>

<details>

<summary></summary>

</details>

<details>

<summary></summary>

</details>

***

## Pre-Thunderlord

<details>

<summary></summary>

</details>

<details>

<summary></summary>

</details>

<details>

<summary></summary>

</details>

***

## True End

<details>

<summary></summary>

</details>

<details>

<summary></summary>

</details>

<details>

<summary></summary>

</details>

s


# Tools

## Pre-Advanced

<details>

<summary>Mythril Pickaxe</summary>

</details>

<details>

<summary>Orichalcum Pickaxe</summary>

</details>

<details>

<summary>Titanium Pickaxe</summary>

</details>

<details>

<summary><img src="https://3522175436-files.gitbook.io/~/files/v0/b/gitbook-x-prod.appspot.com/o/spaces%2FrcgtxEHRbgBRPbt4a4vb%2Fuploads%2FhgwXR2FDpAoQ7Kay6Z1S%2Fimage.png?alt=media&amp;token=f1609a3a-d631-496e-a06e-2e5671941c7e" alt="" data-size="line"> Traveler's Map</summary>

The Traveler's map is an item that leads the player towards any of the [Midgard biomes](/dim/overworld/hub-dimension-old#biomes-terralith).

**Obtaining:**\
It can be found in most of Midgard's structures, and is more likely to lead you to a biome with the opposite temperature of the one you're in, making Traveler's map found in the [Spire](/dim/overworld/hub-dimension-old#structures-27) or [Glacial hut](/dim/overworld/hub-dimension-old#structures-27) lead most of the time to warm biomes.

</details>

***

## Advanced

<details>

<summary>Basic Pickaxe</summary>

Unbreakable pickaxe

</details>

<details>

<summary>Basic Axe</summary>

Unbreakable axe

</details>

<details>

<summary>Great Pickaxe</summary>

Faster variant of Basic Pickaxe

</details>

<details>

<summary>Great Axe</summary>

Faster variant of Basic Axe

</details>

<details>

<summary>Enhanced Great Axe</summary>

</details>

<details>

<summary>Butcher's Axe</summary>

</details>

<details>

<summary>Bone Cracker</summary>

</details>

***

## Muspelheim

<details>

<summary><img src="https://3522175436-files.gitbook.io/~/files/v0/b/gitbook-x-prod.appspot.com/o/spaces%2FrcgtxEHRbgBRPbt4a4vb%2Fuploads%2FcQdO9Sa7b64L3prvqRFJ%2Fimage.png?alt=media&amp;token=d78e31e0-8836-4cd9-8ae6-31d6404dfa89" alt="" data-size="line"> Hefty Pickaxe</summary>

The Hefty pickaxe is a Diamond pickaxe with the ability to randomly break blocks around the block you mined in the Nether.

### Obtaining

The Hefty pickaxe can be found on an armor stand in the blacksmith room, which as a chance to be found in the Forbidden castle.

* [![](https://static.miraheze.org/stardustlabswiki/thumb/9/9f/Blacksmith_room2.png/120px-Blacksmith_room2.png)](https://stardustlabs.miraheze.org/wiki/File:Blacksmith_room2.png)
* [![](https://static.miraheze.org/stardustlabswiki/thumb/4/49/Hefty_pickaxe_location_%282%29.png/120px-Hefty_pickaxe_location_%282%29.png)](https://stardustlabs.miraheze.org/wiki/File:Hefty_pickaxe_location_\(2\).png?filetimestamp=20220413232332&)
* [![](https://static.miraheze.org/stardustlabswiki/thumb/5/57/Blacksmith_room.png/120px-Blacksmith_room.png)](https://stardustlabs.miraheze.org/wiki/File:Blacksmith_room.png)
* [![](https://static.miraheze.org/stardustlabswiki/thumb/3/37/Blacksmith_room3.png/120px-Blacksmith_room3.png)](https://stardustlabs.miraheze.org/wiki/File:Blacksmith_room3.png)

### Modifications

This item can be renamed without loosing its effect, but it will lose its font color.

#### Possible upgrades

The Hefty pickaxe can be upgraded with Netherite on a Smithing table without loosing its ability.

#### Description

*A nether-oriented excavator*

</details>

<details>

<summary><img src="https://3522175436-files.gitbook.io/~/files/v0/b/gitbook-x-prod.appspot.com/o/spaces%2FrcgtxEHRbgBRPbt4a4vb%2Fuploads%2FjO52s8WOUKjaCoaYClA2%2Fimage.png?alt=media&amp;token=bed6bcad-1b26-4eff-aff5-399e1581fe33" alt="" data-size="line"> Torch of Lunacy</summary>

Torch of lunacy is a soul torch with the ability to make Desert blazes ignore you.

### Obtaining

The Torch of lunacy can be found in the treasure room of the Pipelines.

### Modifications

This item can be renamed without loosing its effect, but it will lose its font color.

#### Description

*Emits a strange light which blinds nearby desert blazes if kept in your inventory*

</details>

<details>

<summary><img src="https://3522175436-files.gitbook.io/~/files/v0/b/gitbook-x-prod.appspot.com/o/spaces%2FrcgtxEHRbgBRPbt4a4vb%2Fuploads%2FpKundSflWx9K4ejhBj1e%2Fimage.png?alt=media&amp;token=d70e1141-e23b-471e-9e52-be5581cd99a4" alt="" data-size="line"> Unstable Powder</summary>

The Unstable powder is an item that, when dropped on the ground, highlights hostile mobs in a 30 blocks radius.

### Obtaining

It has a chance to be found in a barrel in the Forbidden castle Brewing room.

* [![](https://static.miraheze.org/stardustlabswiki/thumb/7/72/2022-03-04_23.38.02.png/120px-2022-03-04_23.38.02.png)](https://stardustlabs.miraheze.org/wiki/File:2022-03-04_23.38.02.png)

### Modifications

This item can be renamed without loosing its effect, but it will lose its font color.

#### Description

*Emits a brilliant light when dropped*

</details>

<details>

<summary><img src="https://3522175436-files.gitbook.io/~/files/v0/b/gitbook-x-prod.appspot.com/o/spaces%2FrcgtxEHRbgBRPbt4a4vb%2Fuploads%2FL4UfuSNoBWL4GdU94cVA%2Fimage.png?alt=media&amp;token=10ac311e-b439-4fa3-805f-84acbf1e500f" alt="" data-size="line"> Scroll of Returning</summary>

The Scroll of returning is an item with the ability to send you back to the Overworld spawn when interacted with in the Nether.

### Obtaining

The Scroll of returning has a 50% to be dropped by the Sanctum illusionist in the Sanctum.

### Modifications

This item can be renamed without loosing its effect, but it will lose its font color.

### History

The Scroll of Returning is a Patron item requested by Redhawk after he wished for a way to quickly leave the Nether without needing to build or go back to a Nether portal.

**Description**

*A long forgotten technique to transport back to the overworld*

</details>

<details>

<summary><img src="https://3522175436-files.gitbook.io/~/files/v0/b/gitbook-x-prod.appspot.com/o/spaces%2FrcgtxEHRbgBRPbt4a4vb%2Fuploads%2FU1RVsGjLG8XKTyh5nvIQ%2Fimage.png?alt=media&amp;token=361113a5-95f4-4936-a5ea-854a12806861" alt="" data-size="line"> Restless Nature</summary>

The Restless nature is a throwable seed which, if thrown (only) on Netherrack, Soulsoil or Basalt in the Nether, makes a Nether tree appear where it's thrown.

### Obtaining

One or two Restless natures, with one more per Looting enchantement levels are dropped by the Restless spirits found in the Withered forest. They do not drop if the Restless spirit is exorcized with a chainmail armor.

### Modifications

This item can be renamed without loosing its effect, but it will lose its font color.

![](https://3522175436-files.gitbook.io/~/files/v0/b/gitbook-x-prod.appspot.com/o/spaces%2FrcgtxEHRbgBRPbt4a4vb%2Fuploads%2FzTEt41VHKDmGDKy81r46%2Fimage.png?alt=media\&token=2d9e2897-1988-4e82-be17-4c0babafabbf)

</details>

***

## Pre-Dragon

<details>

<summary>Iridium Pickaxe</summary>

</details>

<details>

<summary></summary>

</details>

<details>

<summary></summary>

</details>

***

## Post-Dragon

<details>

<summary><img src="https://3522175436-files.gitbook.io/~/files/v0/b/gitbook-x-prod.appspot.com/o/spaces%2FrcgtxEHRbgBRPbt4a4vb%2Fuploads%2FZJkVvNVjsmqatzFBIOpp%2Fimage.png?alt=media&amp;token=e29fa08e-9a41-4a89-8e07-5789e3a99685" alt="" data-size="line"> Shulker Tools</summary>

**Damage:** Netherite tool + 0.5\
**Attack Speed:** Same as Netherite\
**Tooltip:** (Blank) - Donor Item -\
**Durability:** 2703

#### Obtaining

* **Upgrade Recipe:** Upgrade a Netherite tool with 4 Shulker Shells and 1 Enderite Smithing Template at the Altar of the Accursed.

#### Usage

* **Haste Effect:** Holding any Shulker Tool grants Haste I. This increases the speed of mining or attacking by 10%, allowing for quicker harvesting of materials and more efficient combat.
* **Damage Bonus:** Shulker Tools also provide an additional 0.5 damage on top of the Netherite tool's base damage.

#### Tips

* **Shulker Sword:** While the Shulker Sword is a solid weapon on its own, it is often overshadowed by other weapons with more unique effects, such as Stellarity. However, it is still a good choice for straightforward combat.
* **Tool Benefits:** Shulker Tools are especially valuable due to their unique ability to provide Haste I. They offer a significant upgrade in mining speed and efficiency, making them worthwhile for resource gathering and general use.
* **Alternatives:** The Hematic Pickaxe is another viable option but serves a different purpose compared to Shulker Tools.

#### Trivia

* **Durability:** Shulker Tools have an increased durability of 2703, which makes them more long-lasting compared to regular Netherite tools.
* **No Direct Alternatives:** Shulker Tools are unique in their ability to provide Haste I, setting them apart from other tools and making them a valuable addition to any player’s inventory.

</details>

<details>

<summary><img src="https://3522175436-files.gitbook.io/~/files/v0/b/gitbook-x-prod.appspot.com/o/spaces%2FrcgtxEHRbgBRPbt4a4vb%2Fuploads%2F5owOfi3gtgmqip6JQtld%2Fimage.png?alt=media&amp;token=484130cb-a4db-4e76-b7db-3837f0d07283" alt="" data-size="line"> Hematic Pickaxe</summary>

**Damage:** 6\
**Attack Speed:** 1.2\
**Tooltip:** Can dig out extra loot from various stone blocks\
**Durability:** 1561

#### Obtaining

* **Crafting Recipe:** Upgrade a Netherite Pickaxe with 1 Living Flesh and 1 Enderite Smithing Template at the Altar of the Accursed.
* **Drop Chance:** Zombified Piglins in Flesh Tundras have a 3% chance to be holding a Hematic Pickaxe.

#### Usage

* **Extra Loot:** When mining stone blocks (including regular stone, and ores like coal, iron, and gold), the Hematic Pickaxe has a chance to yield extra loot. The additional items you might receive include:
  * Flint
  * Gunpowder
  * Bones
  * Coal
  * Iron Nuggets
  * Gold Nuggets
  * Redstone
  * Lapis Lazuli

#### Tips

* **Loot Efficiency:** The additional loot from stone blocks can significantly increase the yield of your mining expeditions, making it a valuable tool for resource gathering.
* **Use in Bulk:** To maximize the benefits of the Hematic Pickaxe, use it for large-scale mining operations or in areas rich with stone and ores.
* **Complementary Tools:** Pairing the Hematic Pickaxe with other resource-enhancing tools or enchantments can further boost your mining efficiency.

</details>

<details>

<summary></summary>

</details>

***

## Post-Empress

<details>

<summary><img src="https://3522175436-files.gitbook.io/~/files/v0/b/gitbook-x-prod.appspot.com/o/spaces%2FrcgtxEHRbgBRPbt4a4vb%2Fuploads%2FvxunqbxMSeeq4eT3uBOG%2Fimage.png?alt=media&amp;token=db526230-17e9-4665-9d5b-ee36be7672a3" alt="" data-size="line"> Prismatic Pearl</summary>

**Tooltip:** Acts as an infinite supply of Ender Pearls with faster flight and a rainbow trail.

#### Obtaining

* **Drop Chance:** 33% chance to be dropped by the Empress of Light.
* **Conditions:**
  * Must be killed in The End.
  * Alternatively, can be dropped in the Overworld during nighttime.

#### Usage

* **Function:** Works like a standard Ender Pearl but with enhancements.
* **Enhanced Features:**
  * **Return Time:** Returns to the player after 5 seconds.
  * **Flight Speed:** Flies 25% faster and covers 25% greater distance compared to a regular Ender Pearl.
  * **Visual Effect:** Leaves a rainbow trail while flying.

#### Tips

* **No Minimum Damage Threshold:** The Prismatic Pearl’s features do not depend on the damage threshold, making it versatile for various scenarios.
* **Synergy:** It pairs well with items like the Starstruck Carcanet for enhanced mobility and visual effects.

#### Trivia

* **Special Pearl Trail:** Players named Bush\_King will have an alternative pearl trail that alternates between the colors of the bisexual flag, adding a personalized touch to the visual effect.

</details>

<details>

<summary></summary>

</details>

<details>

<summary></summary>

</details>

***

## Pre-Solar

<details>

<summary></summary>

</details>

<details>

<summary></summary>

</details>

<details>

<summary></summary>

</details>

***

## Pre-Giants

<details>

<summary></summary>

</details>

<details>

<summary></summary>

</details>

<details>

<summary></summary>

</details>

***

## Pre-Punky

<details>

<summary></summary>

</details>

<details>

<summary></summary>

</details>

<details>

<summary></summary>

</details>

***

## Pre- Space Event Horizon

<details>

<summary></summary>

</details>

<details>

<summary></summary>

</details>

<details>

<summary></summary>

</details>

***

## Pre-Asgard

<details>

<summary></summary>

</details>

<details>

<summary></summary>

</details>

<details>

<summary></summary>

</details>

***

## Pre-Thunderlord

<details>

<summary></summary>

</details>

<details>

<summary></summary>

</details>

<details>

<summary></summary>

</details>

***

## True End

<details>

<summary></summary>

</details>

<details>

<summary></summary>

</details>

<details>

<summary></summary>

</details>

s


# List of Pickaxes

## Pickaxes

### Basic Pickaxe

#### Use

* The Basic Pickaxe is the standard starter mining tool and uses the STONE\_PICKAXE base material.
* It is a normal-rarity tool (lore-format: normal) intended for early progression before metal tiers.

#### Recipe

**Crafting Station:** Tool Forge\
**Ingredients:**

* Stone Pickaxe Head
* Wooden Handle
* Leather Binding

#### Trivia

* This item is configured as breakable (unbreakable: false).

### Diamond Pickaxe

#### Use

* The Diamond Pickaxe is a higher-tier mining tool using DIAMOND\_PICKAXE as its base material.
* It serves as the durable mid-tier bridge before Netherite-class pickaxes.

#### Recipe

**Crafting Station:** Tool Forge\
**Ingredients:**

* Diamond Pickaxe Head
* Reinforced Handle
* Leather Binding

#### Trivia

* It is configured with lore-format: normal in your data.

### Gold Pickaxe

#### Use

* The Gold Pickaxe uses GOLDEN\_PICKAXE as its base material and fits into the standard tool ladder.
* It’s typically used when players need a gold-tier tool for progression gates or gold-themed gathering bonuses.

#### Recipe

**Crafting Station:** Tool Forge\
**Ingredients:**

* Gold Pickaxe Head
* Wooden Handle
* Leather Binding

#### Trivia

* It is configured as unbreakable: false.

### Great Pickaxe

#### Use

* The Great Pickaxe is an IRON\_PICKAXE-based tool named “Great Pickaxe” in the config.
* It acts as an early metal upgrade over stone pickaxes in the tool ladder.

#### Recipe

**Crafting Station:** Tool Forge\
**Ingredients:**

* Iron Pickaxe Head
* Reinforced Handle
* Leather Binding

#### Trivia

* It uses lore-format: normal.

### Hematic Pickaxe

#### Use

* The Hematic Pickaxe is a custom-model netherite pickaxe variant (material: netherite\_pickaxe, custom-model-data: 90001.0).
* Its lore frames it as a blood-powered mining tool, making it ideal as a “flavor” pickaxe for dark/ritual builds.

#### Recipe

**Crafting Station:** Blood Altar\
**Ingredients:**

* Netherite Pickaxe
* Bloodstone Core
* Sealed Vial of Vitae

#### Trivia

* Its lore explicitly states it “draws power from blood.”

### Iridium Pickaxe

#### Use

* The Iridium Pickaxe is an epic-tier netherite-model pickaxe (material: NETHERITE\_PICKAXE) with custom-model-data: 80001.0.
* It is configured as **indestructible** (unbreakable: true), making it a permanent endgame mining tool.
* Its lore lists extended break permissions, including Mythril/Orichalcum/Titanium and also Iridium/Uranium.

#### Recipe

**Crafting Station:** Master Tool Forge\
**Ingredients:**

* Titanium Pickaxe
* Iridium Ingot x3
* Core Stabilizer Rune

#### Trivia

* The item’s lore includes the misspelling “Indestructable,” which can be kept as-is for charm or corrected.

### Iron Pickaxe

#### Use

* The Iron Pickaxe is a standard tool using IRON\_PICKAXE as its base material.
* It’s typically the first “reliable” metal pick for routine ore gathering.

#### Recipe

**Crafting Station:** Tool Forge\
**Ingredients:**

* Iron Pickaxe Head
* Reinforced Handle
* Leather Binding

#### Trivia

* It uses lore-format: normal.

### Mythril Pickaxe

#### Use

* The Mythril Pickaxe is a rare-tier netherite-model pickaxe (material: NETHERITE\_PICKAXE) with custom-model-data: 1.0.
* Its lore indicates it can break Mythril Ore and Orichalcum Ore, defining it as the gateway tool into advanced ore tiers.

#### Recipe

**Crafting Station:** Advanced Tool Forge\
**Ingredients:**

* Netherite Pickaxe
* Mythril Ingot x3
* Tempering Flux

#### Trivia

* It is configured as unbreakable: false (so it remains a “powerful but maintained” tool).

### Netherite Pickaxe

#### Use

* The Netherite Pickaxe is a rare-tier pickaxe using NETHERITE\_PICKAXE as its base material.
* Its lore explicitly states it can break Mythril Ore, positioning it as the first “special ore-capable” pick in your progression.

#### Recipe

**Crafting Station:** Tool Forge\
**Ingredients:**

* Diamond Pickaxe
* Netherite Ingot x1
* Reinforced Binding

#### Trivia

* The item includes “Can break: Mythril Ore” in its lore text.

### Orichalcum Pickaxe

#### Use

* The Orichalcum Pickaxe is a rare-tier netherite-model pickaxe (material: NETHERITE\_PICKAXE) with custom-model-data: 2.0.
* Its lore states it can break Mythril Ore, Orichalcum Ore, and Titanium Ore, making it a multi-tier mining unlock tool.

#### Recipe

**Crafting Station:** Advanced Tool Forge\
**Ingredients:**

* Mythril Pickaxe
* Orichalcum Ingot x3
* Core Stabilizer Rune

#### Trivia

* It is configured as unbreakable: false.

### Shulker Pickaxe

#### Use

* The Shulker Pickaxe is a netherite-model pickaxe (material: netherite\_pickaxe) with custom-model-data: 90000.0.
* Its lore describes it as “imbued with shulker magic,” making it a thematic utility pick for end/void-themed content.

#### Recipe

**Crafting Station:** Arcane Infuser\
**Ingredients:**

* Netherite Pickaxe
* Shulker Essence
* Ender Pearl x2

#### Trivia

* It uses lore-format: normal in your config.

### Stone Pickaxe

#### Use

* The Stone Pickaxe is a baseline tool using STONE\_PICKAXE as its base material.
* It fills the early mining slot for players before iron progression.

#### Recipe

**Crafting Station:** Tool Forge\
**Ingredients:**

* Stone Pickaxe Head
* Wooden Handle
* Leather Binding

#### Trivia

* It is configured as unbreakable: false.

### Titanium Pickaxe

#### Use

* The Titanium Pickaxe is an epic-tier netherite-model pickaxe (material: NETHERITE\_PICKAXE) with custom-model-data: 3.0.
* Its lore indicates it can break Mythril Ore, Orichalcum Ore, Titanium Ore, and Iridium Crystal, making it a late-progression gather tool.

#### Recipe

**Crafting Station:** Master Tool Forge\
**Ingredients:**

* Orichalcum Pickaxe
* Titanium Ingot x3
* Iridium-Tuned Edge Plate

#### Trivia

* It uses lore-format: epic.

### Wood Pickaxe

#### Use

* The Wood Pickaxe is the entry-level mining tool using WOODEN\_PICKAXE as its base material.
* It’s best used for tutorial-tier resources and as an early crafting component.

#### Recipe

**Crafting Station:** Basic Workbench\
**Ingredients:**

* Wooden Pickaxe Head
* Wooden Handle
* Twine Binding

#### Trivia

* It uses lore-format: normal.


# List of Axes

## Axes

### Basic Axe

#### Use

* The Basic Axe is a starter axe using STONE\_AXE as its base material.
* It supports early woodcutting and serves as a stepping stone into iron-tier tools.

#### Recipe

**Crafting Station:** Tool Forge\
**Ingredients:**

* Stone Axe Head
* Wooden Handle
* Leather Binding

#### Trivia

* It is configured as unbreakable: false.

### Bone Cracker

#### Use

* Bone Cracker is a two-handed STONE\_AXE-based weapon/tool with attack-damage: 9.9 and attack-speed: 0.8 in your config.
* It also grants defense: 5.0, making it a hybrid “bruiser” axe that supports aggressive play while staying tanky.

#### Recipe

**Crafting Station:** Heavy Forge\
**Ingredients:**

* Stone Axe
* Bone Reinforcement Plates
* Resin Grip Wrap

#### Trivia

* It is flagged two-handed: true and includes a durability block with base: 55.0.

### Butcher’s Axe

#### Use

* Butcher’s Axe is an IRON\_AXE-based weapon/tool with attack-damage: 6.0 and attack-speed: 0.7.
* It includes crit stats (critical-strike-chance: 5.0 and critical-strike-power: 248.0) plus an ice element damage line (ice damage: 3.2).
* It has a right-click CIRCULAR\_SLASH ability (mode: RIGHT\_CLICK) with cooldown: 39.0 and damage: 6.0, used as a burst/cleave tool in close-range fights.

#### Recipe

**Crafting Station:** Combat Forge\
**Ingredients:**

* Iron Axe
* Frost Core Shard
* Carved Butcher’s Grip

#### Trivia

* It is configured with one gem socket (Uncolored).

### Diamond Axe

#### Use

* The Diamond Axe is a standard axe using DIAMOND\_AXE as its base material.
* It typically represents the high-efficiency woodcutting tier before netherite-grade tools.

#### Recipe

**Crafting Station:** Tool Forge\
**Ingredients:**

* Diamond Axe Head
* Reinforced Handle
* Leather Binding

#### Trivia

* It has revision-id: 2 in your config.

### Enhanced Great Axe

#### Use

* Enhanced Great Axe is an IRON\_AXE-based tool labeled rare (lore-format: rare).
* It is configured with efficiency: 2.0 and hide-enchants: true, implying an upgraded gathering axe presented as “clean” in UI.

#### Recipe

**Crafting Station:** Tool Forge\
**Ingredients:**

* Great Axe
* Tempered Iron Edge
* Enchanting Wax

#### Trivia

* Its displayed name is “Enhanced Great Axe” in the config.

### Gold Axe

#### Use

* The Gold Axe uses GOLDEN\_AXE as its base material.
* It fills the standard gold-tier slot in the axe progression ladder.

#### Recipe

**Crafting Station:** Tool Forge\
**Ingredients:**

* Gold Axe Head
* Wooden Handle
* Leather Binding

#### Trivia

* It is configured as unbreakable: false.

### Great Axe

#### Use

* The Great Axe is an IRON\_AXE-based axe named “Great Axe” in your config.
* It serves as a basic iron-tier upgrade line that later branches into Enhanced Great Axe.

#### Recipe

**Crafting Station:** Tool Forge\
**Ingredients:**

* Iron Axe Head
* Reinforced Handle
* Leather Binding

#### Trivia

* It uses lore-format: normal.

### Heavenly Axe

#### Use

* Heavenly Axe is a legendary-tier axe (lore-format: legendary) using NETHERITE\_AXE as its base material.
* It is configured with efficiency: 10.0 and hide-enchants: true, making it the peak “pure gathering” axe in this set.

#### Recipe

**Crafting Station:** Master Tool Forge\
**Ingredients:**

* High Axe
* Netherite Ingot x2
* Celestial Tempering Oil

#### Trivia

* Its displayed name is “Heavenly Axe.”

### High Axe

#### Use

* High Axe is an epic-tier axe (lore-format: epic) using DIAMOND\_AXE as its base material.
* It has efficiency: 7.0 configured (hidden), making it an end-of-diamond-tier gathering axe.

#### Recipe

**Crafting Station:** Tool Forge\
**Ingredients:**

* Superior Axe
* Refined Diamond Edge
* Enchanting Wax

#### Trivia

* It is configured as unbreakable: false.

### Iron Axe

#### Use

* The Iron Axe uses IRON\_AXE as its base material.
* It’s the standard dependable mid-tier axe for general harvesting.

#### Recipe

**Crafting Station:** Tool Forge\
**Ingredients:**

* Iron Axe Head
* Reinforced Handle
* Leather Binding

#### Trivia

* It uses lore-format: normal.

### Iridium Axe

#### Use

* The Iridium Axe is an epic-tier netherite-model axe with custom-model-data: 80001.0.
* It is configured as unbreakable: true, positioning it as a permanent endgame harvesting axe.
* Its lore includes the same extended “Can break” list style as the Iridium Pickaxe.

#### Recipe

**Crafting Station:** Master Tool Forge\
**Ingredients:**

* Netherite Axe
* Iridium Ingot x3
* Core Stabilizer Rune

#### Trivia

* The lore contains “Indestructable,” mirroring the pickaxe variant.

### Kaleidoscope

#### Use

* Kaleidoscope is a netherite-model axe (material: netherite\_axe) with custom-model-data: 90001.0.
* Its lore describes it as “an axe that shifts and changes,” making it ideal as a cosmetic/identity tool tied to illusion, trickster, or arcane themes.

#### Recipe

**Crafting Station:** Arcane Infuser\
**Ingredients:**

* Shulker Axe
* Prismatic Shard
* Distilled Mana

#### Trivia

* It uses lore-format: normal.

### Netherite Axe

#### Use

* Netherite Axe is a rare-tier axe (lore-format: rare) using NETHERITE\_AXE as its base material.
* It’s the baseline netherite axe that sits directly beneath Heavenly Axe in your efficiency progression line.

#### Recipe

**Crafting Station:** Tool Forge\
**Ingredients:**

* Diamond Axe
* Netherite Ingot x1
* Reinforced Binding

#### Trivia

* Its display name is “Netherite Axe.”

### Shulker Axe

#### Use

* Shulker Axe is a netherite-model axe (material: netherite\_axe) with custom-model-data: 90000.0.
* Its lore frames it as “imbued with shulker magic,” suitable for an End/void progression branch.

#### Recipe

**Crafting Station:** Arcane Infuser\
**Ingredients:**

* Netherite Axe
* Shulker Essence
* Ender Pearl x2

#### Trivia

* It uses lore-format: normal.

### Silver Axe

#### Use

* Silver Axe is an IRON\_AXE-based weapon/tool with variable attack-damage (base: 9.5) and attack-speed (base: 0.95) in the config.
* It includes critical-strike-chance base: 6.0 and a SHIFT\_RIGHT\_CLICK CIRCULAR\_SLASH ability with damage: 6.0 and cooldown: 20.0.
* Because its ability description is embedded in lore, it doubles as a “teaches mechanics through item text” weapon.

#### Recipe

**Crafting Station:** Combat Forge\
**Ingredients:**

* Iron Axe
* Silver Ingot x2
* Balanced Counterweight

#### Trivia

* It includes efficiency: 1.0 as a hidden enchant (hide-enchants: true).

### Skull Breaker

#### Use

* Skull Breaker is a two-handed IRON\_AXE-based weapon with high attack-damage (base: 17.0) but very low attack-speed (base: 0.35).
* It applies a movement-speed penalty of -0.02, reinforcing the “heavy hitter” identity.
* Its lore emphasizes slowing targets when smashing their skull, aligning with a crowd-control bruiser role.

#### Recipe

**Crafting Station:** Heavy Forge\
**Ingredients:**

* Iron Axe
* Weighted Head Plate
* Crushing Rune

#### Trivia

* It is flagged two-handed: true.

### Stone Axe

#### Use

* The Stone Axe uses STONE\_AXE as its base material.
* It is a basic tier axe for early harvesting and early melee fallback.

#### Recipe

**Crafting Station:** Basic Workbench\
**Ingredients:**

* Stone Axe Head
* Wooden Handle
* Twine Binding

#### Trivia

* It is configured as unbreakable: false.

### Superior Axe

#### Use

* Superior Axe is a rare-tier axe (lore-format: rare) using DIAMOND\_AXE as its base material.
* It has efficiency: 4.0 configured as a hidden enchant, making it the “true” diamond-tier gathering axe before High Axe.

#### Recipe

**Crafting Station:** Tool Forge\
**Ingredients:**

* Diamond Axe
* Refined Diamond Edge
* Enchanting Wax

#### Trivia

* It uses hide-enchants: true.

### Wood Axe

#### Use

* The Wood Axe uses WOODEN\_AXE as its base material.
* It’s the earliest chopping tool and often acts as a crafting component for beginner professions.

#### Recipe

**Crafting Station:** Basic Workbench\
**Ingredients:**

* Wooden Axe Head
* Wooden Handle
* Twine Binding

#### Trivia

* It uses lore-format: normal.


# List of Shovels

## Shovels

### Diamond Shovel

#### Use

* The Diamond Shovel uses DIAMOND\_SHOVEL as its base material.
* It represents the high-tier digging tool before netherite-class shovels.

#### Recipe

**Crafting Station:** Tool Forge\
**Ingredients:**

* Diamond Shovel Head
* Reinforced Handle
* Leather Binding

#### Trivia

* It uses lore-format: normal.

### Gold Shovel

#### Use

* The Gold Shovel uses GOLDEN\_SHOVEL as its base material.
* It fills the standard gold tier role in the digging tool ladder.

#### Recipe

**Crafting Station:** Tool Forge\
**Ingredients:**

* Gold Shovel Head
* Wooden Handle
* Leather Binding

#### Trivia

* It is configured as unbreakable: false.

### Iron Shovel

#### Use

* The Iron Shovel uses IRON\_SHOVEL as its base material.
* It’s the dependable mid-tier shovel for routine dirt/sand/gravel gathering.

#### Recipe

**Crafting Station:** Tool Forge\
**Ingredients:**

* Iron Shovel Head
* Reinforced Handle
* Leather Binding

#### Trivia

* It uses lore-format: normal.

### Netherite Shovel

#### Use

* Netherite Shovel is a rare-tier shovel (lore-format: rare) using NETHERITE\_SHOVEL as its base material.
* It’s the endgame baseline shovel before any special/arcane variants.

#### Recipe

**Crafting Station:** Tool Forge\
**Ingredients:**

* Diamond Shovel
* Netherite Ingot x1
* Reinforced Binding

#### Trivia

* Its configured display name is “Netherite Shovel.”

### Shulker Shovel

#### Use

* Shulker Shovel is a netherite-model shovel (material: netherite\_shovel) with custom-model-data: 90000.0.
* Its lore marks it as “imbued with shulker magic,” ideal for an End-tech or void-mining themed progression branch.

#### Recipe

**Crafting Station:** Arcane Infuser\
**Ingredients:**

* Netherite Shovel
* Shulker Essence
* Ender Pearl x2

#### Trivia

* It uses lore-format: normal.

### Stone Shovel

#### Use

* The Stone Shovel uses STONE\_SHOVEL as its base material.
* It is the basic digging tool for early game routes and quest tasks.

#### Recipe

**Crafting Station:** Basic Workbench\
**Ingredients:**

* Stone Shovel Head
* Wooden Handle
* Twine Binding

#### Trivia

* It is configured as unbreakable: false.

### Wood Shovel

#### Use

* The Wood Shovel uses WOODEN\_SHOVEL as its base material.
* It’s the earliest shovel tier, mainly used for starter gathering and crafting steps.

#### Recipe

**Crafting Station:** Basic Workbench\
**Ingredients:**

* Wooden Shovel Head
* Wooden Handle
* Twine Binding

#### Trivia

* It uses lore-format: normal.


# List of Hoes & Scythes

## Hoes & Scythes

### Diamond Hoe

#### Use

* The Diamond Hoe uses DIAMOND\_HOE as its base material.
* It represents the high-tier farming implement before netherite-grade farming tools.

#### Recipe

**Crafting Station:** Tool Forge\
**Ingredients:**

* Diamond Hoe Head
* Reinforced Handle
* Leather Binding

#### Trivia

* It uses lore-format: normal.

### Gold Hoe

#### Use

* The Gold Hoe uses GOLDEN\_HOE as its base material.
* It fills the standard gold tier for farming/profession progress.

#### Recipe

**Crafting Station:** Tool Forge\
**Ingredients:**

* Gold Hoe Head
* Wooden Handle
* Leather Binding

#### Trivia

* It is configured as unbreakable: false.

### Iron Hoe

#### Use

* The Iron Hoe uses IRON\_HOE as its base material.
* It is the dependable mid-tier farming tool used for consistent field work.

#### Recipe

**Crafting Station:** Tool Forge\
**Ingredients:**

* Iron Hoe Head
* Reinforced Handle
* Leather Binding

#### Trivia

* It uses lore-format: normal.

### Netherite Hoe

#### Use

* Netherite Hoe is a rare-tier farming tool (lore-format: rare) using NETHERITE\_HOE as its base material.
* It’s the top “standard” hoe tier, suitable for endgame farming loops and event harvesting.

#### Recipe

**Crafting Station:** Tool Forge\
**Ingredients:**

* Diamond Hoe
* Netherite Ingot x1
* Reinforced Binding

#### Trivia

* Its configured display name is “Netherite Hoe.”

### Shulker Hoe

#### Use

* Shulker Hoe is a netherite-model hoe (material: netherite\_hoe) with custom-model-data: 90000.0.
* Its lore identifies it as “imbued with shulker magic,” perfect for an End-farming aesthetic or void-crop system.

#### Recipe

**Crafting Station:** Arcane Infuser\
**Ingredients:**

* Netherite Hoe
* Shulker Essence
* Ender Pearl x2

#### Trivia

* It uses lore-format: normal.

### Starless Scythe

#### Use

* Starless Scythe is a netherite-model hoe (material: netherite\_hoe) with custom-model-data: 90001.0, presented as a scythe via lore.
* Its theme (“reaps without stars”) makes it an excellent signature tool for New Moon / shadow-aligned farming events.

#### Recipe

**Crafting Station:** Night Loom\
**Ingredients:**

* Netherite Hoe
* Starless Ink
* Void Thread x3

#### Trivia

* It uses lore-format: normal in the config.

### Stone Hoe

#### Use

* The Stone Hoe uses STONE\_HOE as its base material.
* It is an early farming implement used for starter cultivation and tutorials.

#### Recipe

**Crafting Station:** Basic Workbench\
**Ingredients:**

* Stone Hoe Head
* Wooden Handle
* Twine Binding

#### Trivia

* It is configured as unbreakable: false.

### Wood Hoe

#### Use

* The Wood Hoe uses WOODEN\_HOE as its base material.
* It is the first-tier farming tool, commonly used to introduce crop systems.

#### Recipe

**Crafting Station:** Basic Workbench\
**Ingredients:**

* Wooden Hoe Head
* Wooden Handle
* Twine Binding

#### Trivia

* It uses lore-format: normal.


# Basic Rods

## Fishing Rods

### Fisher of Voids

#### Use

* Fisher of Voids is a fishing\_rod-based item with custom-model-data: 90000.0 and a void-fishing theme in its lore.
* It’s ideal as a “special waters” rod for void pools, rift lakes, or Nonas/Lastia event fishing.

#### Recipe

**Crafting Station:** Rodwright Bench\
**Ingredients:**

* Fishing Rod
* Void Filament x2
* Sinkstone Weight

#### Trivia

* Its lore explicitly says it can “catch fish from the void.”

### Fishing Rod

#### Use

* Fishing Rod is the baseline rod using FISHING\_ROD as its base material and lore-format: normal.
* It serves as the entry tool for fishing progression before enchanted/rare rods.

#### Recipe

**Crafting Station:** Rodwright Bench\
**Ingredients:**

* Treated Wooden Rod
* Braided Line
* Simple Hook

#### Trivia

* It is configured as unbreakable: false.

### Super Fishing Rod

#### Use

* Super Fishing Rod is a rare-tier fishing rod (lore-format: rare) with lure: 5.0 configured as a hidden enchant.
* It also grants a fishing multiplier permission (aureliumskills.multiplier.fishing.100), making it your “efficiency rod” for dedicated fishing grinds.

#### Recipe

**Crafting Station:** Rodwright Bench\
**Ingredients:**

* Fishing Rod
* Enchanted Lure Core
* Braided Line x2

#### Trivia

* The item has hide-enchants: true set, so the enchant power is functional but visually clean.


# More Rods

## Fishing Rods

### Copper Fishing Rod

#### Use

* A basic tier fishing rod made from copper, offering a modest durability of 100.
* Functions as an early-game upgrade from the standard wooden rod.

#### Recipe

**Crafting Station:** Tool Forge / Rod Bench\
**Ingredients:**

* Fishing Rod
* Copper Ingot x2

#### Trivia

* Uses custom model data `1000`.

### Diamond Fishing Rod

#### Use

* High-durability rod (500 durability) for extended fishing sessions.
* Standard high-tier tool for dedicated anglers.

#### Recipe

**Crafting Station:** Tool Forge\
**Ingredients:**

* Fishing Rod
* Diamond x2

#### Trivia

* Uses custom model data `1002`.

### Fishing Rod

#### Use

* The default fishing rod enhanced with a wait-time reduction effect.
* **Effect:** Wait Time Multiplier 1.5 (fishing is faster/slower depending on scale interpretation, usually implies speed).

#### Recipe

**Crafting Station:** Workbench\
**Ingredients:**

* Stick x3
* String x2

#### Trivia

* This is the base `FISHING_ROD` configuration.

### Golden Fishing Rod

#### Use

* A fast but fragile rod with only 85 durability.
* Often used for luck-based fishing tasks or specific gold-tier requirements.

#### Recipe

**Crafting Station:** Tool Forge\
**Ingredients:**

* Fishing Rod
* Gold Ingot x2

#### Trivia

* Uses custom model data `1004`.

### Iron Fishing Rod

#### Use

* A sturdy mid-tier rod with 250 durability.
* Reliable daily driver for most fishing quests.

#### Recipe

**Crafting Station:** Tool Forge\
**Ingredients:**

* Fishing Rod
* Iron Ingot x2

#### Trivia

* Uses custom model data `1001`.

### Netherite Fishing Rod

#### Use

* The ultimate durability rod (750 durability) capable of fishing in lava.
* **Effect:** Lava Fishing enabled.
* Lore explicitly states: "THIS ROD CAN BE USED FOR LAVA FISHING".

#### Recipe

**Crafting Station:** Smithing Table\
**Ingredients:**

* Diamond Fishing Rod
* Netherite Ingot

#### Trivia

* Uses custom model data `1003`.


# Baits

## Other

### Book

#### Use

* A requirement item or placeholder for bait mechanics.
* **Condition:** Can only be used on "Magical Fishing Rod".
* Displays error message: "This bait can only be used on Magical Fishing Rod" if condition not met.

#### Recipe

**Crafting Station:** N/A\
**Ingredients:**

* Book

#### Trivia

* Standard book material with special NBT requirement tags.

## Baits

### Magnetic Lures

#### Use

* High-performance bait that significantly speeds up fishing.
* **Effects:**
  * Reduces wait time (multiplier 0.9)
  * Increases game time window (+2)
* Lore describes it as having a "radiant shimmer" that is "irresistible to curious fish."

#### Recipe

**Crafting Station:** Bait Station\
**Ingredients:**

* Iron Nugget
* Redstone Dust
* Paper

#### Trivia

* Uses custom model data `50002`.

### Simple Lures

#### Use

* Basic bait for beginner anglers that makes fishing easier.
* **Effect:** Reduces fishing difficulty (-10).
* Lore describes it as "made from natural ingredients" for a "calm and steady" experience.

#### Recipe

**Crafting Station:** Bait Station\
**Ingredients:**

* Wheat Seeds
* Paper

#### Trivia

* Uses custom model data `50001`.

### Wild Lures

#### Use

* High-risk, high-reward bait for catching larger fish.
* **Effects:**
  * Increases fishing difficulty (+20)
  * Increases fish size multiplier (1.5x)
  * Reduces game time window (-2)
* Lore describes it as an "infusion of potent natural ingredients" for "fearless anglers."

#### Recipe

**Crafting Station:** Bait Station\
**Ingredients:**

* Rotten Flesh
* Spider Eye
* Paper

#### Trivia

* Uses custom model data `50003`.


---

[Next Page](/llms-full.txt/1)